Art Nouveau Christmas!

Thank you for following this blog, subscribing the weekly newsletter and purchasing my products! It’s time to enjoy the beauty of holiday decorations, relax, maybe pick a brush on a quiet moment and fly to the world of imagination. With this video, Art Nouveau Christmas, I wish you happy holidays!
The Power of Positive Self-Criticism in Art

My latest mixed media artwork is called “Positivity Grows”. It is dedicated to all of you who have a strong inner critic. If you want to improve, it is essential to evaluate your own work. But sometimes the self-criticism can have too negative tone. Have you experienced any of these?
1) Big Picture Panic
The artwork gets evaluated as a whole in a too early stage. It is like making a meal and after tasting the raw potatoes, you’d decide that it’s not going to succeed. “I must have done something wrong when peeling those potatoes!”
2) Overclean Obsession
You take the safe way: you don’t mix colors, don’t let anything intersect, draw sloo-owly, keep everything plain, simple and controlled. This reminds me of a tadpole (a baby frog) which I got from my friend when I was a child. The tadpole lived in a jar filled with muddy water. I picked a clean vase, poured plenty of tap water and put the little frog there. It did not live long. I did my best to take care of it but did not understand that for the tadpole, there was nothing to eat, nowhere to hide. So – Mix those colors! Add diversity! Give some nourishment to the growing artist in you!
3) Mistake Hunt
If you focus on the things that “went wrong” instead of those which “went right”, you are playing the wrong game. Art is in small nuances, it requires sensitivity and openness. If your self-evaluation is too negative, you do not notice the beautiful little details that appear in your art. They are often lucky accidents if you take care of the diversity. When enhanced, those details can take over and bring your end result to the new level.
Positive Self-Criticism
You can get cured of any of those diseases with a healthy dose of positive self-criticism. From the moment you make the first brush stroke, focus on the details and look for beautiful and interesting areas. I will show you how I did that while creating the artwork of this post.
Phase 1 – Watercolors
When I began the artwork of this post, I just made a mess with watercolors. I kind of made the muddy jar for tadpoles to prosper!
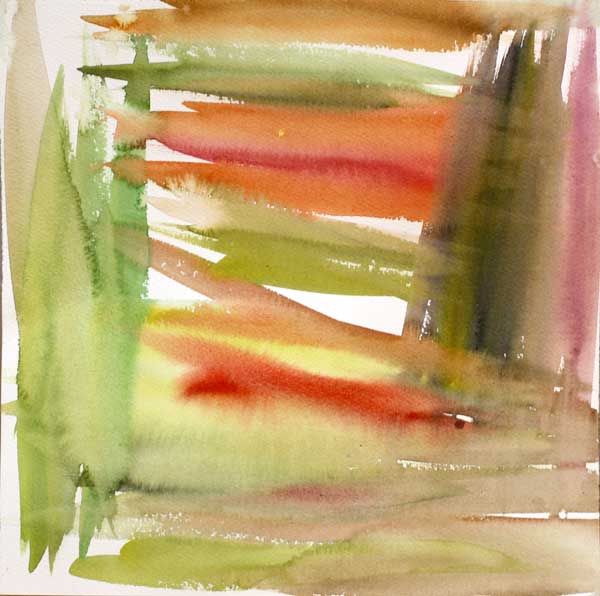
After painting this, I could have just quitted and called it ruined. Or I could have tried to make that dark muddy area brighter. But instead, I began to investigate the painting closely.
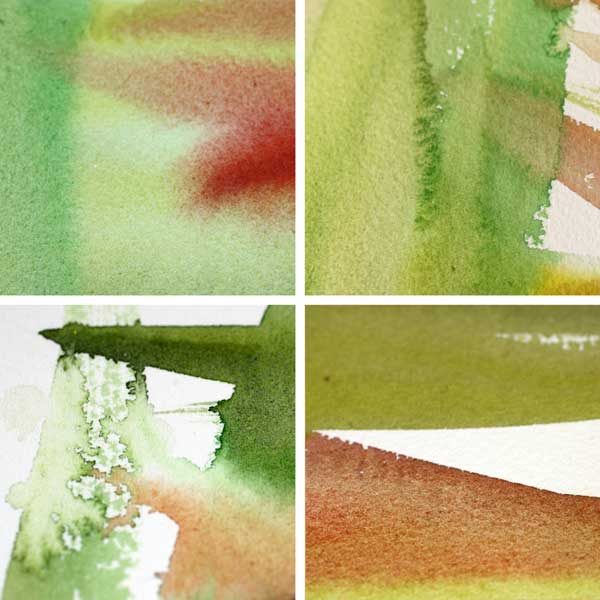
My inner critic pointed the little details with so much beauty that I began to feel confident and excited. The whole process of making this artwork began to feel like an adventure. Instead of mistakes, I was hunting treasures!
Phase 2 – Watercolors
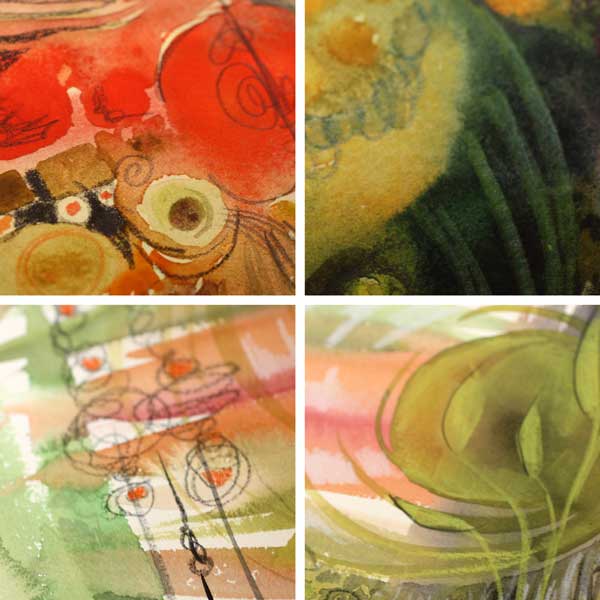
Next, I continued with watercolors and created new layers of elements. I took care of the diversity: there’s a lot of various hues and shapes. And even more important: the layers intersect so that they create new happy accidents.
After painting this, I enjoyed this tiny detail: a yellow spot. It was like a little star! I felt I was lucky and genius at the same time.
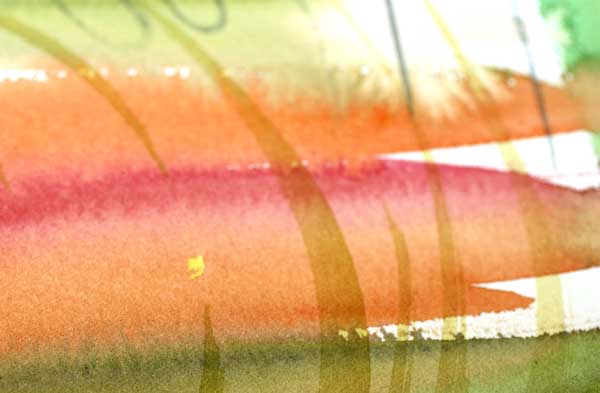
I spent some time searching for more beautiful areas and enjoying them. With watercolors, the edges of brush strokes are often really beautiful.

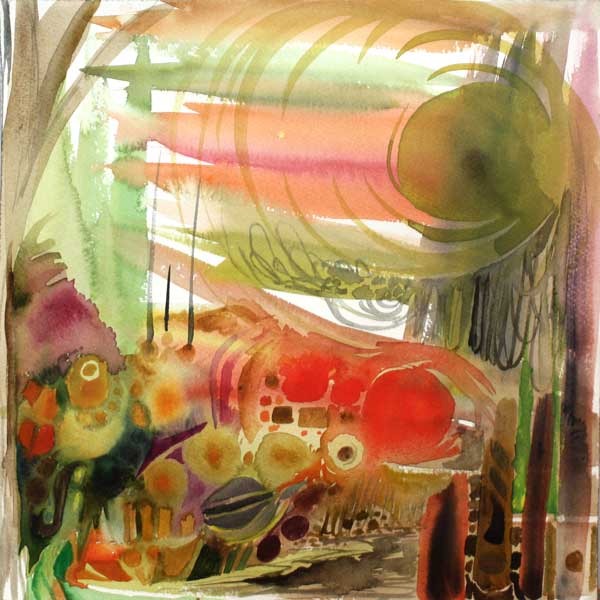
Phase 3 – Colored Pencils
To keep the diversity level high, I changed watercolors to colored pencils. I also changed the music I was listening to. Working from a small area to another, I enlarged the beautiful details found after another.
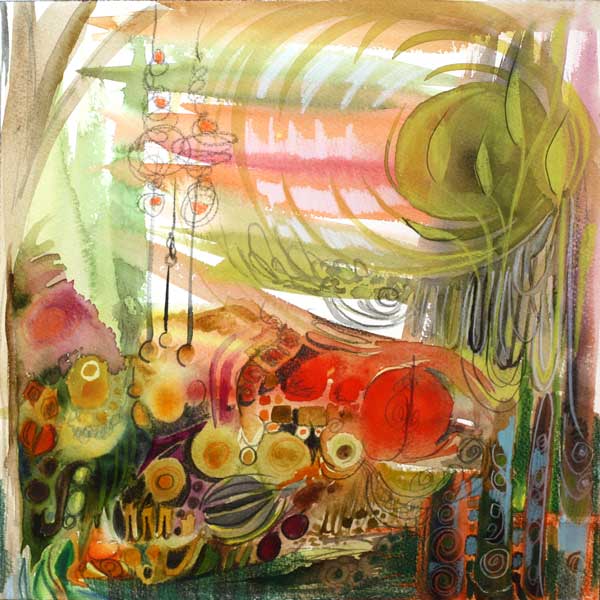
In this phase I realized that the main theme of the artwork would be growth. I searched for the details that would express the theme. I found several and they made me happy!
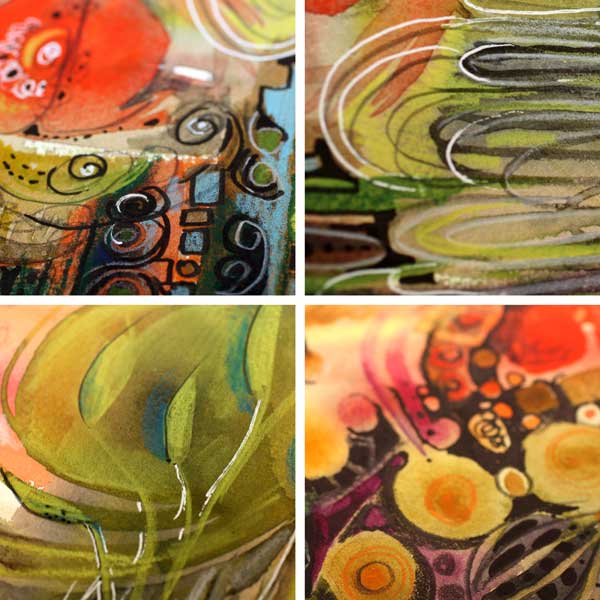
Phase 4 – Pens
New music and new supplies! This time I picked a black PITT Artist Brush Pen and a white gel pen (Uni-Ball Signo). I was encouraging myself to create strong contrasts. They would make the pretty details really pop. Again, I was not worrying about hiding the not-so-pretty details but enhancing the good ones.

In this phase I began to look the artwork as a whole. However, instead of correcting the poor composition, I analyzed which of the details looked most appealing and how they were located.
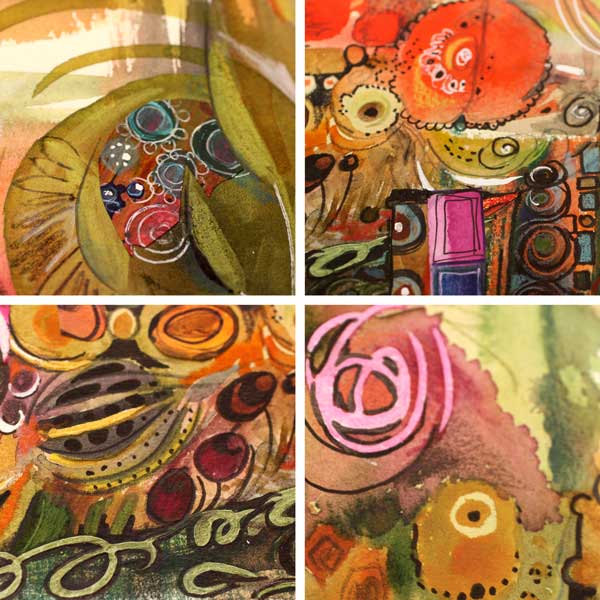
Phase 5 – Finishing
When finishing, I like to listen to the rhythmic music which gives me the confidence to carefully adjust the balance of the work. I picked a white correction pen and a box of hand decorated papers. By doodling and cutting papers, I changed the composition so that the eye would find all the pretty little details one by one.
The Summary
You can be analytical and critical when making art. You can also be strict: mix the colors, change the tempo, keep the image alive! But maintaining the gentleness and sensitivity is crucial too. Let the little details that appeal to you be the foundation for your self-expression!

Blank Page Syndrome before Big Picture Panic?
Buy the video “Watercolor 101 for Intuitive Painting” where I will show you how you can get a fast start and keep going! Click here for the preview!
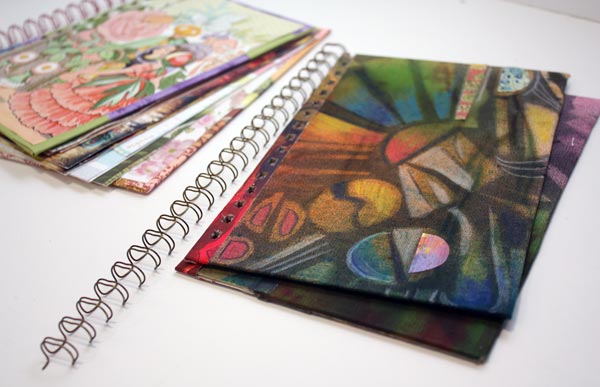
Art Deco Journal Covers

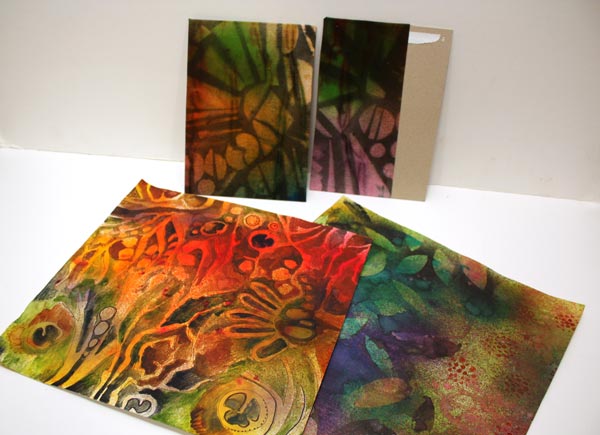
My sisters will get empty handmade journals from me for Christmas. They both like writing and literature so I hope they will put the journals in use. My idea is to include some photos, decorative papers, scrap pictures and such – so that the journal is like a handmade version of Smash book more than a basic blank book. I have also chosen the themes for the journals. The older sister will get an art deco themed book and the younger sister will get flowers and fairies. Here’s a snapshot of the latter.
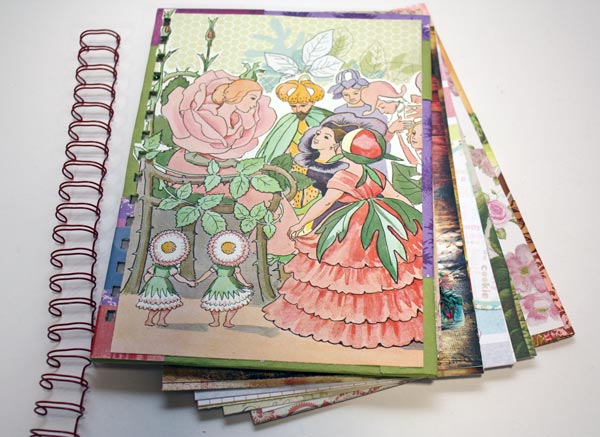
I had an old Elsa Beskow’s children’s book which I used for the cover image. There are plenty of pretty papers too! My other sister would not have this, it is much too cute for her. She likes something more artistic.
I chose art deco as I have been thinking a lot about that style lately. I love the muted, sliding color transitions combined with black and white. And I have been more and more into using graphic, sharp shapes.
Art Deco Journal Covers
I will show you how I made the covers for the art deco themed journal. First, I picked some Sticky Canvas by Claudine Helmuth Studio. It is a canvas sheet that is like a huge sticker. You can attach it without glue after you have finished it. You do not need sticky canvas for this project. You can use a drawing paper or thin fabric instead.
1) Background Colors
I started with watercolors, then used some Dylusions ink sprays. As the canvas got all wet, it got wrinkled. I emphasized the wrinkles by brushing Distress ink pads against the canvas.
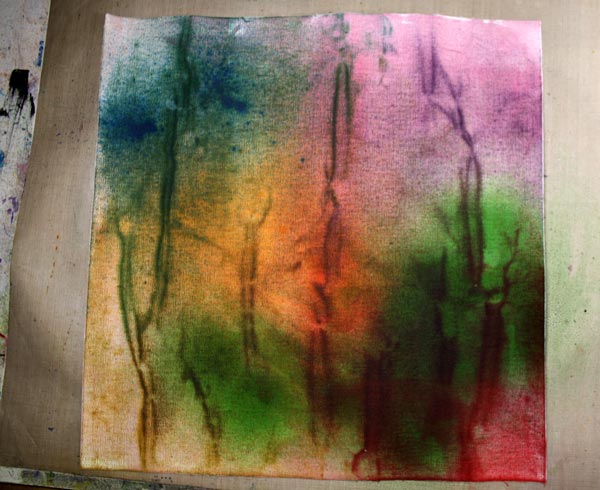
Now I got the muted, soft color transitions. Next task was to add contrasts and sharpness to it.
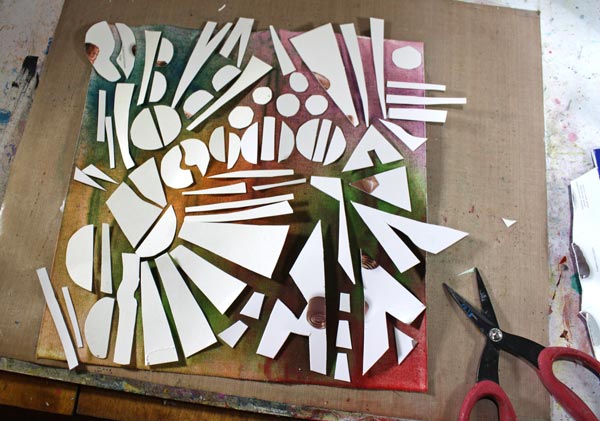
2) Background Motifs
I cut art deco styled shapes from old cardboard boxes and arranged them on the canvas.
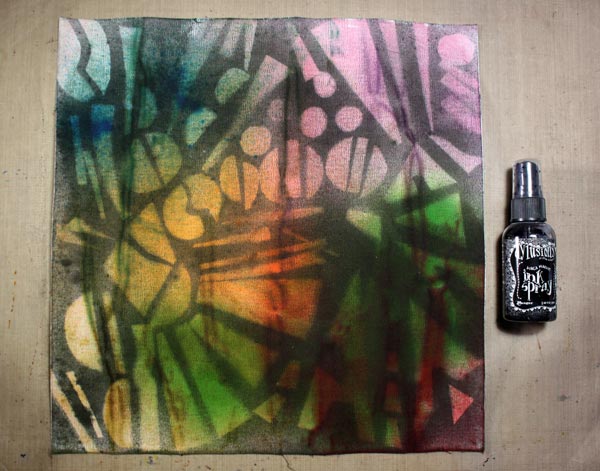
Then I sprayed with the black Dylusions ink spray over the shapes.
3) Finishing the Covers
I cut two thick cardboard pieces for covers. Then I covered them with the sticky canvas. I had a couple of handmade decorated papers which I wanted to use too.
I added decorated papers to the covers. Colored pencils were used to highlight the muted tones. The holes were punched with Zutter Bind-It-All. It is amazing how thick it can cut!
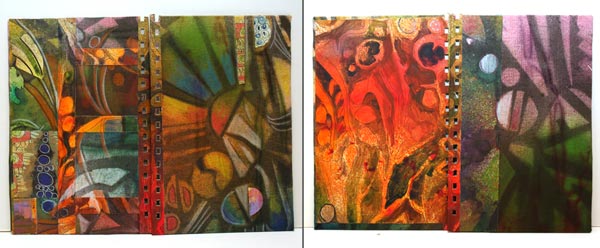
The front and back covers are shown on the left, and the inside covers on the right.
Now I just have to add pages, draw some art deco style ornaments to them and find a photo of my sister where she looks a bit like a beauty of that era!
Art Deco appeared first time in 1920-40s, just after Art Nouveau.
Leave a comment, what do you like in Art Deco or have you noticed it at all? Have you ever made anything Art Deco?
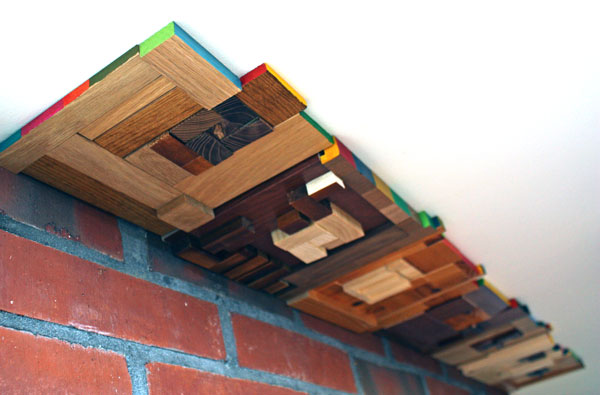
Scrap Wood Collage

After working day and night with Folk Bag Workbook, it was time to relax. But honestly, I am not very good at doing nothing, so I decided to put my mind in rest by finishing the scrap wood collage. It is a project I have been making with my husband. I talked about the project first time in one of the video blog posts.
Background of the Project
While renovating the studio, we ran out of the ceiling panels. (You can see the hole in the ceiling on the video.) My husband had a box of wooden pieces collected from the past woodworking projects. We decided to use them to create an artwork together.
We had been talking about a project like this for a long time. My husband is an avid woodworker and I love to draw and paint. We are both extremely interested in art and design, so we thought this would be the perfect project for combining our strengths.
Planning
When the project started I drew some sketches and we discussed about them. I focused on the concept of how the wooden pieces should be arranged. I knew I wanted to include paint too, but was not too concerned about it yet. We agreed to create a sort of log cabin quilt type design and organize the wooden pieces by color. My husband drew the size of the artwork on the big piece of paper so that we could understand the proportions more accurately.
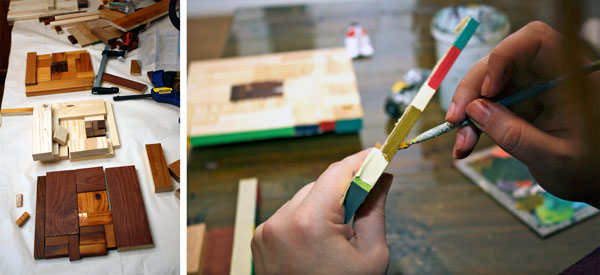
Making the Blocks
When we began to make the blocks, it dawned on us that I was too impatient to glue and adjust the pieces. And my husband had not much ideas about how the pieces should be composed visually. So I designed each of the block by organizing the wooden pieces on the table and my husband glued and finished the blocks. As every block is unique and most of the small wooden pieces are different sizes, my husband had a lot of work!
When all the blocks were glued, I wanted to add paint on them. I did not want to cover the wooden surfaces but add some color to the edges. As the theme of the studio is 1960s, I mixed colors from that era and painted each of the edges in different color.
Attaching the Blocks
After the blocks were painted, the artwork was ready to be put in place. My husband had made a wooden panel where he glued each of the blocks.

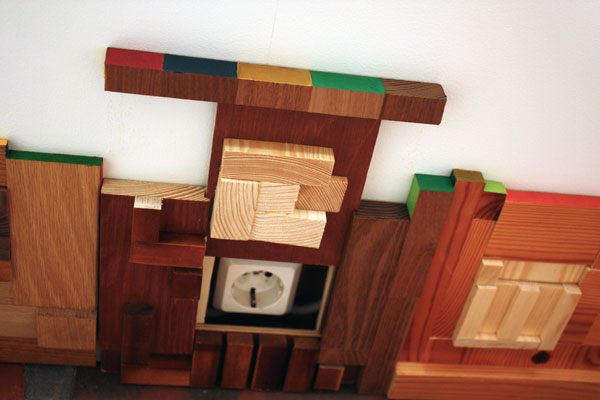
A Special Feature
If you watched the video carefully, you might have noticed that there is a power plug on the ceiling. The artwork is designed so that there is a flap in one of the blocks that can be slided away!
Lessons Learned?
All in all, this was a great project! This is what I learned here:
1) Let the creativity correct the mistakes.
We could have just ordered few more ceiling panels but we did the exact opposite!
2) Make it meaningful.
Many of the scraps carry memories themselves. And we created more memories by working together.
3) Search for new territories.
My approach for wood was totally different from traditional woodworker’s. The artwork was designed like a modern quilt even if it has been made from wood. For me, various wood species represented various colors. The wood grains were combined so that they formed rhytmic lines and ornaments. I also wanted to create a texture, but not by carving like a woodworker had done, but by playing with the height differences of each piece.
The fourth lesson is:
4) It’s good when it looks like it’s alive.
The end result might look terrible if you look at it like a traditional woodworker. While we made the project, my husband had some problems to get over the fact that every wooden piece does not fit exactly and there will be so much variety on the artwork. But in the end it all looks alive. I love the uneven, colorful edge. Combined with the texture, it all looks very organic even if there are clear, graphic blocks.
While creating this, I began to think of wood as a new art supply. Then I realized that most of the things in the world can be seen as an art supply! Mind-blowing, isn’t it!
P.S. Soon after we finished our artwork, my husband saw a woodworking video about making a wall-decoration from scrap wood. Does it differ from ours? Leave a comment and tell what do you think!