
Creating Wood by Doodling Layers
My husband is into woodworking, and he often shows me stuff that inspires me too. Like this box! After seeing it, I wanted to work with papers like they were wood. Carve with my pen and all!
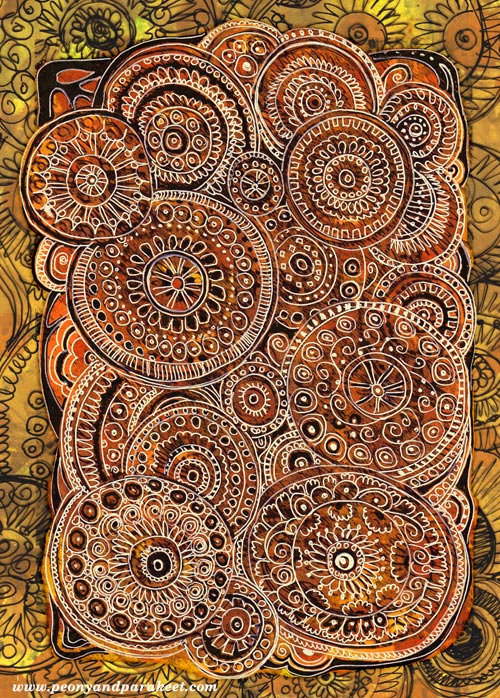
Here’s my little piece of wood, only on paper!
Doodling on a Transparency
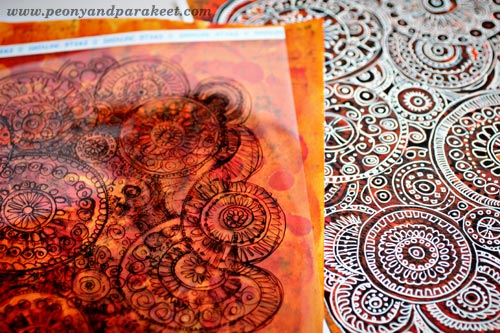
First, I only had an idea of how wood is constructed. It has lots of layers. I made the bottom layer with inks and chose deep orange shades. Then I took one of my illustrations, converted it black and white with a computer and printed it to a transparent film. It was pretty full of everything – as my work usually is – even in black and white, but of course it was not quite enough. I added some more doodling on it with a black marker. It already began to look like wood when setting the transparency over the orange background.
Doodling on a Print
I was not finished, though. The two layers were then scanned and manipulated digitally to make the black look like it’s gone deeper into the orange layer. The result was printed on paper. I added “the carving” using a white gel pen. Then back to the computer! I cut the piece in Photoshop and added the original scan as a background. Some fine tuning and there it was!
Doodling Layers – Creating Your Own Visual World
An American artist Georgia O’Keeffe said: “To create one’s own world, in any of the arts, takes courage.” I do not know about courage, but it surely is the best art can give to me: to create my own world. By process-oriented approach like by doodling layers, it’s both easy and fun!
Subscribe to my weekly emails – Get a free mini-course!
Pretty Art Journaling
I have started to wonder: is there only one style in art journaling? Is it only for those who are ready to explore with paint and who are not afraid of getting messy. And scrapbooking: is it about using commercial products and aiming for pretty pages?
Can’t there be pretty art journaling?
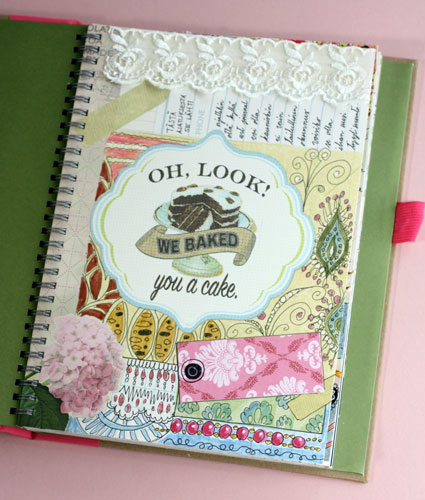
I bought this pink Smash book some time ago. The pages were so pretty I could not put any mess over them. And my style of making scrapbooks was not suitable for them either. But after getting fed up with messy mixed media, I dared to open it and just make it pretty!

So why not glue all the pretty stuff to your art journal? Add lace and frills and anything you find beautiful!

I added both commercial products and my own hand decorated papers to the page. Even my handwriting is a bit more controlled than how I usually write.
Finished Journal
>> See the flip-through video of this art journal!
Let me be your art teacher: Subscribe to my weekly emails!
How to Make Paper Flowers
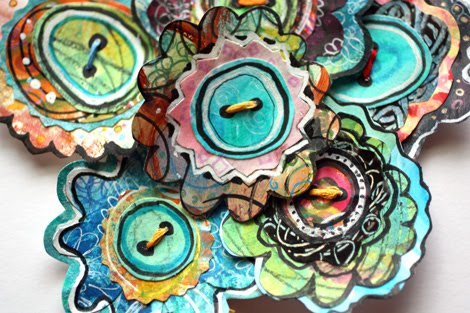
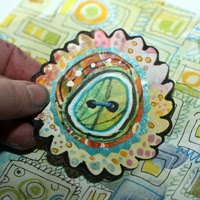 Once you have made your own patterned paper, why not turn them into adorable paper flowers!
I just love the way they go along with the papers. Once you have developed your own style, anything you do can be combined together. As I have said, the best shop for papers and embellishments is the one you can set up for yourself!
So take out your hand decorated papers (I have quite a pile of them) and start making flowers! In addition to papers, you will only need correction pen, black marker (I love PITT artist pens), some embroidery floss, glue (Tombow is my favorite) and scissors.


Pick three papers that work well together. Remember to ensure there’s enough contrast between them.
Cut three circles, a small one, a medium one and a large one. My largest one is about 3 inches (7,5 cm) but you can make them in various sizes. Just be sure the smallest circle is big enough to add details like button holes.
If you have made your papers drawing layered circles, you have your circles ready to be cut. I cut the circles free hand as I am not so fussy about making them accurate.
 After cutting the circles, take the biggest one and draw the shape of the flower with the black marker. I like my flowers to be asymmetrical. I think they look more artsy that way!
Cut by following the marker line so that the black marker line remains visible. The line frames your flower and make it look more dimensional.
You can also change the shape of the second circle if it feels right. I often find myself adjusting the shapes of the circles during the process.
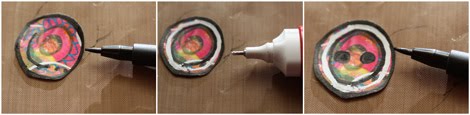
Make the smallest circle to look like a button by drawing circles with the marker and the correction pen. Then add holes with the marker. Big holes look better than small ones.

Now you have the three parts of the flower ready to be attached. Glue the parts together. Then take your needle and sew the buttonhole. After this phase I often add details with the marker. Here I have added little dots around the button and circled the second circle. As I love adding layers to my work, I finally glued the flower to another paper (blue one in the picture) and cut it out.
 Here’s the finished piece. Have fun with your papers!
Let me be your art teacher: Subscribe to my weekly emails!