Painted Paper Collage – 6 Tips for Intricate and Fun Art
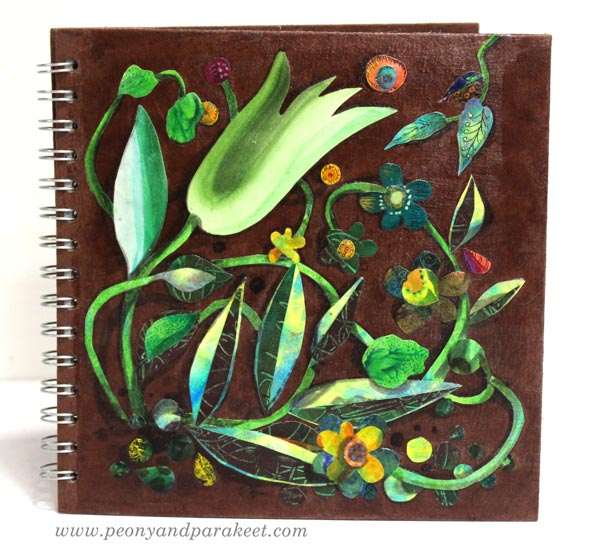
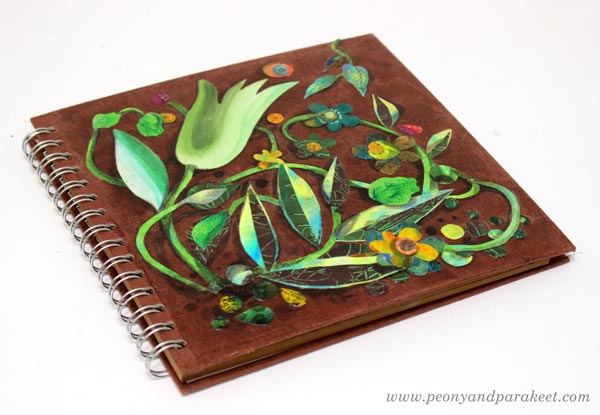
Here’s an 8-by-8-inch sketchbook that I decorated with painted paper collage. Even if all my art is not collage art, I love it. Painted collage art often replaces traditional sketching so that I paint and cut papers to grow the ideas that don’t feel mature enough for bigger work.
In this blog post, I share some tips that are handy for this kind of creative play.
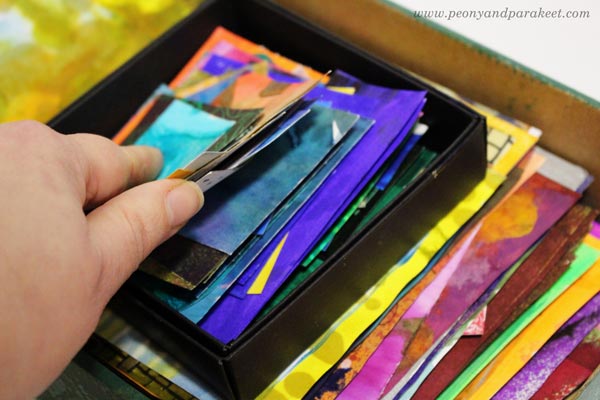
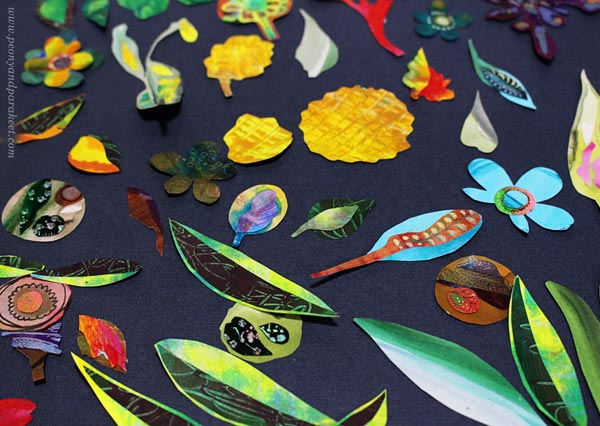
Tip #1 – Organize Painted Papers by Size
I have a box for small paper pieces and another for bigger ones. I keep the papers rectangular in shape so that they are easy to browse.
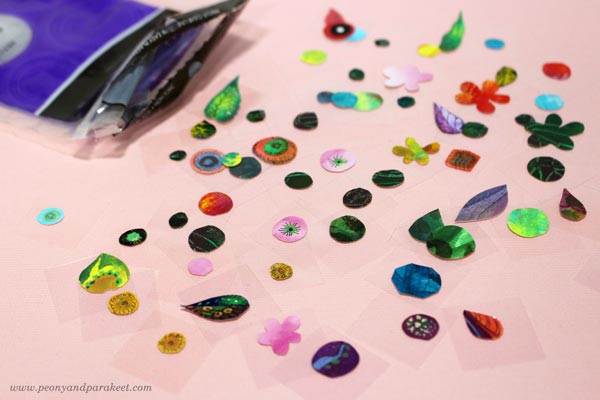
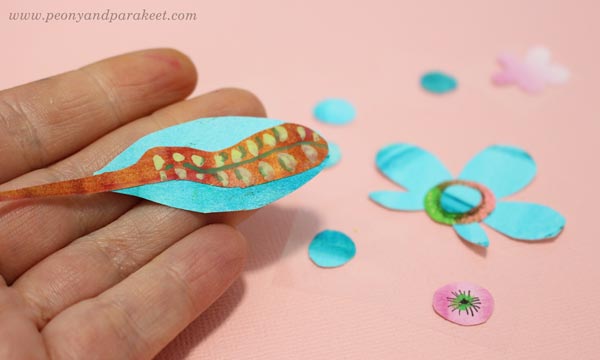
Tip #2 – Add a Lined Adhesive to the Tiniest Pieces
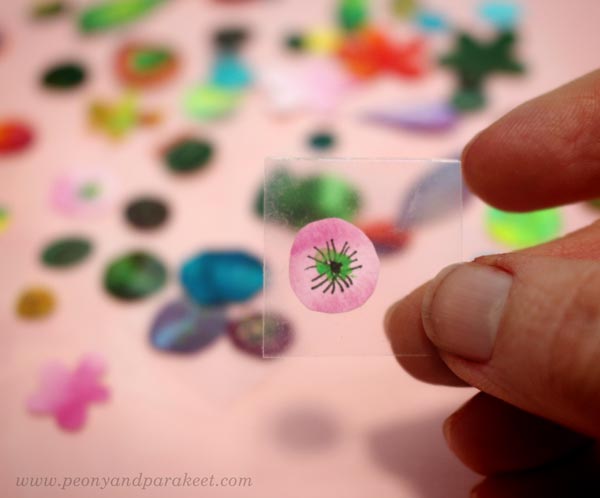
I like to make intricate collage art so I have tiny collage pieces. Small hand-cut pieces are difficult to handle and get lost easily. Thermoweb has clear adhesive dots called Zots (affiliate), that come with two liners, and they are perfect for both storing and attaching small paper pieces.
Zots are very flat compared to many glue dots, and they have two liners. Just remove the first one, attach the piece, and then remove the second liner when gluing the piece on a collage! Here you can see a close-up picture. This is the smallest size of Zots.
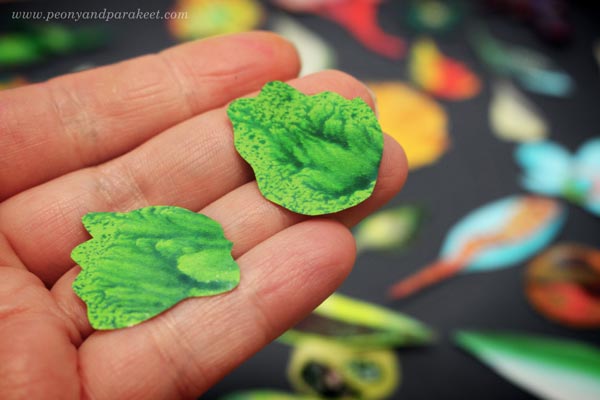
Tip #3 – Make Clusters
Attach small pieces on the bigger elements and treat each piece as a small artwork!
I also like to decorate clusters by painting and drawing.
However, I sometimes have elements that are so beautiful that they don’t need anything on them.
Tip #4 – Group and Layer!
When composing the painted paper collage, use connecting lines and intersecting shapes. They make a more elegant and coherent composition than if the elements don’t touch each other.
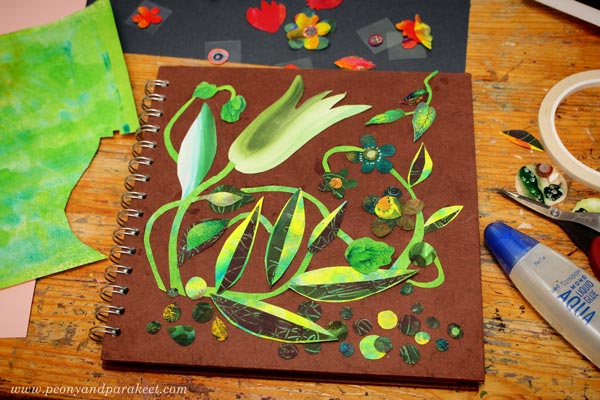
Tip #5 – Add Shadows
For the sketchbook cover, I used grey Faber-Castell PITT Artist Brush Pens (affiliate) to color shadows on both the elements and the background.

Shadows add depth and make the elements look less separate from the background.
Tip #6 – Sealing
I like to attach the collage elements first with glue dots, double-sided tape, or some paper glue and then use gel medium for sealing. This way, my fingers stay fairly clean when I am building the composition. At that stage, I attach the elements only partly, and they get glued when I am sealing the work.
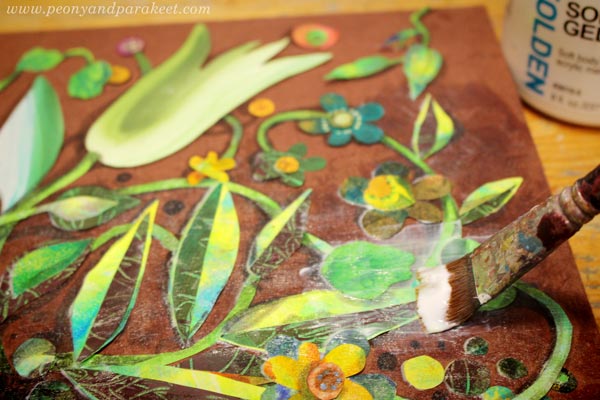
For sealing, I use several layers of gel medium (Golden Soft Gel Gloss (affiliate) is my favorite), especially for the items that will be touched regularly.
Painted Paper Collage – More Ideas
- For those who want to start by making some papers:
Choose Kiwi, Arboretum or Romantic Doodles - For those who like to play:
Dolls in a Gallery – Paper Collage Step by Step! - For those who need to dig deeper as artists:
Draw Your Innocent Little Secrets! - Class recommendations:
Collageland
Inspirational Drawing
Modern Mid-Century
I hope you found these tips both practical and inspirational!
8 thoughts on “Painted Paper Collage – 6 Tips for Intricate and Fun Art”
Comments are closed.
Paivi, Thank you for sharing your amazing talents and gifts. You are so inspirational – I love how the plants on the book cover are all connected by lines. It really brings everything together just like in a garden. I love all your work. Thank you again.
Thanks, Alice!!
Love all your ideas!
Thank you, Eileen!
Thank you again, Päivi, for your very good ideas and tips. These are inspiring both from the practical as well as the esthetical point of view. The sun is shinig here today and that is very refreshing, so maybe I’ll start digging in my boxes and drawers…
Thanks, Eila! Have fun!!
Thank you so much for sharing the idea of using scraps.
Thank you, Nel!