Easter Chick Art – Draw Step by Step!
Let’s draw more than just a little chick—let’s create Easter chick art! By adding details bit by bit, you can turn even a small drawing into a picture full of atmosphere.
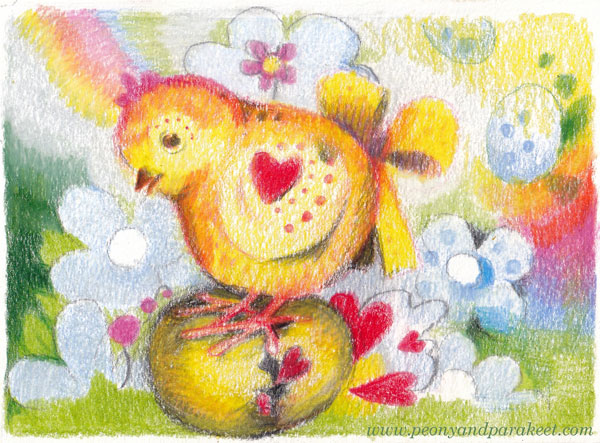
You only need colored pencils and paper. My drawing is about 10 x 14 cm (4 x 5,5 inches).
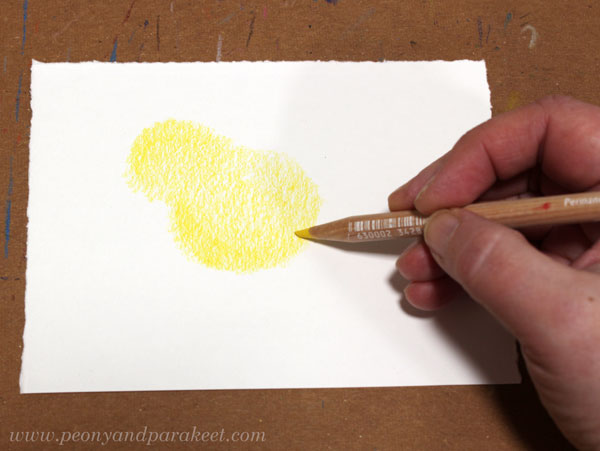
Step 1 – The Shape of the Chick
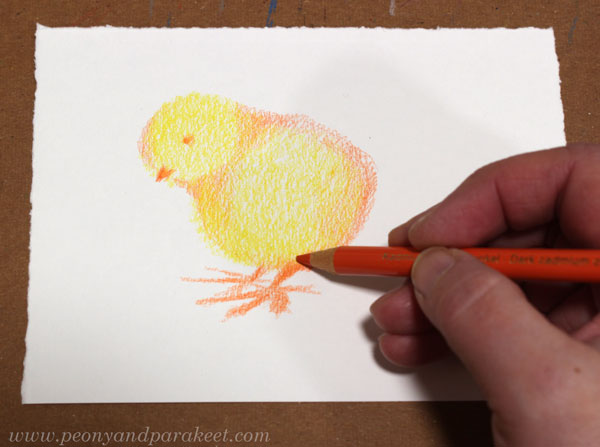
Color two circles that blend into each other.
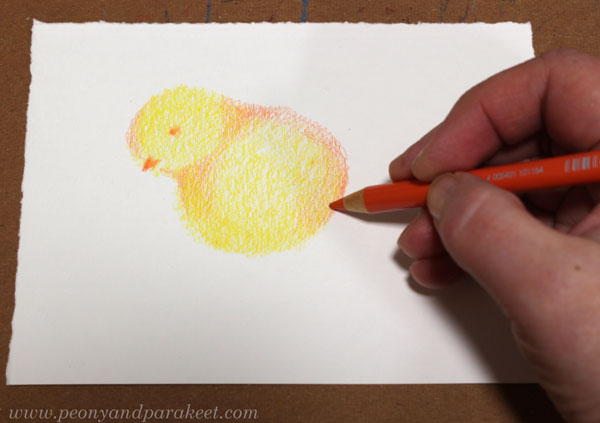
Step 2 – Features of the Chick
Use a darker color to add shadows so that the head and the body are distinct from each other. Then, add the eye and the beak.
Step 3 – The Chick’s Legs
Draw large legs that attach to the body at an angle.
Step 4 – Decorations
Get creative and decorate your chick! Notice that decorations can extend outside the body. For example, I added a bow.
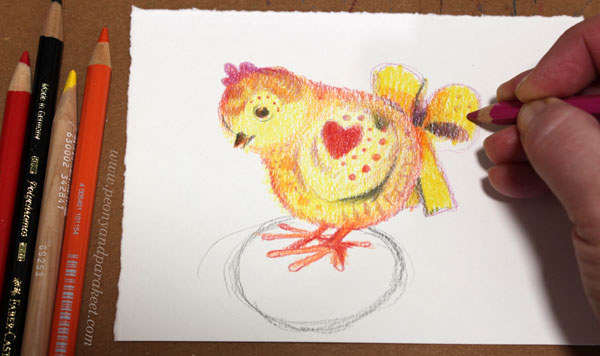
If you draw an Easter egg under the chick, sketch it at this stage. This way, you can add decorations so the chick looks balanced on top of the egg.
Step 5 – The Egg
Color the Easter egg. Use your imagination – what happens to the egg when the chick stands on it? My egg has opened, and hearts are bursting out into the air.
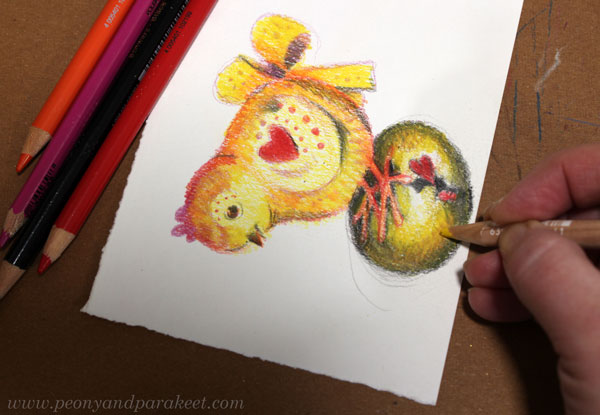
Rotate the paper to adjust the shape of the egg.
Step 6 – The Background
Add decorations, grass, and colorful lights to the background.
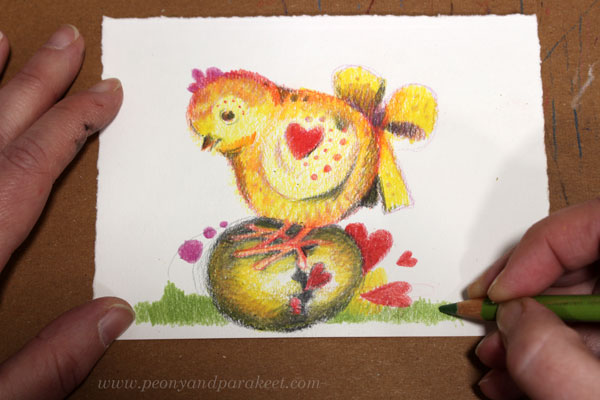
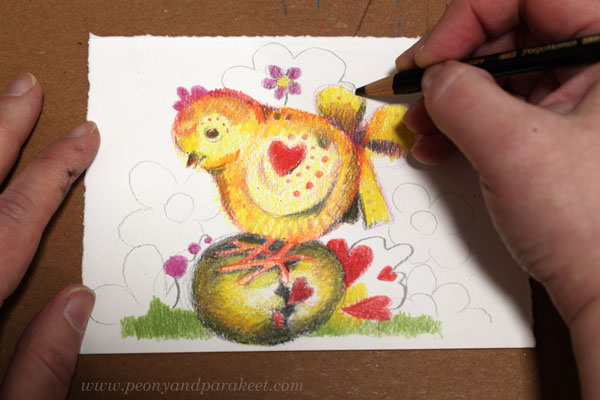
Keep the background light so the chick stands out. Color lightly and soften the colors with white and light gray.
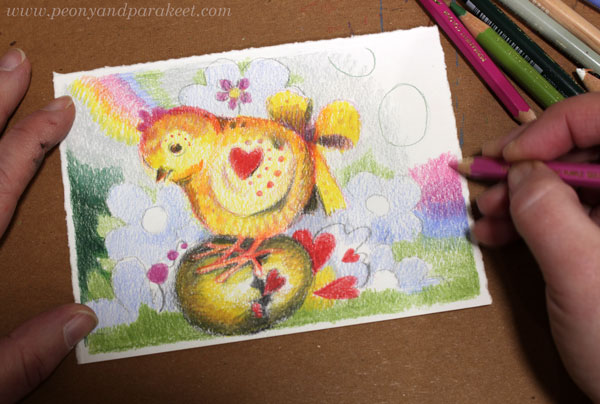
Continuity helps create a balanced look. In my drawing, the rainbow in the background continues on the other side.
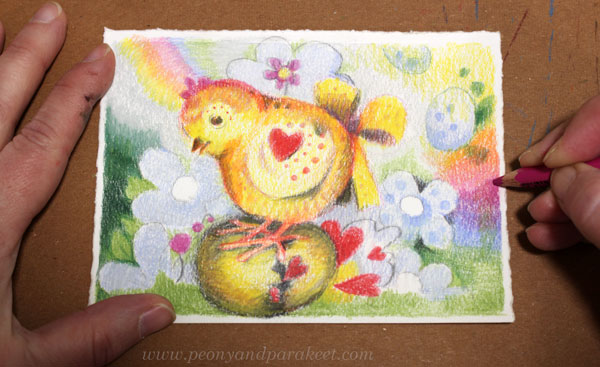
Step 7 – Finishing Your Easter Chick Art
Spend some time finishing your drawing. Color carefully to ensure full coverage where needed so that the chick’s colors are bright and no paper shows through near the outlines.
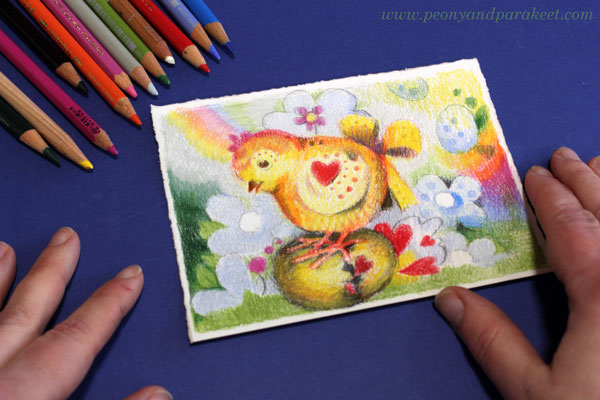
Hearts and Stories!
I like drawing hearts. They are so simple and direct, yet they make the drawing feel warm-hearted. I also have a course about them: Hearts and Stories!
Let’s keep drawing!
Colored Pencil Tutorial “Limitless World”
This week, I have a step-by-step colored pencil tutorial for you. It’s called Limitless World. We color without outlines and end up with something that is partly realistic and yet more creative and limitless than any traditional drawing.

Supplies
This tutorial uses regular colored pencils, but feel free to try it with watercolor pencils, watercolors, or any media that can be layered. Choose the paper that goes with your supplies and is durable. I used Fabriano Accademia Drawing Paper (200 gsm/94 lbs). You can create the drawing in any size, but my piece is A4.
Introduction to The Colored Pencil Tutorial
You might be familiar with the work of Hilma af Klint. She is a wonderful example of how our inner world and intuition can guide the hand. Her art has been the main inspiration for my course Mystical Minis. In this project, however, we reach from the inner to the outer world—making the outer look limitless, too.
Before you start reading the step-by-step tutorial, watch a 5-minute introduction where I tell more about the project.
I hope you enjoy this colored pencil tutorial. Let’s start!
Step 1 – White Shapes
Pick any color. Create abstract white shapes by coloring the background.

Press fairly lightly. We will add more layers over the background.

Make sure you have a wide variety of abstract shapes in different sizes.
Tip: You can turn the paper in different directions during the process and decide on the final orientation later.
Step 2 – Colorful Shapes
Pick any colors. Color abstract shapes so that they form a new layer on top of the background.

Make sure that the colorful shapes extend over the white shapes and don’t follow their outlines.

Also, add new shapes on top of other colorful shapes. Press fairly lightly so that you can add more layers later.

Keep the expression abstract. Don’t guess what the drawing is about. Just color a variety of shapes in different sizes and enjoy the freedom.

When the paper feels full, but you can still easily see the background and the colorful layer, move to the next step.
Step 3 – Connecting Colors
Pick colors that are close to what you have used before. Use one color more than others. My main color is green, but I also use other colors.

Color over the previous layers so that the two layers are no longer separate. Focus on the edges and color a small area at a time. Leave only a few areas blank, mostly near the center.

In this step, you can adjust old shapes and color new shapes, too. Think about attaching two pieces: you can either glue (spread the color over) or tape (add a new shape on top).
Tip: Now you can decide on the orientation and get ideas for the drawing’s topic.
Step 4 – Discovery
Find people, animals, plants, trees, furniture, water, and any realistic objects in the abstract drawing. For example, I have someone in the corner who is like an observer of everything happening in the drawing.

Adjust the shapes so that the viewer will also realize what they represent.
Tip: Remember that we are drawing a limitless world, so odd things can appear! The drawing can make sense emotionally, even if it isn’t rational.

You can also use an eraser to adjust the objects.

Having an eraser pen is handy, and it’s very useful for the course Mystical Minis, too!
Step 5 – Advanced Level
When your drawing feels finished, you can either stop or take it to the advanced level.
Basic level: The drawing feels finished, and you feel quite drawn to it. For a viewer, it may look a bit chaotic, busy, and difficult to comprehend.

Advanced level: The drawing has an engaging atmosphere, and the viewer is gently guided around the drawing.
To achieve this:
- Increase contrast in the middle and reduce contrast near the edges.
- Increase intense colors in the middle and reduce the intensity near the edges. Don’t leave blank areas in the areas that are less important.
- Make the shapes less clumsy by adding notches and lines. Make lines curvier and thinner.
- Direct the viewer’s gaze with contrasting shapes and lines.
Tip: Some areas can be more realistic than others. The world of imagination has no limits!
What Does Your Drawing Tell?

I usually work in my little studio, but this time, I finished the drawing in our living room, and I think that the aquarium, the furniture, the glassware, and the birds chirping outside … they all found their way to this drawing. But every drawing will become different. What does your drawing tell?
This kind of intuitive process is natural and free, and at least for me, much more exciting than making a stiff sketch and then coloring it. I hope this colored pencil tutorial marks the start of a new journey for you—one we can continue together, for example, in the course Mystical Minis!
Intuitive Abstracts with Colored Pencils
This week, we create abstract art with colored pencils so that we let our intuition lead us.
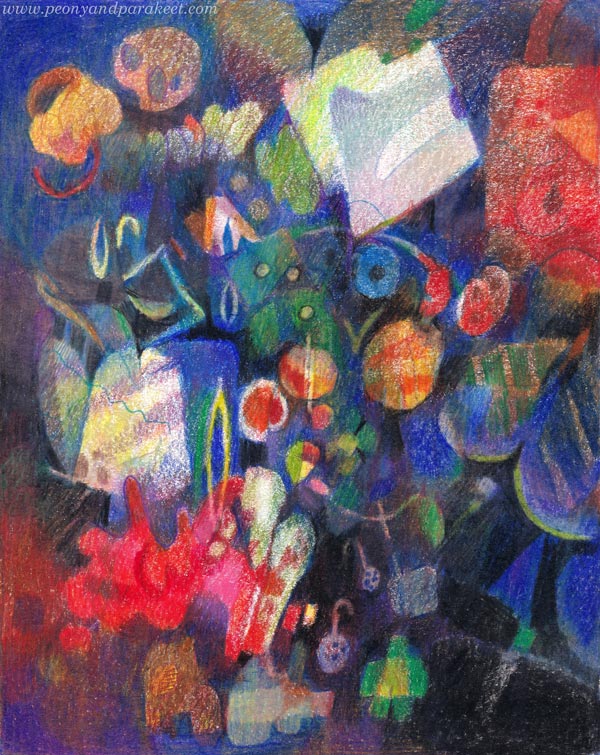
If we only draw realistic art, we miss the layer that is under it. I often call my abstracts “skeletons.” They show how my art is constructed and what its spirit is. By creating abstracts, I can adjust my visual language and discover new shapes, techniques, and color combinations without being constrained by how things “should look.” It’s like Wassily Kandinsky has written in his book “Point and Line to Plane”:
Not everything is visible and tangible or – to be more explicit – under the visible and comprehensible lies the invisible and incomprehensible.
Step #1: Pick Your Shortest Pencil and Color Lightly
The first layer is a seed for future layers, so create a variety of shapes.
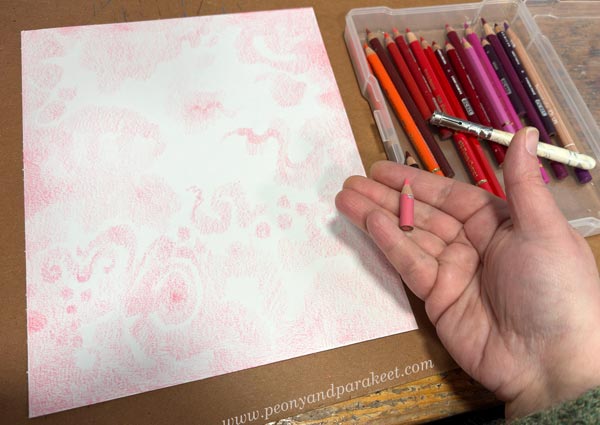
You don’t have to feel anything; just focus on variety.
Step #2 – Add Colors and Shapes Over the First Layer
The new shapes and lines don’t follow the first layer but get inspiration from it.
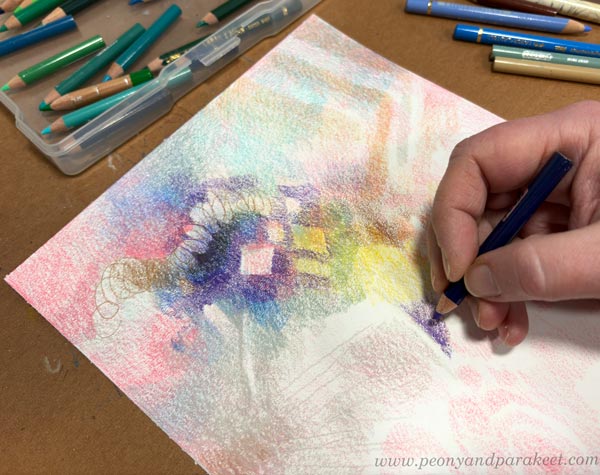
Rather than following the first layer, take a different direction and create the opposite of it. If the stripes of the first layer go in one direction, now color something else in a different direction. If the first layer has a big shape, now add something that is not so heavy, for example, thin lines. Get out of the traditional solutions, and find new ones.
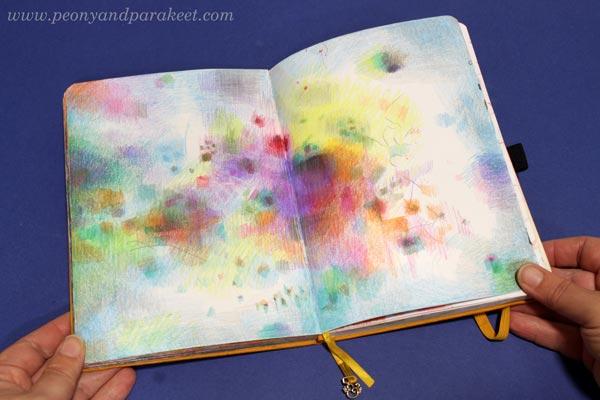
If you don’t have the patience to continue longer, you can leave your abstract to be just a color play. Here’s one of mine in an art journal. This is from 2024.
Step #3 Remember Thin Lines
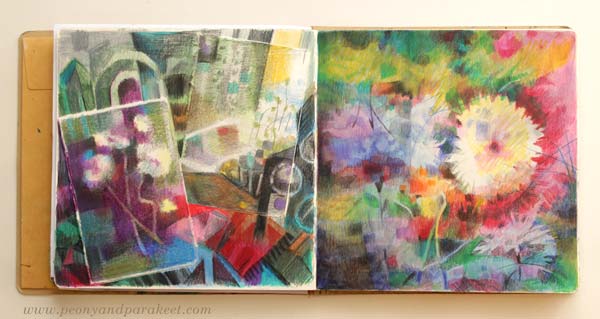
Stripes are fun to color with zig-zag strokes, but by using thin lines, you will bring more of yourself to the drawing.
See how I have used lines in these art journal pages (See the full art journal in this post from November 2025). More than outlining, I like to let the lines wander freely.
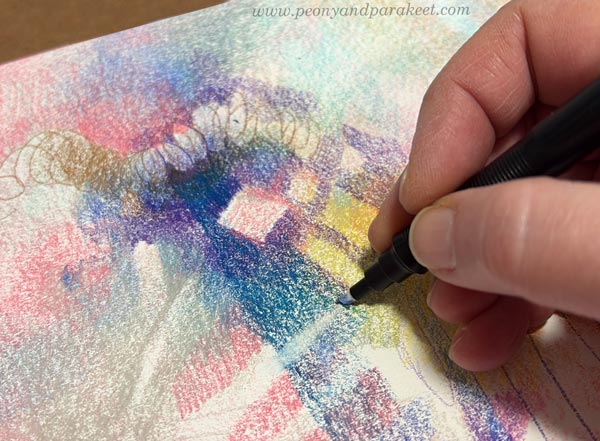
You can also use an eraser for lines. The eraser pen is great for thin strokes, but you can also use a regular eraser and then color around the erased part to make the line thinner and more elegant.
Any straight line is just a stripe, but when the line gets curvier and becomes winding, the artist behind the pen comes up, and more intuition can be brought in.
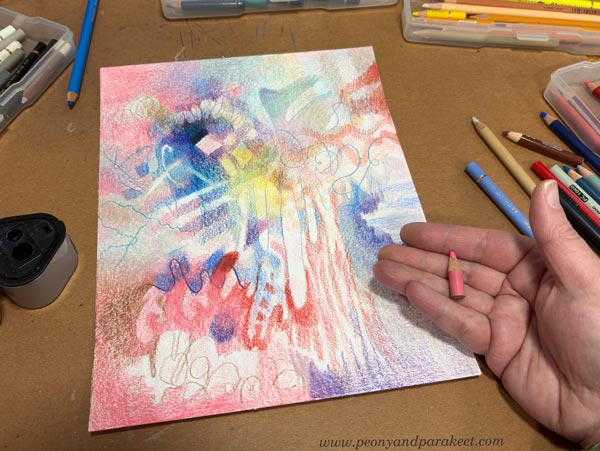
A line that is curly like writing can appear inside a shape or make new shapes. Here’s an example from 2023.
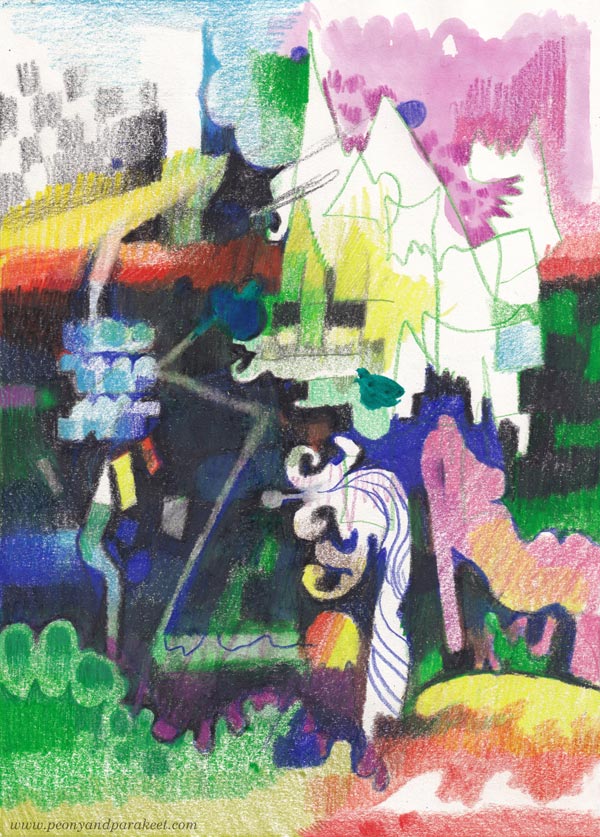
Step #4 Color over Color
Mix colors by adding a new color over the previous one. Color lightly so that the previous layer shows through.
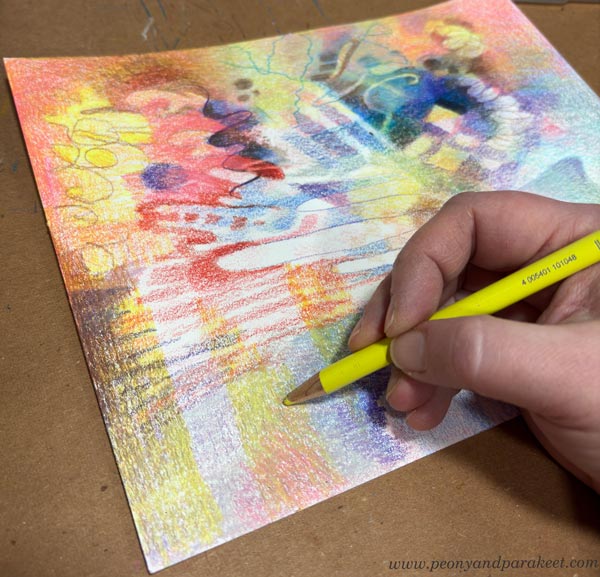
Step #5 Into the Darkness
Be bold and add dark colors too.
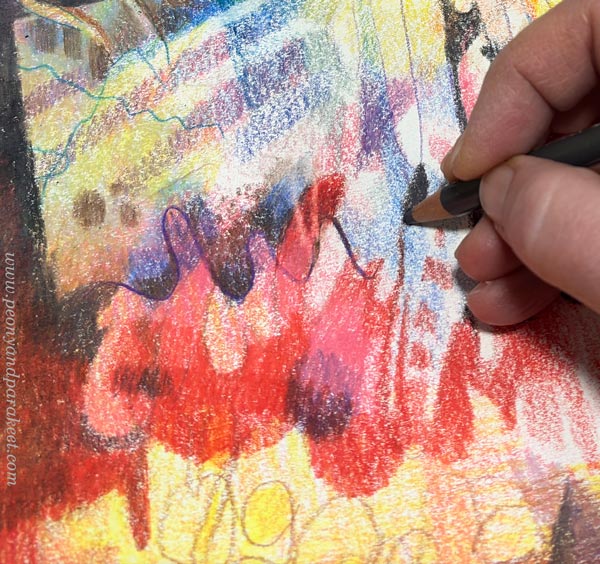
The dark parts make these simple pages look finished. The examples are from 2015.

Step #6 From Intuition to Intention
The further you progress, the more you begin to wonder what the image is about. Remember Kandinskys words: “under the visible and comprehensible lies the invisible and incomprehensible.” I like to keep the abstract drawing in the incomprehensible stage for quite a long time.
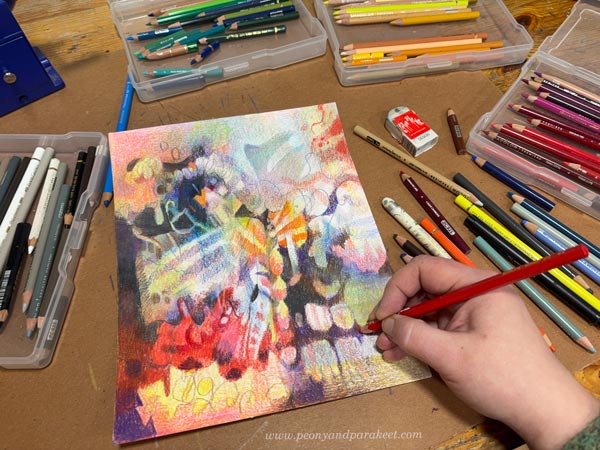
At this stage, I was thinking about sweets, fruits, and drinks. But then I just let go of that thought and allowed the drawing proceed further. The easy thing for me is to make a floral piece from “a skeleton.”

And even now, my drawing started to get more flowery shapes.
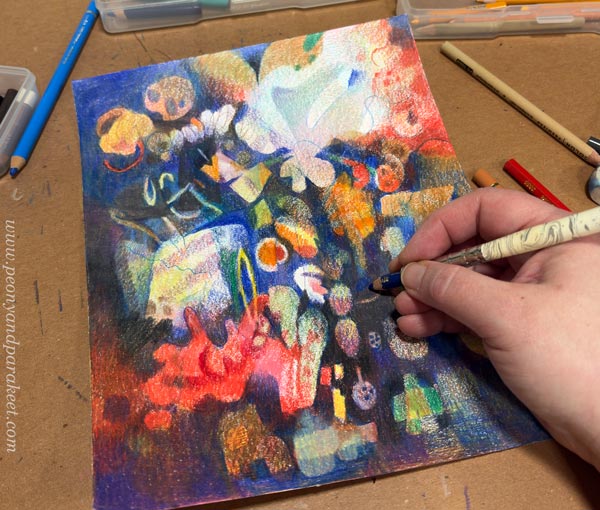
It reminded me of the drawing I made in 2024.

But I don’t want to draw flowers only, so I continued to work on the drawing.
Step #7 Hide Most of the Shapes
Don’t fall in love with every detail! My art is full of details, and I have often struggled with which ones to save and highlight compared to others.

Here too, I made lots of decisions about which shape to save and which alter so that it doesn’t show so clearly. It’s not just about improving the composition but about the atmosphere and topic. Here, I was thinking about jewelry, printed fabrics, all the fashionable things, and how great designs are derived from plants.
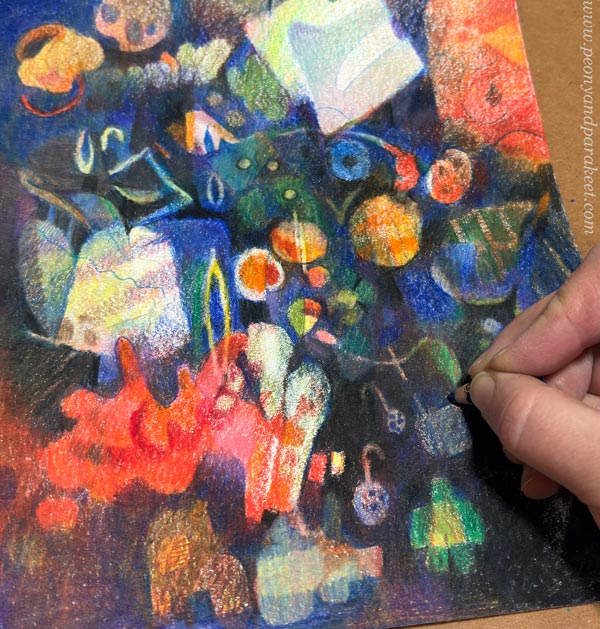
I don’t dress fashionably, and I don’t consider myself to be appearance-oriented, but I have always felt a connection to fashion design. It’s a strange relationship, because all I have to do is catch a glimpse of, say, a Dolce & Gabbana fashion show and my mind is filled with ideas for paintings. My intuition often offers me solutions that I recognize as fashion-related in one way or another. I do have a background, but in industrial design, so it’s a bit mysterious to me!
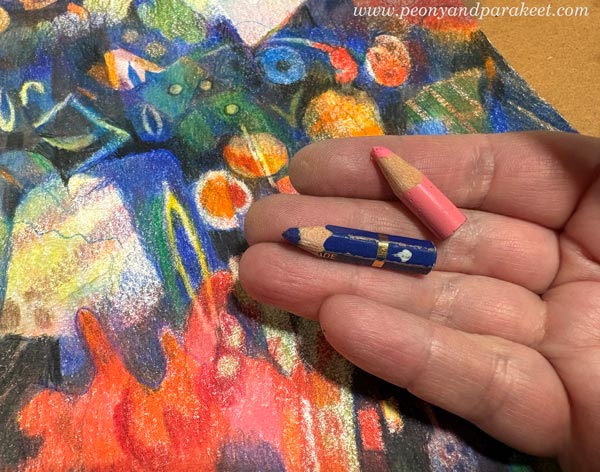
In the end, I tossed these shorties away: Thank you for your service!
I store my colored pencil drawings in a plastic folder.
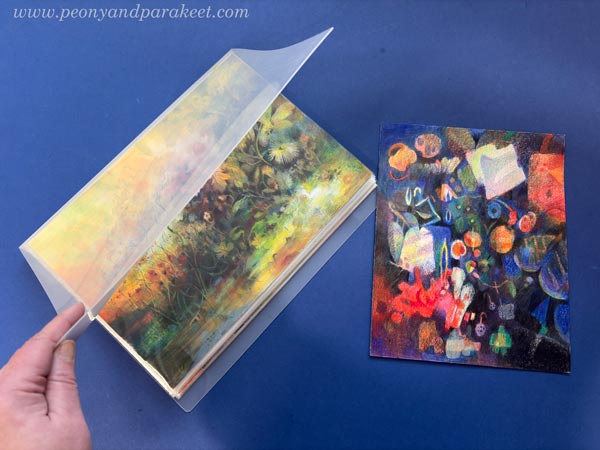
Outer vs. Inner Inspiration
We often need outer inspiration to get started, but to continue, we need the connection with the inner inspiration.
Wassily Kandinsky wrote:
In spite of all the apparently insurmountable contradictions, the present-day human being is, indeed, no longer satisfied with the external alone. His vision is becoming sharper, his ear keener, and his desire to see and to hear the inner in the outer ever increases.
In the course Mystical Minis, we color small abstract drawings and move from the outer to the inner. You can’t find a course like this anywhere else. I have got inspiration from Wassily Kandinsky’s colleagues, Hilma af Klint and Georgiana Houghton, as well as the modernist author Virginia Woolf. Every exercise is different, but all are mystical.
Mystical Minis – Draw abstract art with colored pencils – Buy Now!
Pumpkin Drawing Step by Step
This week, I wish you Happy Halloween with this pumpkin drawing tutorial. Draw one pumpkin or many, make a simple drawing or an atmospheric illustration – these easy ideas have many possibilities!

My drawing is about 29 x 29 cm (11,5 x 11,5 inches) but you can use these ideas for any size. Start with one pumpkin and then decide if you want more. I started from one on the left bottom corner.

Even if the pumpkin looks very decorative and detailed, it’s fun to color with colored pencils. But first, we make a simple sketch.
Step #1 – Sketch a Pumpkin
Pick a pencil and sketch a pumpkin. Start from a circle and then divide it into sections.

I also added one vertical and one diagonal line to mark the perspective. But as you can see in the image below, my guiding lines for the perspective are short ones. They only define a very small section of the background.

After coloring the first pumpkin, we will add more guidelines to the background.
Step #2 – Decorate a Pumpkin
For each section, color a column of simple circles.

Use zigzag strokes and have fun with colors.
Step #3 – Color the Rest of the Pumpkin
Add a background color for each section.

Leave some white around every circle to get more decoration. You can now decorate the stem too.
Pick a yellow pencil and color over the pumpkin. Yellow adds wamth and makes the colors shine.

Step #4 – Add Shadows and Finish the Pumpkin
Add some shadows around the pumpkin and in the centre.

You can now adjust the decorations and make sure that you have colored the pumpkin carefully. The coloring should cover the paper.
Step #5 – Start the Background Patterning
No matter how big your drawing will be, I suggest that you first focus on the surroundings of the first pumpkin. This is “the seed pumpkin” or “the mother pumpkin.” Draw a safe place for her first before drawing more.
By following the guides from the first step, color checkered patterns.

Use a neutral color. You can later add more color on them.
Step #6 – Draw More Pumpkins
Imagine the magic – so, pumpkins flying freely in the space! With a pencil, draw pumpkins in different sizes.

Make sure that some of the pumpkins are only partly visible and that they are oriented in different directions.

First draw a circle and mark the orientation with the stem. Then divide each pumpkin into sections.
Step #7 Color More Pumpkins and Expand the Background Patterning
Now you can let go with the stiff idea of a perspective and make your own. Color the checkered patterns so that they flow in different directions. Again, use neutral colors for them. You can leave a small part of the background without patterning.

At the same time, you can start coloring the pumpkins as well. Change the orientation of the paper while coloring so that your little squares and circles don’t get distorted.

If you were a little careless when sketching (like I was), the pumpkins may look less like pumpkins and more like decorated circles. Add little bumps to the sections between the ribs to correct this.

Step #8 – Color the Background and Finish Your Pumpkin Drawing
The idea of background patterning is to get a sketch for “the air” – so for the 3-dimensional space where the pumpkins are flying. You can now color over the neutral grid and add new checkered patterns with colors as well.

Get creative and let all kinds of fun stuff appear in the background!

To get the festive feel, spend some extra time with the drawing to make sure your colors are strong, your darks are dark, and the paper doesn’t peek through. What started as a simple pumpkin can now become pumpkin art!

Happy Halloween!
P.S. If you liked this tutorial, check the course Fun Botanicum!