
Art Journaling about Imagination
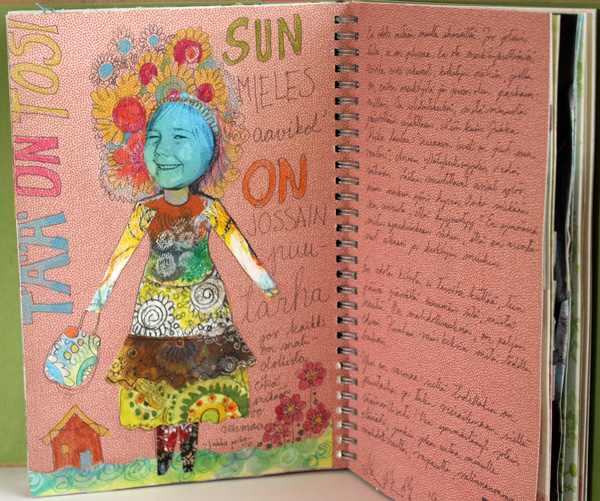
Here’s a page from my Smash book that I use as an art journal. I have picked a phrase from a Finnish reggae artist, Jukka Poika. He has a song called Potentiaalii (“Potential”). This is the best part of the song: “There’s a garden somewhere in the desert of your mind, where everything is possible and nothing is certain.”
I think that’s exactly what creativity can offer us. The only limit is our imagination. When art journaling I sometimes document, but I also dream. I am in the garden of my desert and I always feel happy and content there.
Using Hand Decorated Papers in Scrapbook Pages
“The golden door is open” says this page. I feel like I have entered the new level of scrapbooking when I have increased the amount of handmade elements, especially hand decorated papers.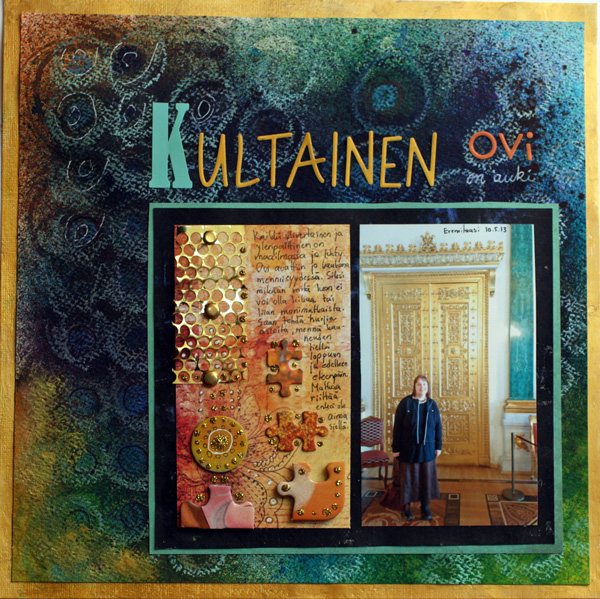
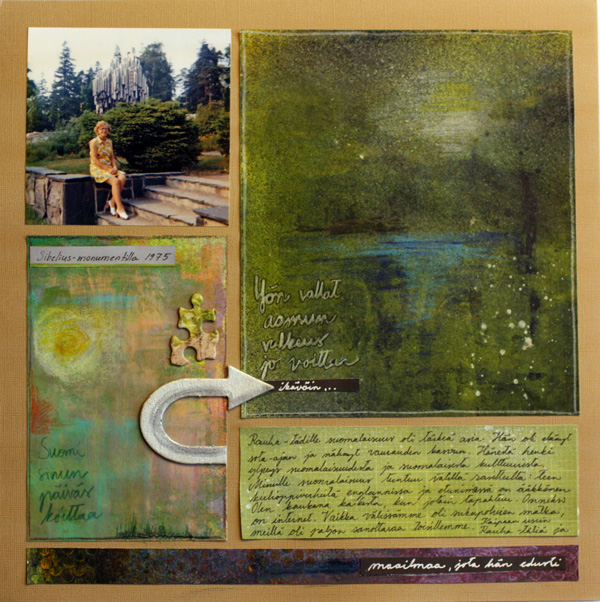
I wonder why store-bought papers are so popular. Using my own papers is so inspiring. Here’s “Empty Scenes”.
In this page I have used odd leftover letter stickers to create patterned background area in the bottom of the page. Did not cost anything but with some gesso and acrylics they got a new look.

With hand decorated papers I have begun to pick themes that I never did before. Like this one about Sibelius’s Finlandia hymn, my aunt and being a Finn.
Inspired by Mark Rothko
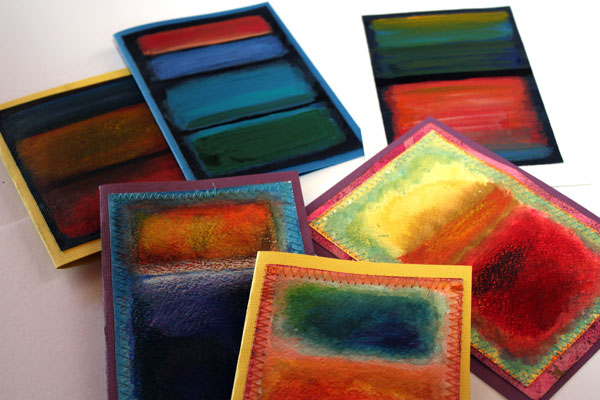
I have some close friends and relatives who have their birthday in May. I came with this idea of Mark Rothko inspired greeting cards when I thought: What would I give them if I had all the money in the world. And I immediately knew the answer: Mark Rothko paintings! Not as genious as the originals of course but still I think this is a fun idea.
Make your own Mark Rothko inspired card!
1) Paint the borders of the cardstock with acrylic paint.
2) Fill the center with watercolors. Paint rectangular areas using multiple shades.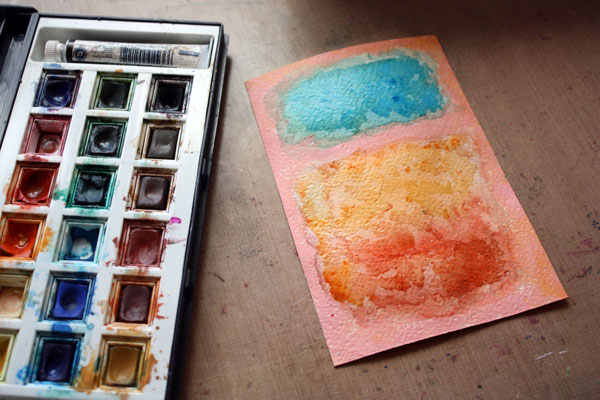
3) Strengthen the watercolors and create layers with color pencils.
4) Attach your artwork to the card base. If you like you can sew zigzag around the edges to add detailing.
You can also use acrylic paints only. In the first row you can see my all-acrylic creations and in the second row are the cards that combine acrylics, watercolors and color pencils.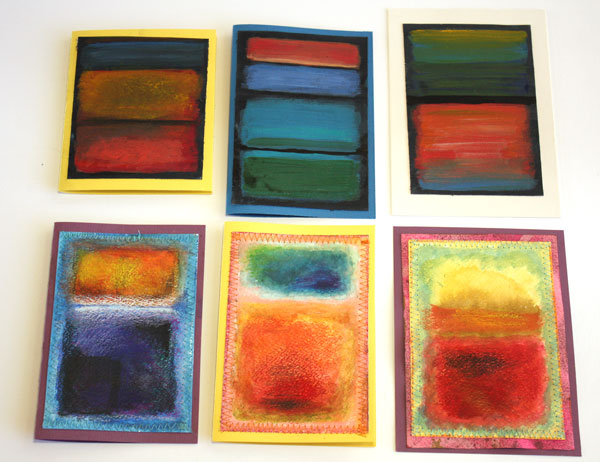
Mark Rothko & abstracts with colored pencils: Buy the e-book Coloring Freely!
How to Create Tissue Paper Collage
Here’s what I did today: the collage of spring flowers using tissue papers!

The idea for the tissue paper collage came from a visual arts teacher who sent me an email asking if I had any ideas about creating art using tissue papers and markers. I had some tissue paper in the storage, and when I went to fetch them, several ideas came to my mind.
Decorating Tissue Papers
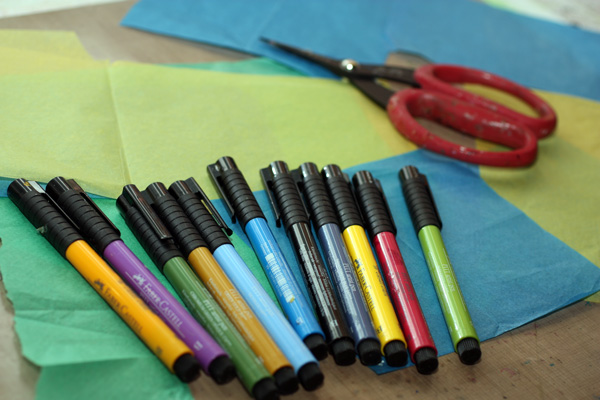
As I love to make my own collage elements, I began with decorating the tissue papers. Alcohol-based markers are best for the job. I used PITT pens, but any markers will do really. You can also use color pencils if you do not have any markers. It is just a bit easier to draw with the markers on the thin tissue paper than with sharp pencils.
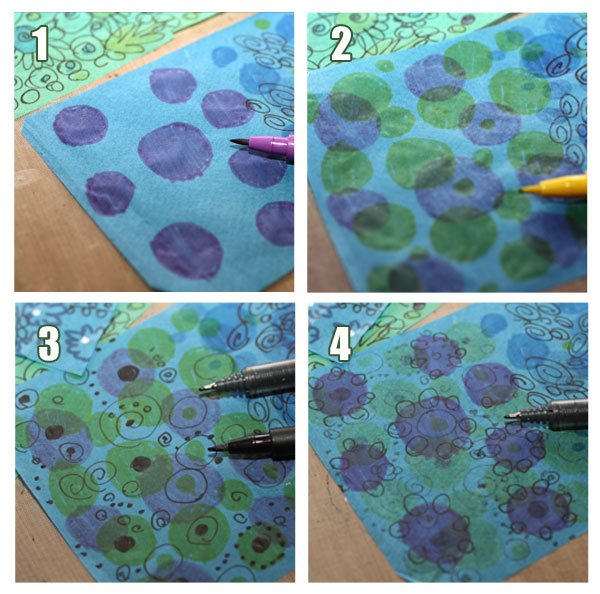
The great thing about tissue paper is that you can use both sides and create interesting layers. Create color motifs on one side (step 1), then turn the paper and do the same there (step 2). I always use various thicknesses of pens as it makes the decoration more interesting. You can add finer details on both sides (steps 3 and 4). This way you have created a paper that you can use either side up in your artwork.
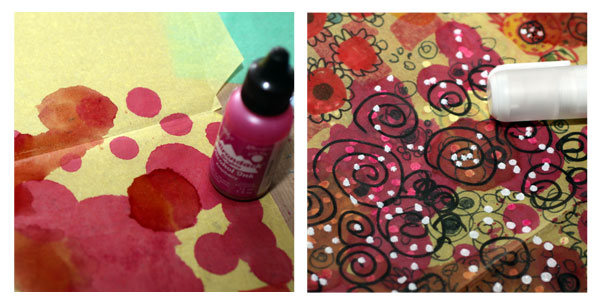
If you have alcohol inks, they add color and interest, especially when layered. White pens or correction pens can be used for the decoration too.
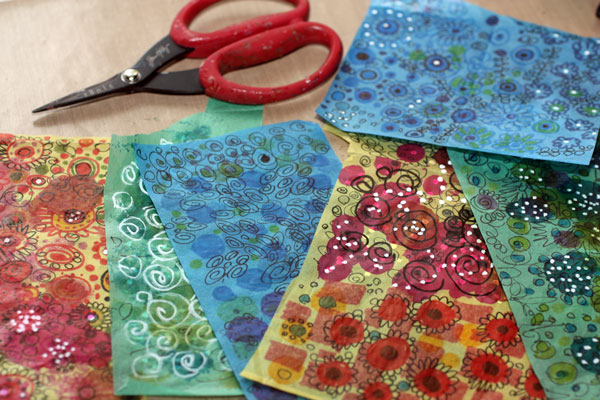
Finally, you’ll have something quite different from the original solid colored papers! The actual making of a collage can now begin.
Tissue Paper Collage
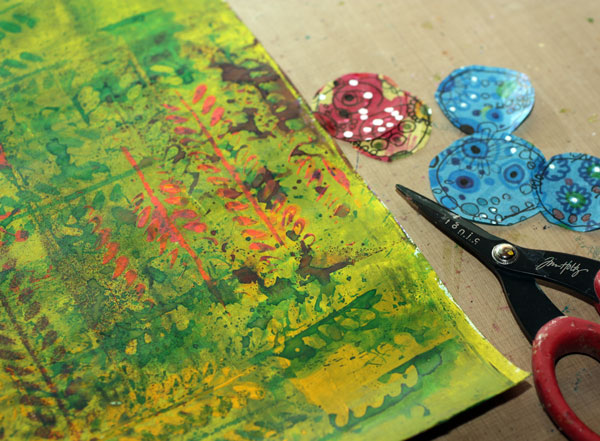
You can use plain white paper as a background, but I could not do that. I am too much of a color person. I grabbed some of my handmade background papers. This background is made using acrylics, stencils and color mists but you can use any techniques for the background. I have some instructions for the backgrounds: see a patterned paper with layers or the frugal version using fewer supplies.
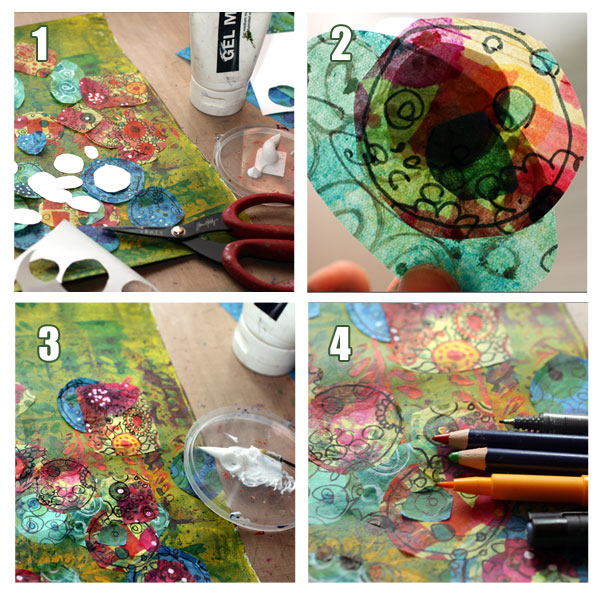
Cut the papers into small pieces. Grab some white paper (I used a thin marker paper) and cut small pieces of that too (image 1). Then glue the pieces together to create small clusters (image 2). Use the white paper between layers to create color variation and lighter shades. I always use matte gel medium to glue the elements together (image 3). If you do not have gel medium, you can use PVC glue with some water. But if you make collages or scrapbook the matte gel medium is a good investment. After gluing the elements create new details with markers and color pencils (image 4).
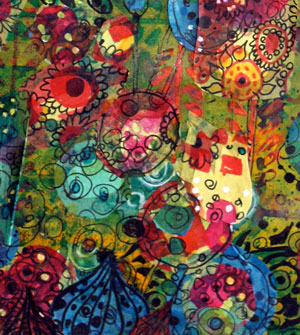 Here’s a detail of the finished tissue paper collage. It looks like there are lots of layers even if the structure is fairly simple. When creating this also some other ideas came to my mind. Maybe I will return to my tissue paper stash some other time to try those. What I represented here does not require a wide range of materials.
Many times creativity is the best material you have. I strongly believe that even if there are so beautiful papers in the craft stores, the best papers are those you create yourself!
Move forward from crafts to art: Get a Free Mini-Course “Loosen up!”