
Video Blog: Finding Inspiration from Plants
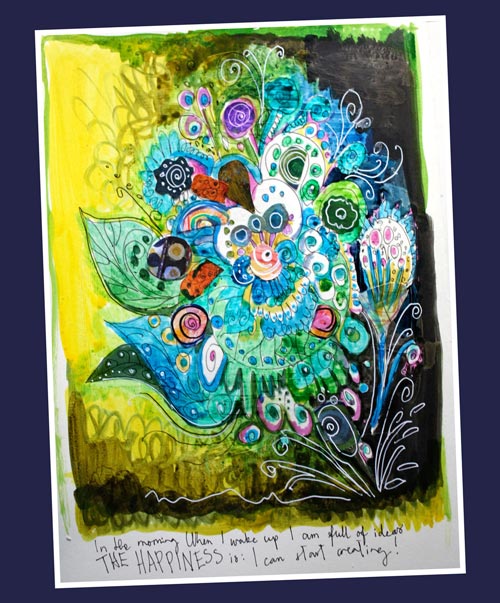
In this video blog post I am creating this art journal page and talk about finding inspiration from plants.
If you got interested in creating imaginative plant-inspired pages, see also the previous blog post mentioned on the video: Create Abstract Botanical Art!
5 Ways Music Can Improve Your Art
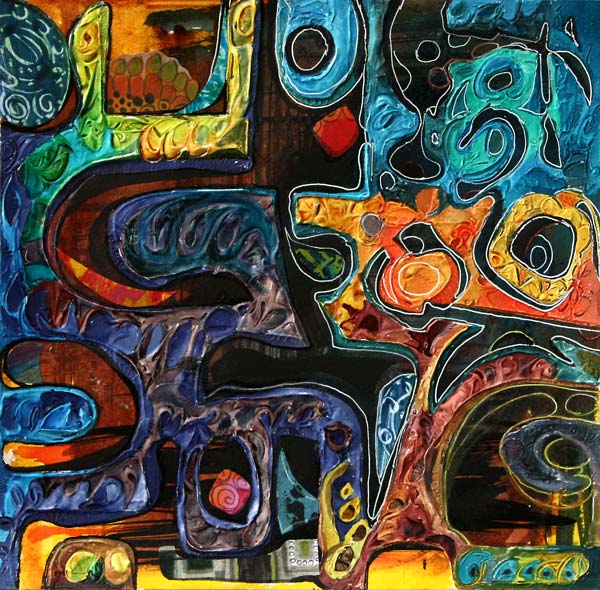
This mixed media collage is called “Opera”. For me, visual images have always been more important than sounds, but I still think that there’s a lot in common and a lot to learn from music.
Tip 1: Let Music Challenge You!
How would jazz look like as a collage? Paint the voice of your favorite artist! Create a rhythm to your artwork!
A week ago was my first time in opera. I had bought the tickets as a birthday present for my husband who is a very cultured person. I was a bit worried about how I would endure the experience as I had disliked opera for all my life. At least the play was one of the easiest pieces, The Marriage of Figaro. While listening to the beautiful sopranos, I saw strong colors and lines in my mind. I began to think how powerful and intellectual music can be. I felt I was challenged! Could I ever express visually what I was experiencing?
However, when I began to create the collage, I did not think of opera. I knew that it would come out someday or another. Like many times, I just had a compelling idea of the technique I was going to use. I was going to create strong shapes with a molding paste.

But before opening the paste jar, I grabbed a sheet of heavy-weight watercolor paper and the box of india inks. Painting the background was fast with a thick brush.
Tip 2: Think Your Artwork as a Space for Music!
I read an interesting interview from the newspaper Helsingin Sanomat. They had interviewed a famous Finnish painter Marika Mäkelä. She quoted another Finnish artist, Leena Luostarinen. She had said that you should imagine a lighting inside the painting. Even the colors of the painting should be considered through the lighting. I think it is ingeniously said. It made me think about the space I would create inside my artwork and how the lights, shadows and color contrasts should flow there. My addition to this thinking is: if the music was played in that space, think about how it would sound. Pick the shapes and lines to express that!
With these deep thoughts, I cut both heavy and light cardboard into pieces. They were attached to the background with a masking tape.

See how irregular the handcut shapes are! I love the uniqueness that only handcuts can give! I can’t understand the popularity of machine-cut stencils.

After placing the masks on the background, I added the molding paste, a lot of it! Some swirls were doodled on the paste, so that the surface would look lively.

I removed the masks carefully before the paste was dry. Drying time was really long, almost a day, even if I used a heat gun to fasten the process. I usually like to take breaks from creating, so this extra waiting time did not frustrate me at all. While I was waiting, I was thinking about how I was going to paint the artwork. How would the light flow around these dramatic shapes?
Tip 3: Pick the Colors from the Music
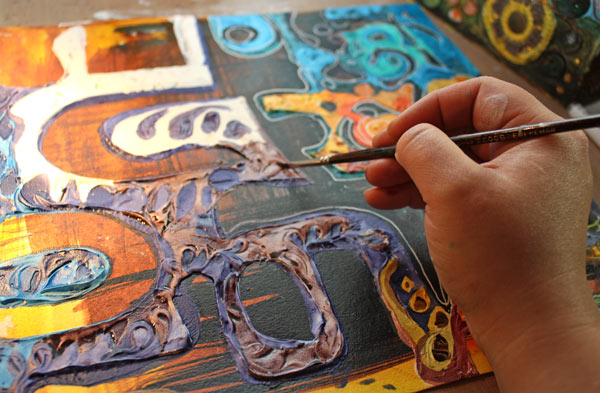
I like to think music as colors. The lower the notes, the darker the colors are. A melancholic song is also darker than the cheerful one. Red and orange are for deep, rich voices. You do not need to overanalyze it: just get into the feeling of the music and pick the colors that come to your mind! The Marriage of Figaro has both bright and dark sounds. I also wanted to express the dramatic nature of the music with colors.
Tip 4: Move to the Rhythm of the Music While Creating
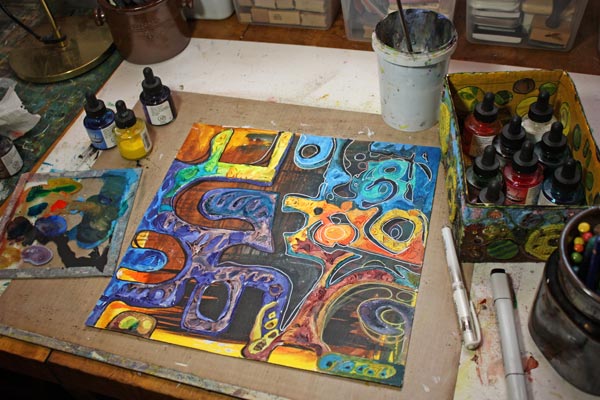
When the painting gets near the end, I often stand up. I need to see my work properly to find the essence of it. This is the stage where I usually put the music on if I have not done it before. I wave my hands and take steps to the rhytm of the music. I try to get as close as possible to the feeling that I want to express. I also try to be as focused as possible.
White gel pen and black markers were in use as I dived into the melodies of the opera.
Tip 5: Focus Your Energy with the Help of Music
It is important not to change the music too much when you want to focus. If you listen to the variety of songs just when you make the final touches, it might not do good for your work. I often play the same song repeatedly when I am finishing the work.

On the other hand, when I am in the earlier stages of the work, I am not that careful. I listen to this and that as long as it gives me the energy to continue. I like to listen to the music that gives me confidence and which doesn’t feel too themed. Here are my recent favorites for boosting the creative process: A Sky Full of Stars (Coldplay), Viva La Vida (Coldplay), This Years Love (David Grey), Change (Tracy Chapman), September (Earth, Wind & Fire), Flower (Kylie Minogue), Thorn in My Side (Eurythmics), I Say a Little Prayer (Aretha Franklin).
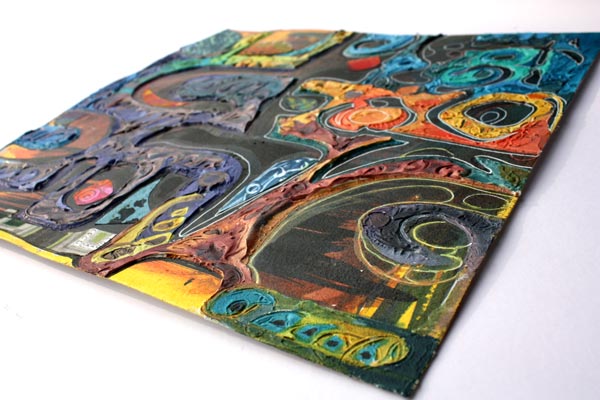
I love how dimensional my artwork became. I am also happy how finished it looks. Hand decorated papers were helpful while finishing the work. With them, it is easy to add details that are interesting and different. Just do not use the same paper too much!
Sometimes I aim for flying lines and relaxed touch, but this time – it was all about opera! My computer was playing The Marriage of Figaro in high volume and I was pushing my boundaries to express the quality of the music. Then finally, after placing the two red pieces, I felt that I have solved it, the riddle of opera music!

What music do you listen to while creating? Try changing the music if you want to fine-tune your art or expand to new areas!
Subscribe to my weekly emails – Get a free mini-course!
Self-Expression with Gelli Plate
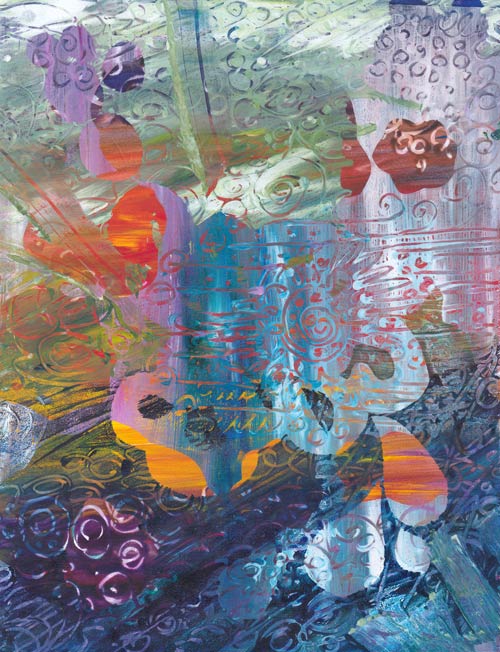
Printing with a Gelli plate was one of the things that popped up from the reader’s survey. As I happen to love mono printing techniques, it was quickly selected for the theme of the week!
Glass Plate
Almost 30 years ago, long before Gelli plates, I used glass plates for mono printing. I usually made a sketch first and then added each color as a separate layer.
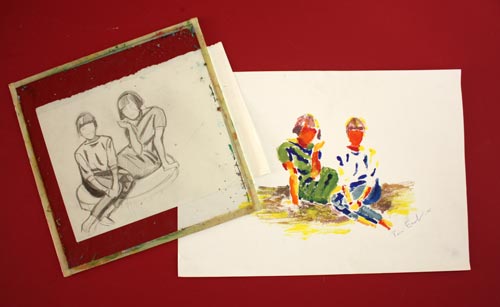
This monoprint was made in 1988, and it represents my sisters.
Gelli Plate
Gelli plate is a great invention, and it’s available in various sizes and shapes. My plate is 8 x 10 inches in size. Acquiring one is not a necessity. Glass plates work fine even today. You can also use any plastic transparent like overhead projector transparencies. The advantage of Gelli plate is that it has a flexible and sticky surface. That makes the using of masks easier. So if you fall in love with mono-printing, I would recommend purchasing the Gelli plate.
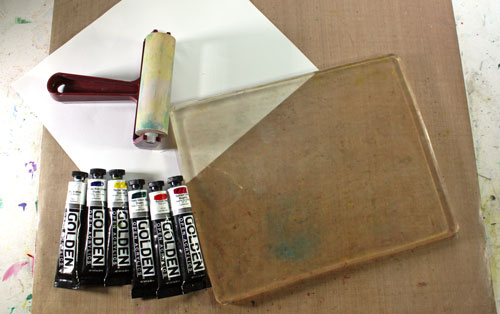
In addition to the plate, I have Golden Open acrylic paints. These paints have extended drying time, so they are especially suitable for mono-printing. I only have six colors, but by mixing them, I can get a huge variety of colors.
To create monoprints that include self-expression, I have 6 tips for you.
Tip 1: Use brushes instead of a brayer
The most common tool with the Gelli plate is a brayer. I have a Speedball brayer, but I often use brushes instead. They make the prints much more artistic, unique and expressive. With brushes, you can easily create non-repeating details and large color areas – the elements that contain more communication than monotone repeats.
Tip 2: Use a variety of tools
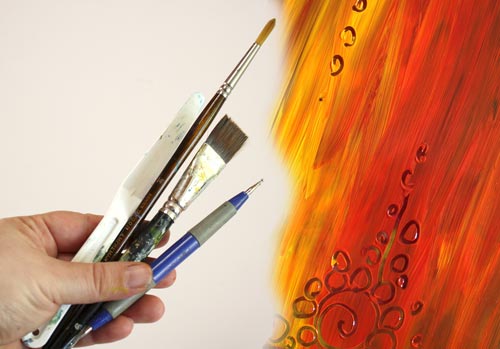
Your artwork is much more interesting if you use a variety of tools. For this post, I have used two different brushes, a double-ended embossing needle for doodling and a long palette knife for wider strokes. Your imagination is the only limitation when tools are considered. Just remember to avoid sharp objects!
Tip 3: Use hand-cut shapes for masks
When combining a variety of colors and surface patterns with hand cut shapes, the result is much more organic than using one color and cutter-cut shapes. The temptation to create a repeated design is bigger than when using freely cut unique shapes.
Here are some patterned papers that I printed from machine-cut shapes.
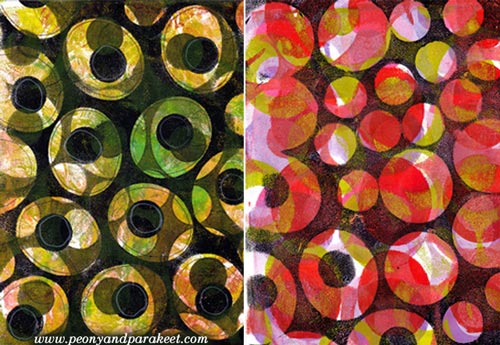
But with freely cut shapes, I avoided repeating the same motif.
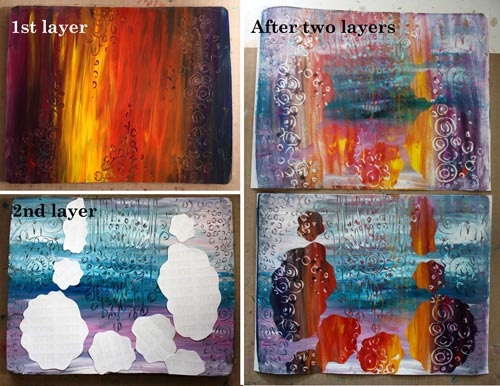
Tip 4: Let each layer bring something new to the artwork
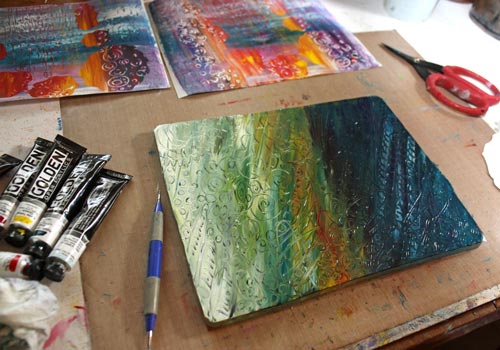
When creating a new layer, I do not mix and match colors too much. Sometimes colors look even more amazing on a plate than on a print, so I had to take a close-up from the plate!
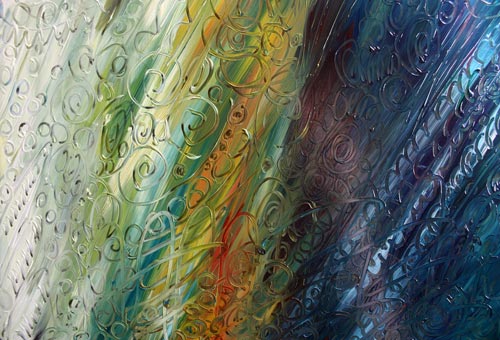
I also think that cutting new shapes for each layer can really pay off. Add new and different with each layer, still letting the lower layers show too!
Tip 5: Create at least two monoprints at the same go
If you use slowly drying acrylics, you can get at least two monoprints from the same layer of paint. You can also experiment with that by creating two different artworks by changing the printing direction. I have turned the last layer upside down in the second monoprint. Thus the two prints differ slightly.
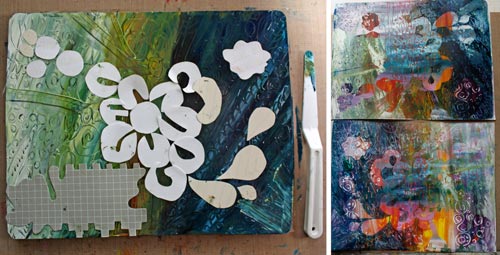
Tip 6: Doodle and color over
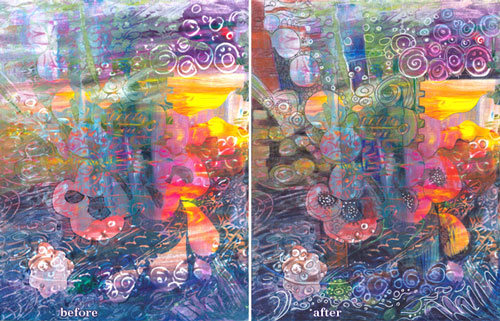
I doodled over the other of the two monoprints created for this post. Besides a white gel pen and a black thin tip marker, I also used colored pencils to fine-tune the colored areas slightly.
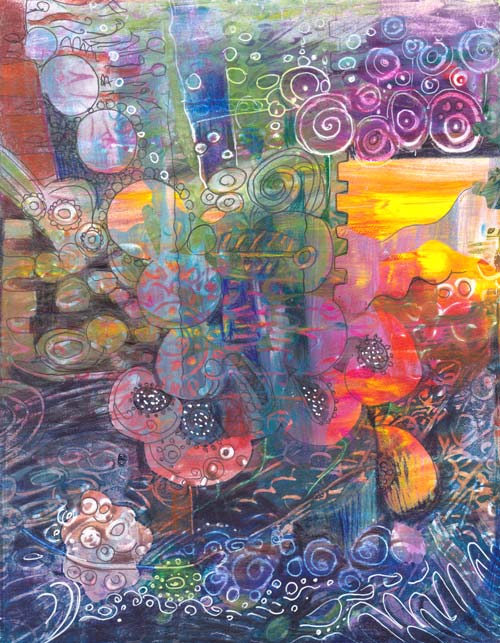
Here’s the bigger picture of the decorated print:
Finished Prints
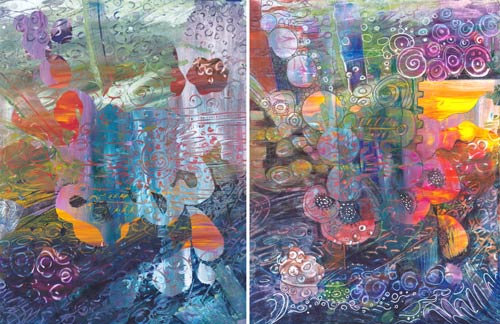
Here are the two finished pieces. Which one do you like more, the one that is not decorated or the one that is?
My husband asked after seeing these: What are you thinking while making these? – I try to think of nothing while creating, I said. I believe that you have to think before you create, not while you create. However, after a vivid discussion, I named these: the one on the left is Humanity, and the one on the right is Technology.
Gelli Printing Project in a Video – Apples and Tomatoes!
In this video, I talk about how and why to add diversity to your art. At the same time, I am creating a monoprint with a Gelli plate showing easy techniques to create an image.
All Gelli Posts
Let me be your mentor in art: Subscribe to my weekly emails!
Video Blog Post: Free Doodling
Here it is – my first video blog post! Here you can see how I create a small artwork by doodling freely with colored pencils and markers. It took about 30 minutes to create the drawing. You will see every single phase, but a part of it is fast forwarded.
This was terribly exciting, so please excuse my slow talking and grammar mistakes!