Hand Bags Only You Can Make

The fashion themed Smash book is just perfect to show my love for bags. When I made these hand decorated papers became heavy fabrics and leather in my mind. It was so fun to draw stitched seams, add layers and choose decorations.
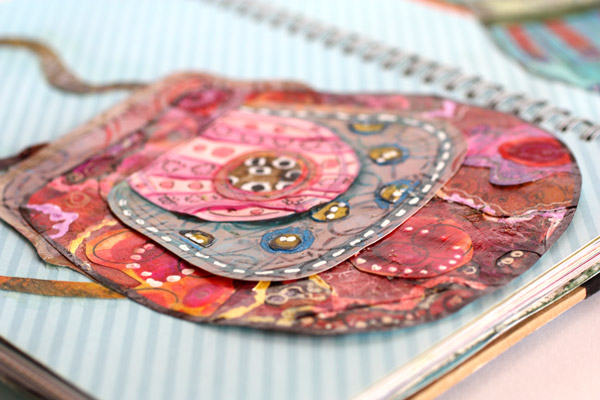
I have a lot of ugly papers in my hand decorated paper collection. I do not take my papers too seriously. Their common nominator is that they are made by myself and thus they fit together whether pretty or ugly.
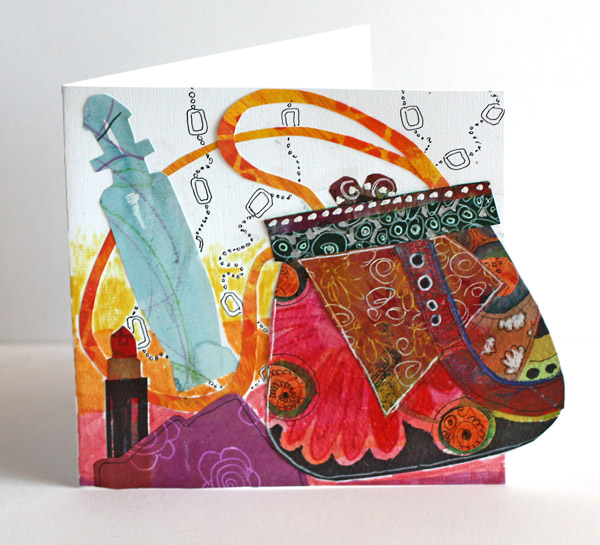
If you prefer to make cards instead of art journal pages, you don’t have to miss the fun. Create bag themed cards like I did! This card is a birthday card for my sister. She loves everything red. I also added some stuff that could be found inside the bag: a lipstick, perfume bottle, small scarf and a necklace. We can always give dreams, even for people who have everything and do not want to own more.
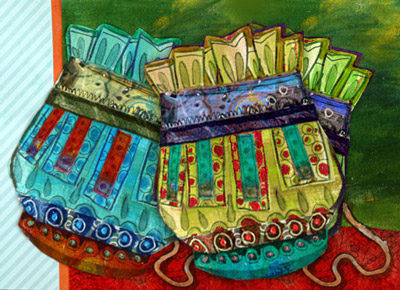 I want my art journals to be like catalogs: full of items to pick and choose. I am like a dream shopper with a hand made credit card (how would that look like, or a row of them!). I could ask from the maker of the turquoise pouch: “Do you make these in green too?” And the maker would respond: “Of course, which tone would you like?” With a little help of image processing in Photoshop, the options are right there.
Think about it: there are millions of hand bags which you, and only you, can make!
Let me be your art teacher: Subscribe to my weekly emails!
Kiwi Patterned Paper

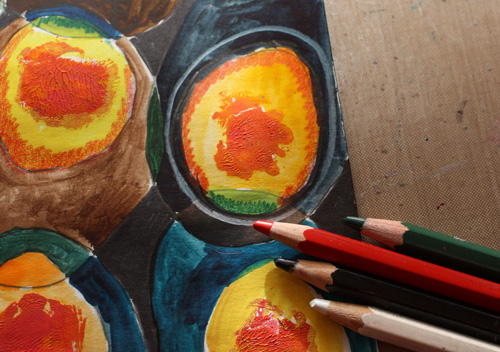
I am continuing the theme of the week to celebrate yellow. Here are step-by-step instructions for a striking patterned paper where yellow and orange are combined with dark colors. You can make variations on the pattern by choosing different colors, adding you own details and picking the materials that you prefer.
1) Fill the Paper with Big and Small Ovals
Fill the paper with intersecting ovals using freely cut templates. Cut plastic templates for a big and a small oval. To achieve an organic form, handcut the shapes freely. I used transparent plastic from a plastic sleeve meant for name tags. Also transpacency sheets for overhead projectors or any easy to cut plastic will do.
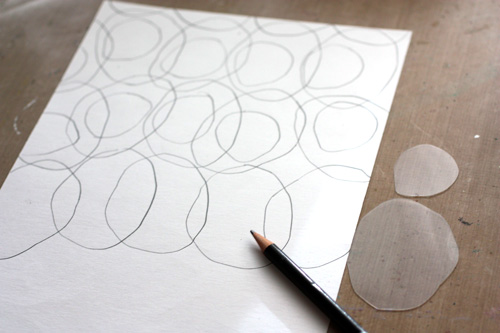
Starting with the bigger template, draw ovals on the paper so that they intersect slightly. Change the orientation of the template now and them. That way the pattern will look more lively. After filling the paper with bigger ovals, draw smaller ovals inside the bigger ones. Each smaller oval should cross one or two lines of the bigger ovals. Change the orientation and placement of the smaller ovals as you did with the bigger ones.
2) Paint the Centers of Small Ovals
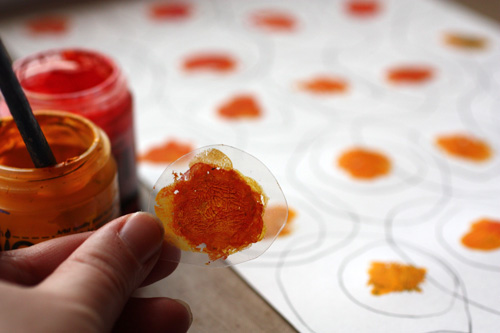
Add acrylic paint to the centers of the smaller ovals. Paint the centre of the smaller template and press one center at a time. Mix yellows and reds to get orange hues on the template. Each center can be a bit different from another.
3) Add Watercolor to the Smaller Ovals
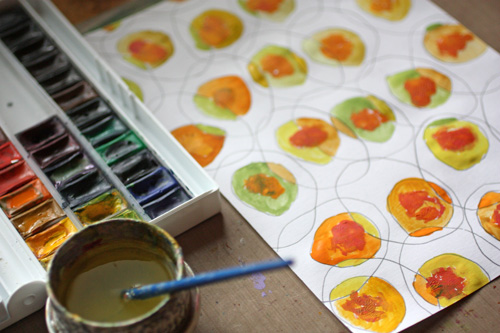
After the acrylic paint has dried, paint the smaller ovals with watercolors. Use yellows mixed with blues and reds. Color each part of the oval with different color. This way you will get an appealing look of ovals that have many hues.
4) Add Watercolor to the Bigger Ovals
After the smaller ovals have dried, paint the bigger ovals with watercolors. Use mixes of browns, blues and blacks. Color each part of the oval with different color.
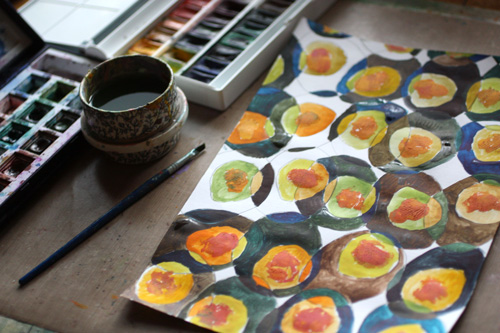
5) Fill The Background
Using black marker, color pencil or watercolor, fill the small white background areas with black.
6) Add Details with Colored Pencils
Draw white lines around smaller ovals. Add black outline for smaller ovals. Color the edges of smaller ovals with red and green depending on the hue of the oval.
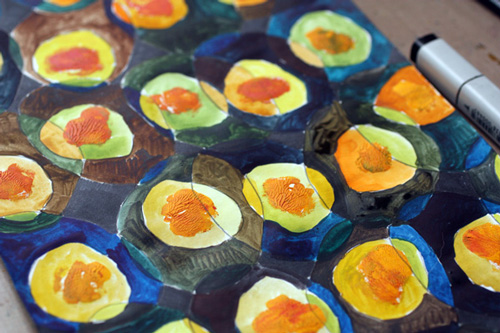
7) Final Touch: Thin Lines and Dots
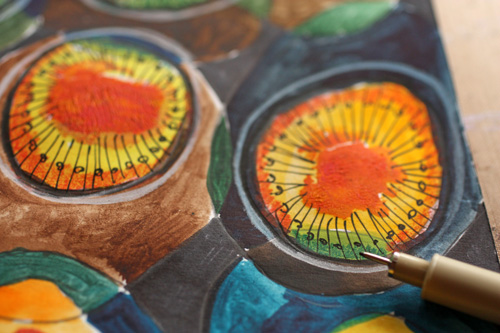
Finally pick a thin black marker or drawing pen. Add radial lines to the smaller ovals and decorate the lines with dots.
Let me be your art teacher: Subscribe to my weekly emails!
Pattern Design Simplified
 rsvMany artists love painting faces, but I feel drawn to patterns. It must be the little engineer inside me who, after seeing almost anything, needs to know: could this be simplified and repeated?
Don’t get me wrong: I am not a big fan of over simplifying everything. Living in a country of snow and white box like houses with white sofas, I have had more than enough of simple forms. But when simplifying involves some clever thinking, hundreds of ideas have been created instead of one.
Namely, you can tweak and change simple structures almost endlessly.
It is like an engineer has made the skeleton which an artist can decorate.
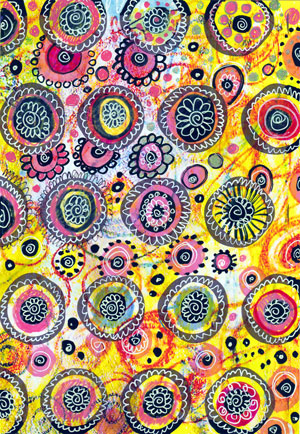
Designing a Hand-Drawn Pattern
The paper above began when the engineer in me found a scanned image of a handpainted paper. The circle pattern was printed on it. Then it was given to the artistic side of me which went a little crazy.
 The pattern that the engineer had created was dull but the artist made it breathe. The result was analyzed carefully and a new surface pattern was born! This design is simple but fun, perfect for the use in collages or even for making cards or gift papers.
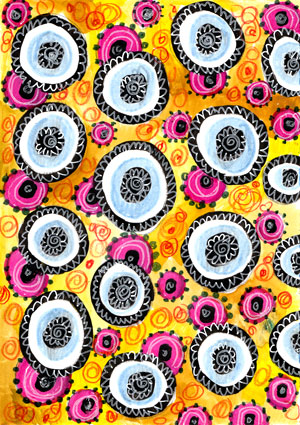
Creating Variations
I also made another version of the same design. Creating variations and studying various color combos is so fun! I always decide to make just a simple paper but end up adding smaller and smaller details!
When decorating these papers I never know beforehand whether I will cut them to pieces for collages or frame them as they are. But I always scan them once they are finished so that I can use them again if I want to.

Instructions for the Hand-Drawn Pattern
I have written detailed step by step instructions for the pattern which I call Spring Flowers.
>> Download PDF
Let me be your art teacher: Subscribe to my weekly emails!
The Greatest Joy of All
 When I was a child my treasure was a chalkboard. I also had 7 little plastic dwarf figures which were my pupils. When I got home after a shcool day I began to teach my silent dwarfs. I loved school and wanted to become a teacher.
But then, some years later, I heard about computers and that was it. I fell in love. I went to study computer science and my career in IT began. I do have taught IT professionals but nothing beats what I have been able to do lately: teach art!
Teaching is giving and there’s nothing greater than that. I have experienced big moments of happiness when creating art and it is wonferful if I can give even a small amount of that for others.
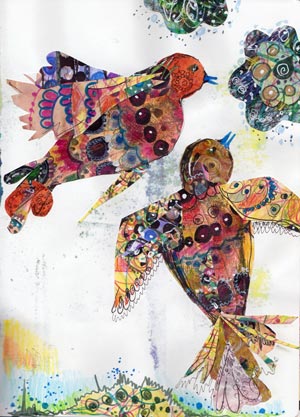
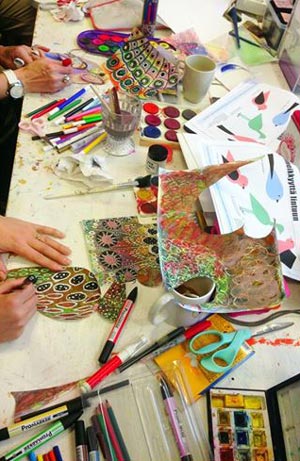
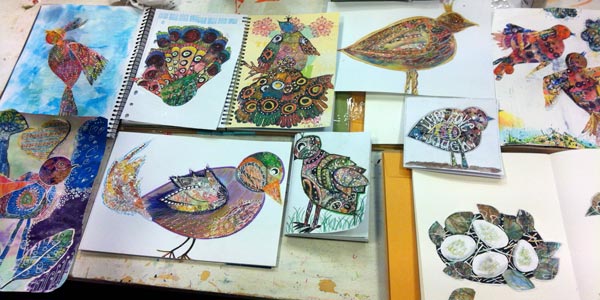
I created these two flying birds when leading a workshop called “Birds of Happiness”. We created not only birds but also bird themed decorative papers, feathers and bird’s nests.
(The photo by Askartelu Amalia)
All the elements were created by hand, using pens and colour pencils, watercolors and acrylic paints. I had made instructions for various elements but they were guidelines and everybody used their creativity for the end result.
We put the birds together in the end of the day and took pictures. I am so inspired by seeing how people have their own styles and how they express themselves while learning to let go and trust their inner voice. Plenty was done in only four hours.
I hope that in the future I could give you more with this blog, with my newsletter and with my services. The most importantly: bring you back in time when you were a child and wholeheartedly enjoyed creating. Giving that back to you would truly be the greatest joy of all.
Let me be your art teacher: Subscribe to my weekly emails!