Watercolor Interiors – Four Tips
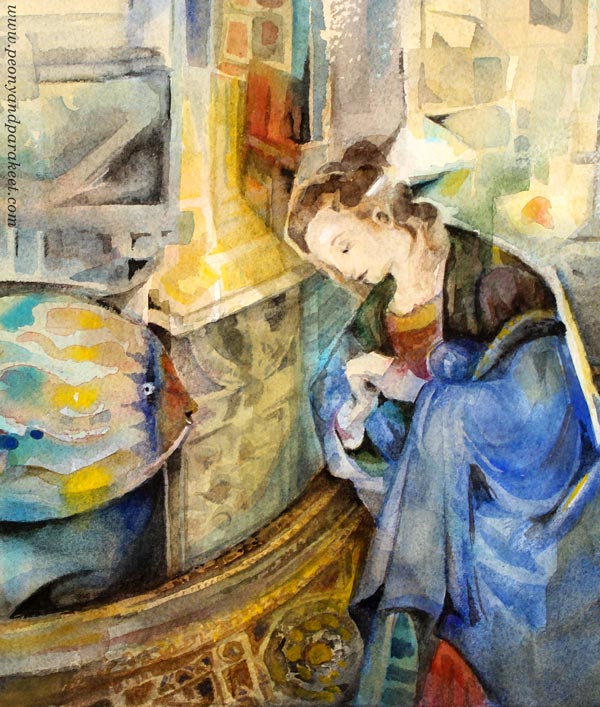
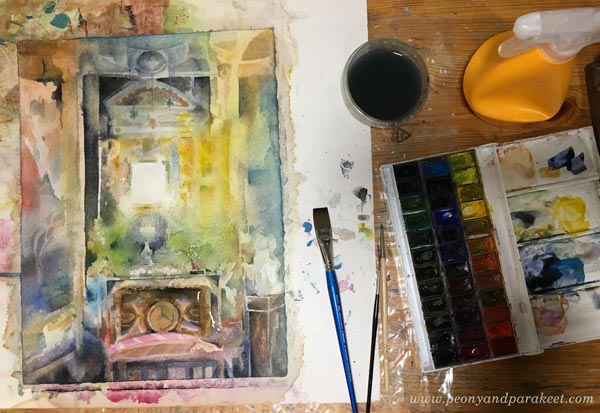
Here’s a watercolor painting that I made while being a student of Finnish watercolor artist Mika Törönen. I took the class to understand more about watercolors. Watercolor is a weird medium, and its weirdness fascinates me! Watercolors seem simple and easy at first. But the more you paint, and the more atmospheric you want your paintings, especially watercolor interiors, to be, the more challenging they become.
I have recently realized that more than outdoor sceneries, I love painting interiors. Here are some of my tips for painting watercolor interiors!
1) Start with Geometry and Positive Attitude
Last spring, I committed to learning more watercolor techniques. I built a class called Watercolor Journey.
In the past, when I was teaching IT professionals my colleagues often said: “You learn best when you are teaching.” First, it felt like cheating because I thought that teachers have to know everything already before starting a class. But when you have to break things into small manageable and teachable parts, deeper insights come up. This way I have found simple methods and easy guidelines for making rich and creative paintings.
This painting is made for the exercise of Watercolor Journey. It’s about painting geometric shapes and thus simplifying the interior. You can make the photo more blurry by squeezing your eyes, and focus on the flat shapes that you see from it, for example.
But methods, tips, and guidelines are not the only useful things that I have learned by building classes. By making sure that I teach with a smiling voice and appearance, I have learned to think positively about what I do and how to encourage myself. One of the most depressing things in classes is to hear negative self-talk, whether it comes from the teacher or the student. That’s why I think it’s important always to express positive emotions, the love for art, and all the enthusiasm that can be found from creating.
2) Choose a Reference You Love
Mika Törönen creates his beautiful paintings from the references. We also had to pick some for the class. I wanted to continue the inspiration that I got by visiting Italy a couple of years ago. I chose a snapshot taken from one of my favorite places – Palazzo Pitti, Florence. Many students used the same photos as references as the teacher did, but to me, it’s difficult to use references that I don’t have any connection.
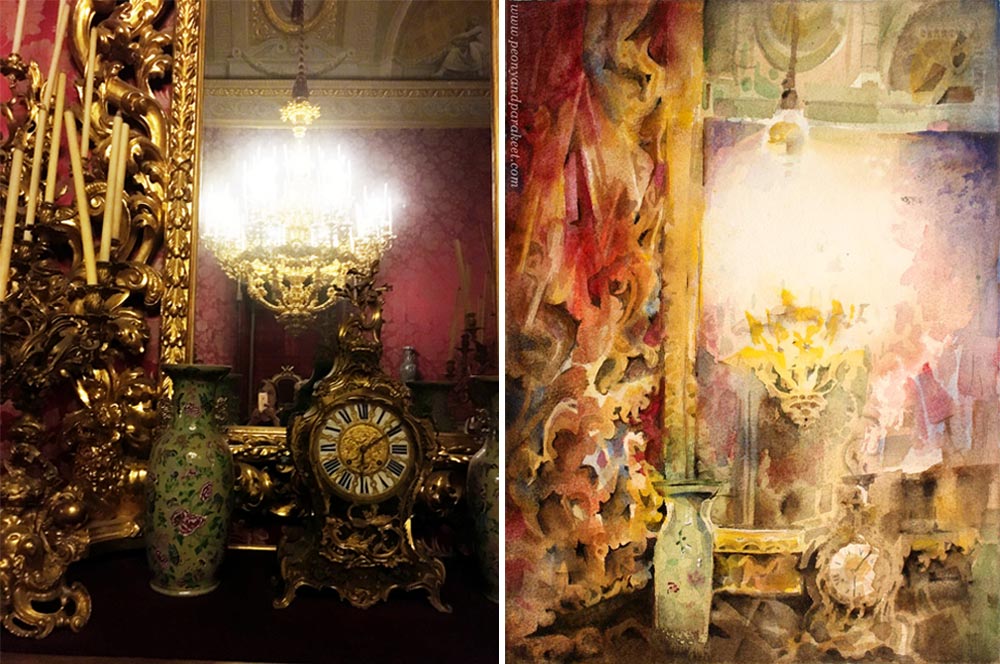
I didn’t aim for an exact copy but still, the photo was quite complicated and it took all the three sessions to complete to painting. I learned some tricks from Mika Törönen, like how to prevent the paper from curling while working (watch the video where I use the method for painting a watercolor bookmark), and the courage to use small shapes and lines of very thick paint when finishing.
The class was based on us students watching him paint. He wasn’t very good at translating his methods to words but as far as I saw it, a lot was to do with finding abstract elements from the photos and building a composition from that. He didn’t guide much, and the painting time was quite limited. The benefit for me was that I got new energy for working with watercolors. I painted a lot between the three weekly sessions.
3) Embrace Surreal to Express Emotions
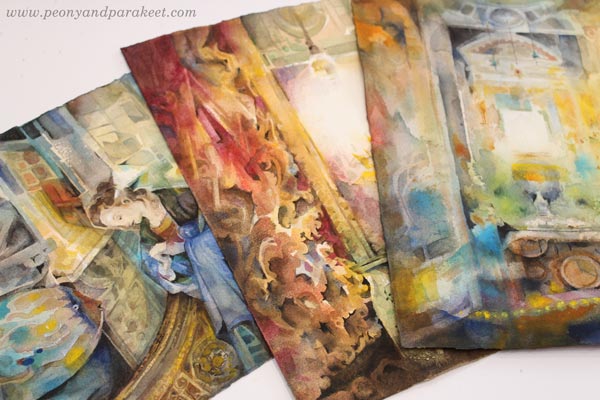
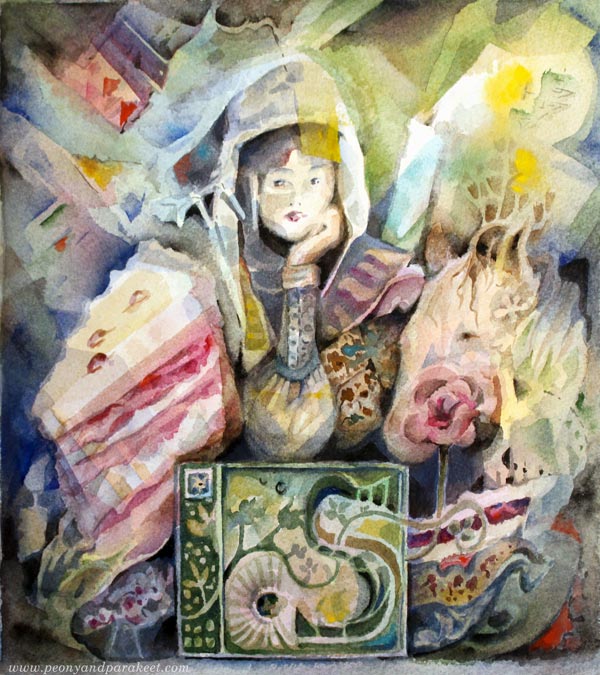
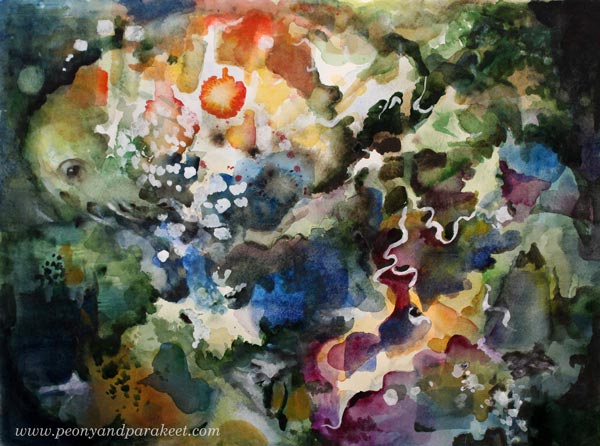
One of the paintings that I have made recently, is this surreal interior. I used several references for this one and also worked quite loosely from them. Choosing one reference is not always the best starting point because it can control the work too much.
Here, my most important influencer was the feeling that I got after the first class session. The session was very quiet, and I felt the loneliness that felt both good and bad. Loneliness gives the chance to spend quality time with imagination. But of course, it is also a sad feeling.
When I have clarity about a specific emotion, I have both the positive and the negative aspect in mind. That tension inspires me to express it. In this painting, I used a fish to symbolize creativity that I connect with the time spent alone.
Often, the loneliness is in your head. You can feel alone even if you are surrounded by people. So I left a blank triangular ray of light that hits her head.
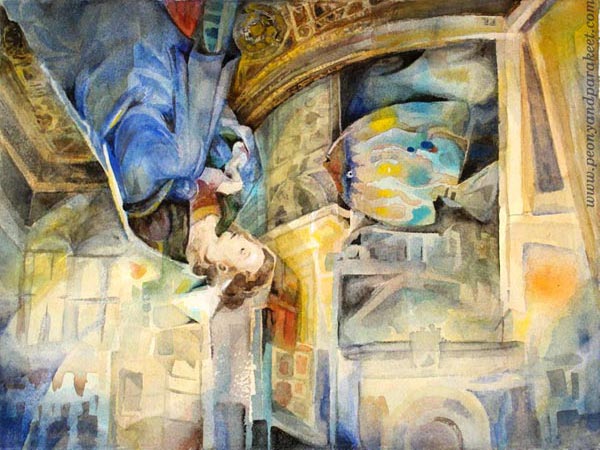
Working with creativity and without other people’s perspectives, can make things turn upside down. I used my photo of Palazzo Vecchio’s Hall of Five Hundred as a loose reference. If I turn the piece, you might recognize some of it.
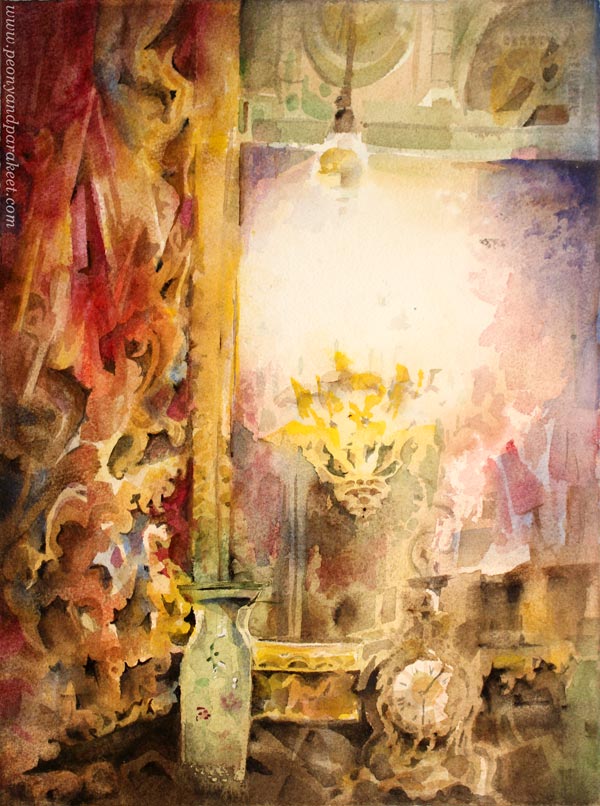
4) Design the Lighting and Focus on the Light
Here’s my latest watercolor painting called “Eternity”. I think that it’s most loose of all the paintings of this blog post because here, I focused on the light.
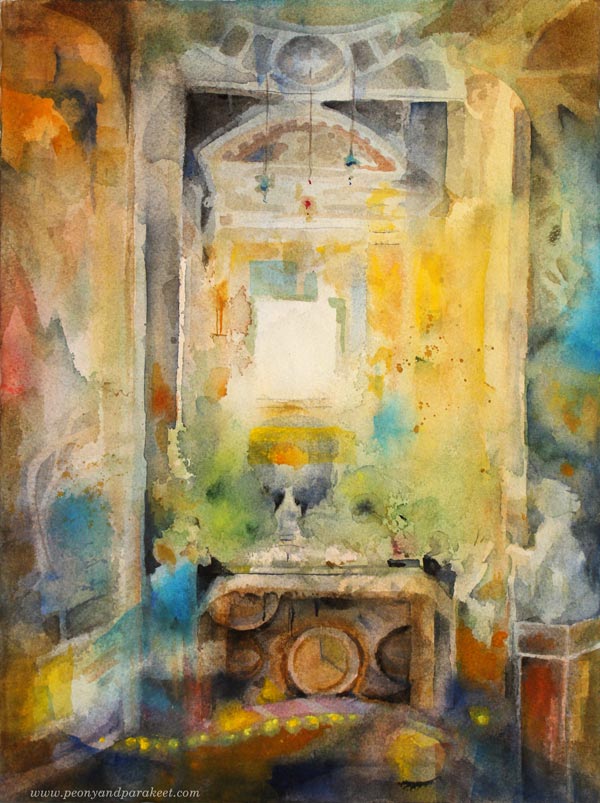
My reference photo was taken in an old church Chiesa del Gesu in Rome. It was only a starting point. After the first pale compositional layers, I abandoned it.
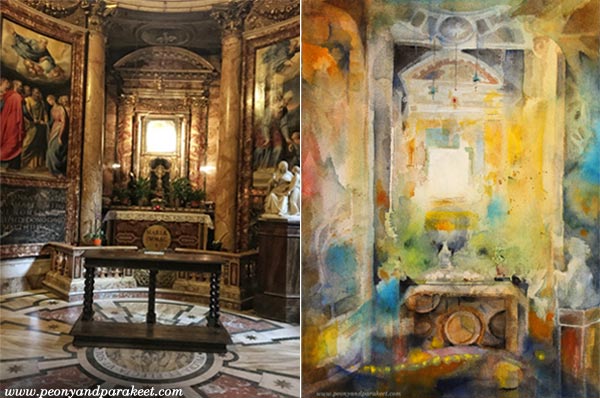
The elements and the lighting didn’t quite match my vision of
I used a lot of water when making this one! Sprayed, too!
Watercolor Interiors – and Flowers!
I used Arches Rough 300 gsm watercolor paper for these three watercolor interiors. I hope that this blog post inspired you to pick your watercolor set and paint some watercolor interiors!
This spring I will rerun my class Floral Fantasies in Three Styles, where we paint watercolor florals, a very suitable theme to go with the interiors! There will also be an extra watercolor exercise, which will be available separately if you already have the class. Stay tuned!
Zebra Madonna – Drawing Fantasy Art
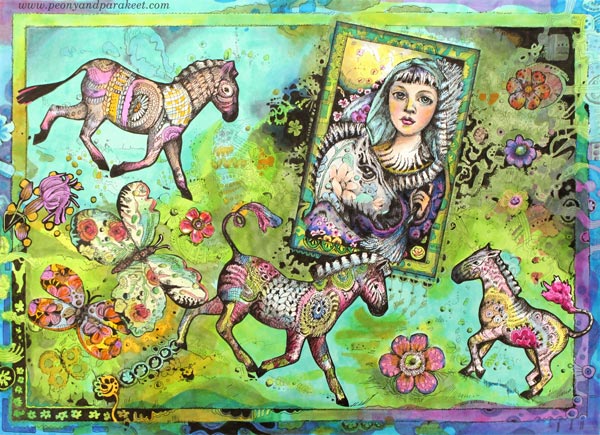
This fantasy art piece is a hand-made collage called “Zebra Madonna”. It’s made mostly with Copic markers, some elements have been colored with colored pencils. It’s hand-drawn from start to finish, mostly for my class Animal Inkdom where I show easy ways to draw and color wonderful wildlife animals like flying butterflies and running zebras.
Time Flies When You Are Having Fun
It often happens to me that I am going to draw just something small, but then end up making a bigger project. Jane Austen has a novel called “Sense and Sensibility”, but my inner conversation is not very romantic.
Sensibility says: “I have an idea.” Sense says: “Don’t!” Sensibility says: “I want to do it. Now.” Sense says: “It’s 2 AM, no way! Go to sleep and wait for tomorrow.”
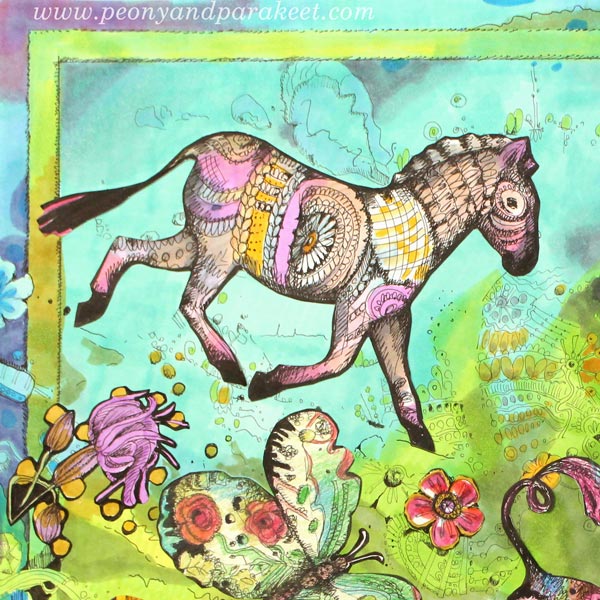
What was I drawing in the middle of the night? A small drawing of a girl with a zebra. The girl is a bit like zebra herself, and the zebra looks almost like a unicorn without a horn.
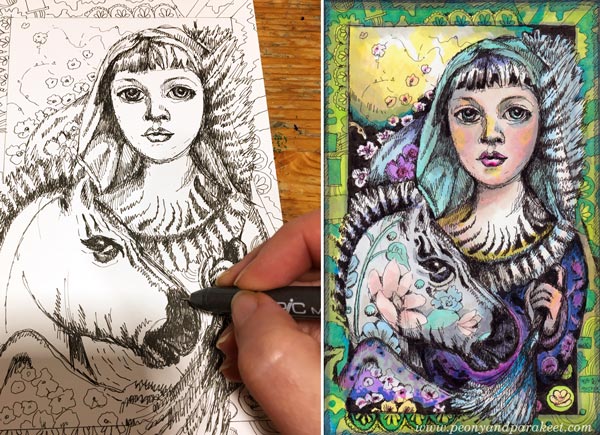
I started with a black and white drawing, but because coloring is fun too, I couldn’t resist. Time flew, and I was having fun.
For Animal Inkdom, I drew a lot of collage pieces as samples, and then many in the videos. So I have two boxes, big and small, that have all kinds of fantasy creatures. It felt like the zebra of the small drawing started calling his fellows, and these three came out!
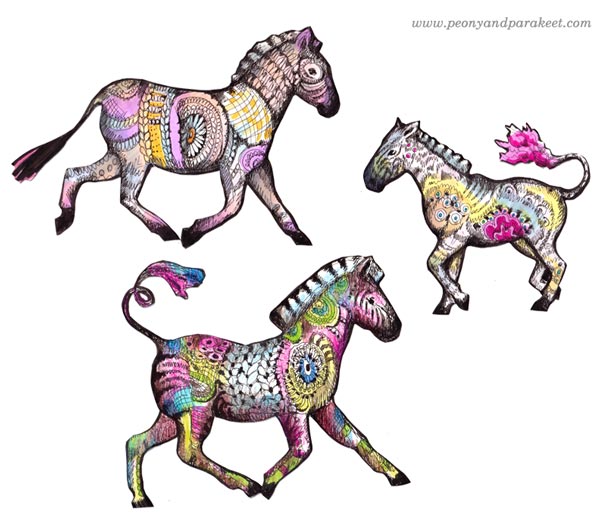
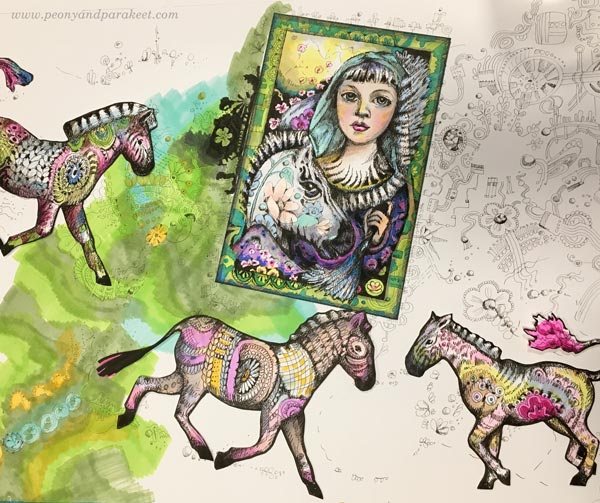
Even if my zebra madonna was framed and all, I wanted to make a new image where the other zebras could join her. I cut a big piece of Bristol paper, approximately 14 x 20 inches. This is when I went to sleep! It was apparent that I would need quite a lot of energy to fill it with markers and doodles.
Self-Doubts
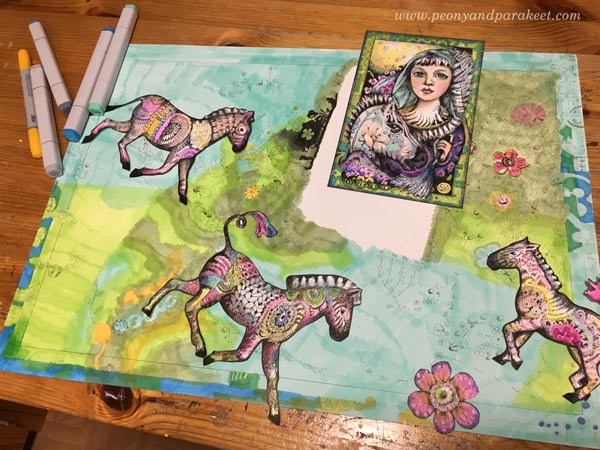
Next morning, I woke up determined to continue the project. I wanted to “paint” with markers – use several layers so that they would blend. I also wanted to draw with a very thin pen, Copic multiliner 0.03, so that most of the background would have subtle patterns. At this point, I wasn’t so sure if these were good ideas. Drawing took a long time, and markers weren’t so quick either.
I was also hesitating to use the zebras. Of all the animals that I had drawn for Animal Inkdom, they were my favorites. I reminded myself that because I had developed an easy way to make them, I could draw more at any time!
Before starting to ill the background, I had marked the places for the elements with a dashed line. Still, there was quite a lot to color. Here you can see how uneven the coloring is when there’s just one thin layer. I needed more layers!
It’s typical that at some point my Sense is starting to say: “This wasn’t a very good idea.” I am at the rock bottom trying to figure out how the project could be finished quickly because it doesn’t seem so fun anymore.
New Inspiration for Fantasy Art
My way to cope with what I call “the ugly phase” is to focus on a small area and start listening to an audiobook or a podcast. I also get inspired by colors, mostly by … black! It makes other colors shine, and my collection of black pens is growing steadily. I find it difficult to express any fantasy without black!
Fantasy art can be just fantasy and play, but I usually have a deeper thought in my mind. Despite the happy colors and fantasy feel, the message that I have in mind often has dark tones
Fantasy Art – Zebra Madonna in Detail
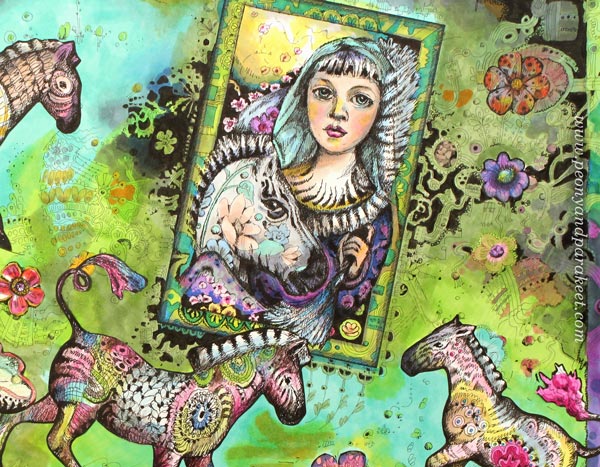
Here’s the finished piece again.

And because it has a lot of details, here are some pictures of them.
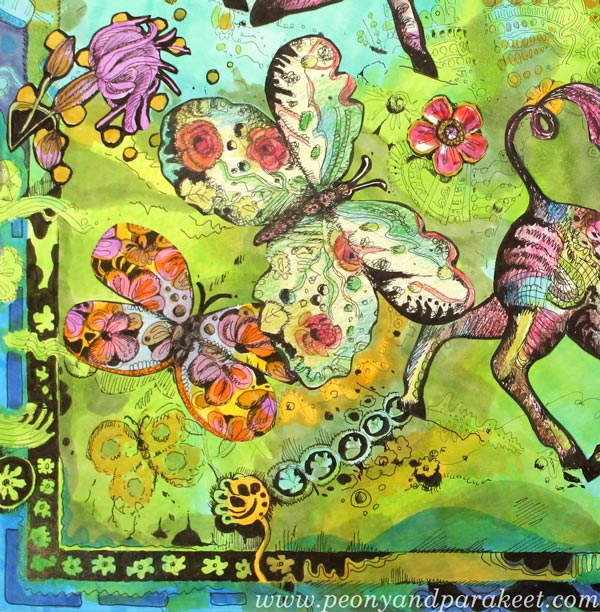
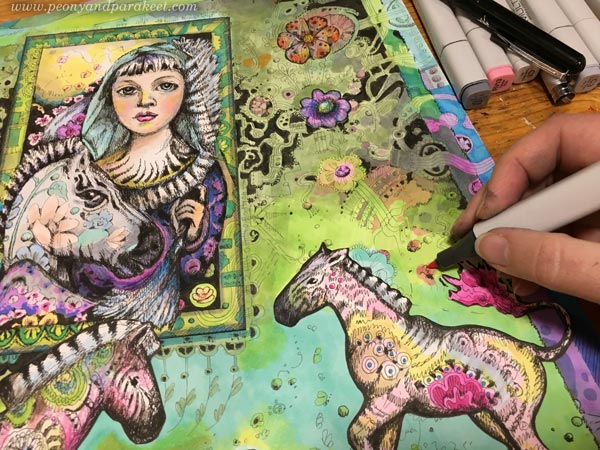
The butterflies are also from my class Animal Inkdom. I think they fit perfectly to the color scheme. I also added the third butterfly on the background. It’s just a careless drawing but it adds depth because it looks to be further away than the two colorful collage elements.
One of the zebra is flying with the butterflies, and if you look carefully, you can see his wings that I doodled vaguely.
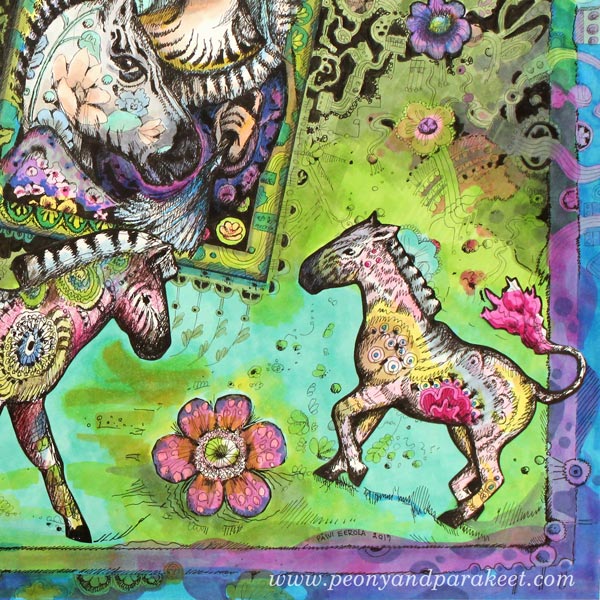
I like how the black continues the framed image and gives more depth and contrast. The right upper corner has a grey layer so that it doesn’t take the attention away from the central elements.
Drawing and Playing in Animal Inkdom
Come to draw and decorate animals with us in Animal Inkdom! You will get the published lessons immediately after the registration, and you can start drawing right away. Sign up for Animal Inkdom here!
Watercolor Inspiration – 5 Ideas and Techniques

Watercolor is a medium where I really want to grow my skills this spring. It’s so versatile and much quicker than oil painting, for example. It can be easily combined with drawings and and … Well, I think if you follow this blog, you also love watercolors! Here’s some watercolor inspiration!
1) Watercolor Bookmarks – A Small and Fun Project
Who wouldn’t like to get a hand-painted bookmark? Watch the video with practical tips for watercolor painting!
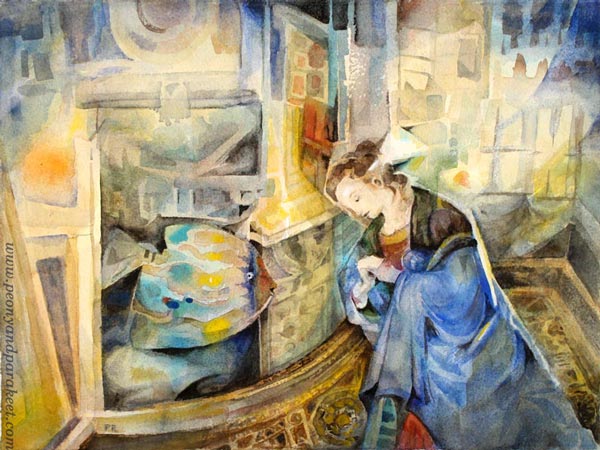
2) Illustration in Watercolor – Use a Drawing as a Starting Point
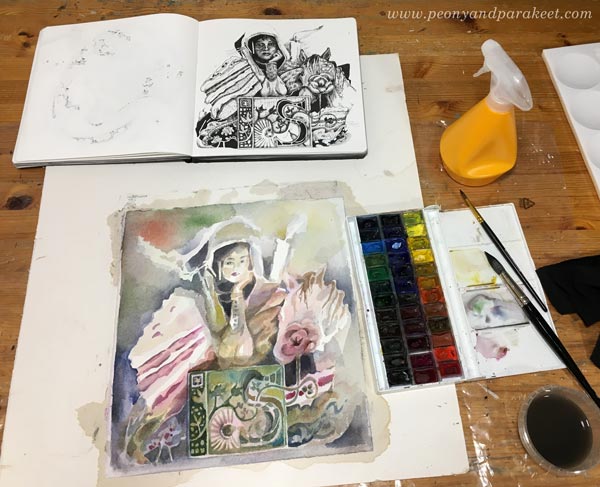
If you like to draw, pick one of your sketches and use that as a starting point. My drawing from last Inktober is very detailed, but I enjoyed painting it!

Here’s my setting. I kept the sketch visible most of the time but allowed my painting to evolve too. I didn’t use any pencil to copy the drawing, I just started painting with pale colors and made adjustments layer by layer.
Here’s the finished painting. When I drew the sketch, I wanted the person to look like she’s contemplating, and wasn’t quite happy with the face. But here, I was more successful the facial features. Colors also add to the expression.
What I really liked
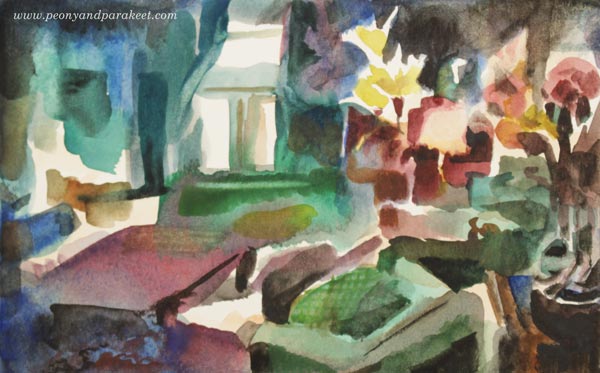
3) Watercolor Sceneries – Play with the Level of Abstraction
Mastering watercolors is impossible without making most of the happy accidents and allowing abstract elements build the image. Try how abstract you can and want to go!
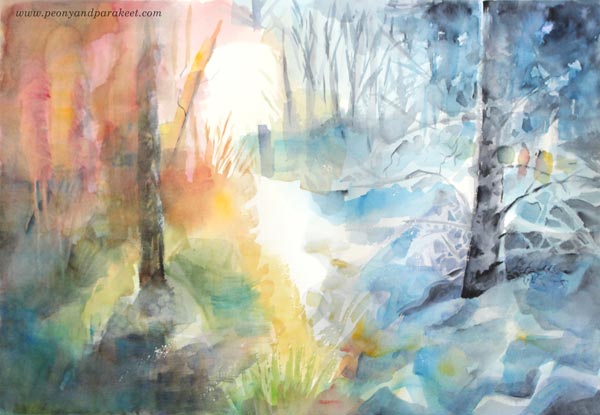
These images are from my class Watercolor Journey. The first landscape is quite realistic and representational. It’s easy to see that there are trees and the sun.
Here’s a more abstract version of the same project. Trees are not so clear anymore and the sun is more vague too, but on the other hand, it’s not as static as the previous one.
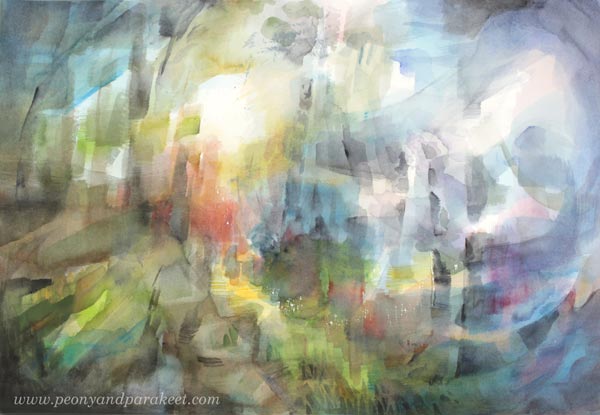
Which of the two do you like more? How far do you want to go in your paintings?
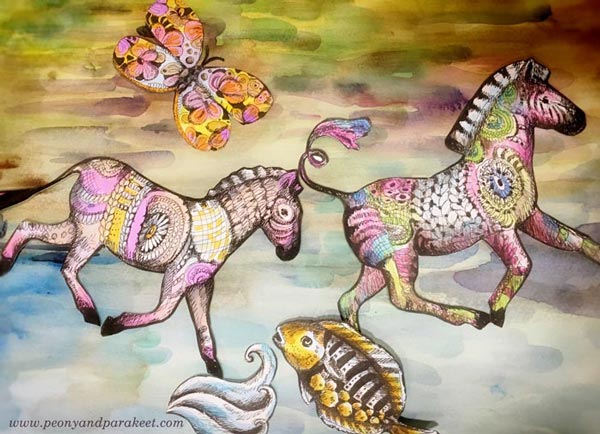
4) Intuitive Painting – Loosen Up by Starting with Three Photos
If you like to solve mysteries, here’s a project for you! Pick three photos and use one for each of the three first layers. Watch the video for more detailed tips and instructions!
I definitely did not see that there would be a fish in my piece when I started!
With watercolors, the art of seeing can be sometimes more important as the art of painting!
5) Watercolor Collage – Join my Class Animal Inkdom!
I have also used watercolors several times in my class Animal Inkdom. In Module 3 where we explore the underwater world, watercolors are a natural choice. For example, in this collage project watercolors have a central role. You will learn ways to draw fun and unique sea life animals, and make

Come to draw and paint with us in Animal Inkdom! You will get the published lessons (including Module 3) immediately after the registration, and you can start drawing and painting right away. Sign up for Animal Inkdom here!
Dolls in a Gallery – Paper Collage Step by Step!
Last week, I published a video about drawing a paper doll. Now when you have the dolls, what’s next? Let’s take them to an art gallery, and show them all the other art that you have created! Follow me step by step to create a fun paper collage!
1) Draw Lines to Define the Space
Take a ruler and divide the paper so that it has two walls and the floor.
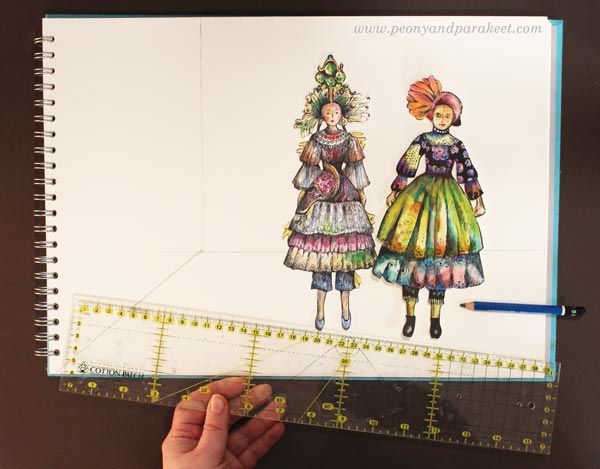
Start with the horizontal line and make sure that there’s enough room for the dolls to wander around the space. Then draw a vertical line approximately one third from the edge, and finally a diagonal that completes the side wall.
2) Paint The Floor and The Walls
I used watercolors to paint the background, but you can use any medium. Because you will add art on the walls and carpets on the floor, the interior can look quite plain at this point. Empty galleries usually are pretty sad-looking but that’s going to change in the next step!
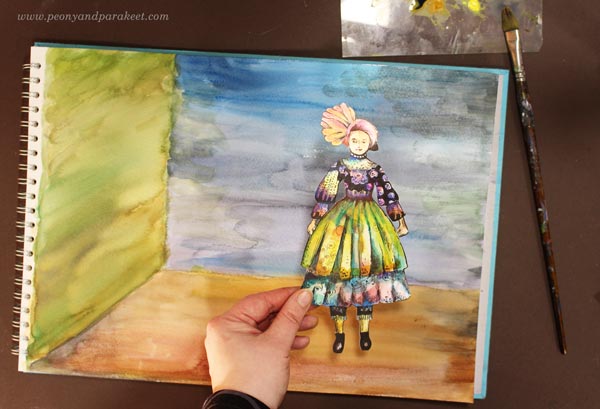
To make the gallery look more 3-dimensional, I used cooler colors on the back wall.
3) Decorate by Making a Paper Collage
Now the fun can begin. Turn your painting into a paper collage! Start by picking collage pieces to decorate the gallery. Hang art on the walls and make carpets on the floor. Go to your box of hand-decorated papers and use those! If you don’t have any, you can print some or cut images from magazines. But I think this project is the best if you can hang your art on the walls, and be the star of the gallery!
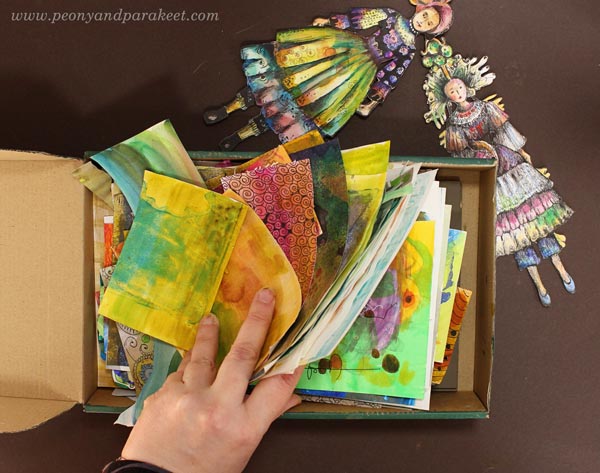
I also have a class called Collageland where I show how to make and use hand-decorated papers.
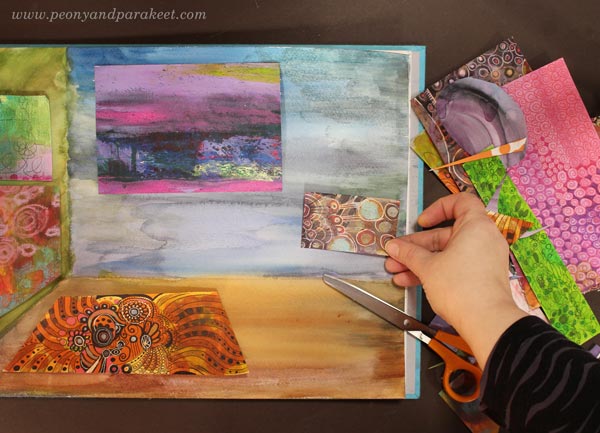
The back wall is the easiest to decorate because the papers can be rectangular there. But when cutting the pieces for the side wall, and the floor, make them inclined so that they follow the perspective.
To Glue or not to Glue?
I glued all the decorations with gel medium. If you make a pile of paintings and carpets, maybe some other furniture too, you may not want to attach them permanently so that you can change them. I didn’t glue my dolls in Step 5, but you can glue everything to complete the image.
4) Add Details with Pens
You can add fringes on the carpets, shadows near the paintings and panels, and adjust colors.
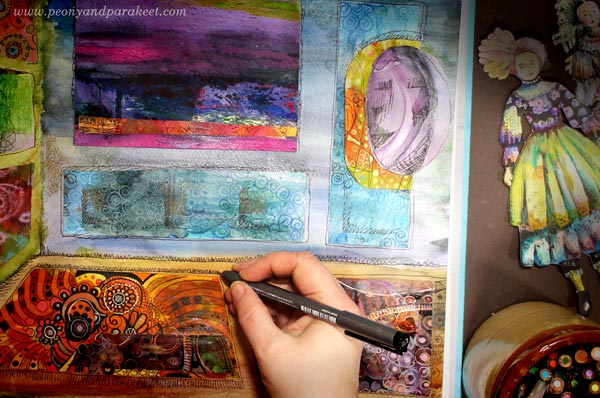
I use a black thin-tipped drawing pen (Copic Multiliner) and colored pencils in this step.

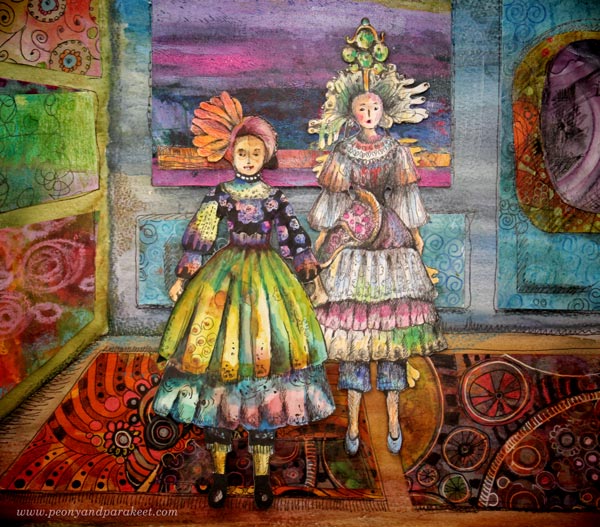
Here’s how my gallery looks when it’s finished. Because I love to take a step away from reality, I made a magic mirror on the wall. I made this paper collage on one of my A3-sized sketchbooks that has watercolor paper.
5) Let the Dolls in and Play!
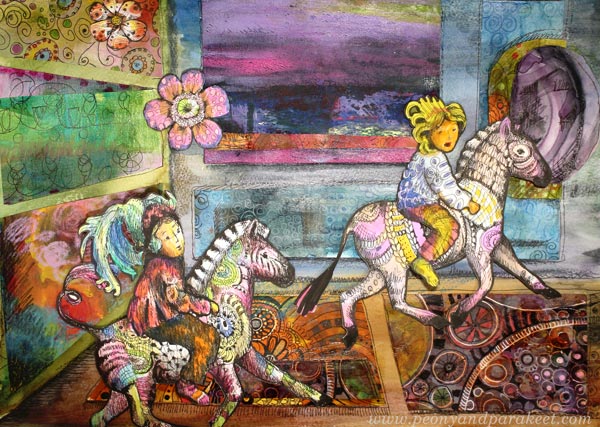
Now invite the dolls to the opening! My dolls got so excited that the magic mirror became activated. It opened a door for the whole wild world!
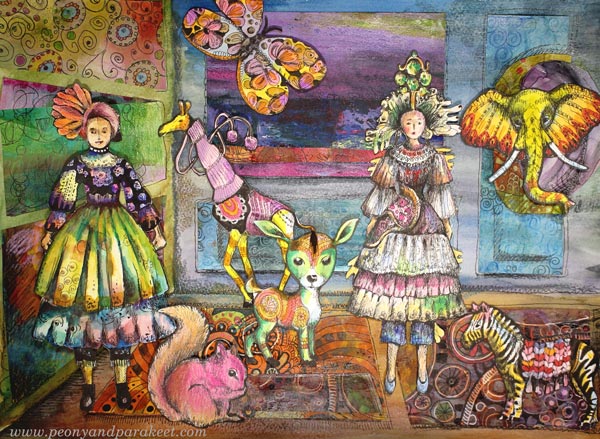
And after the opening was over, a couple of the guests decided to take an adventure through the mirror with zebras!
Drawing and Playing in Animal Inkdom
Take the paper doll with you, and come to draw and decorate animals with us in Animal Inkdom! You will get the published lessons immediately after the registration, and you can start drawing right away. Sign up for Animal Inkdom here!