
How to Trust Yourself when Creating Art
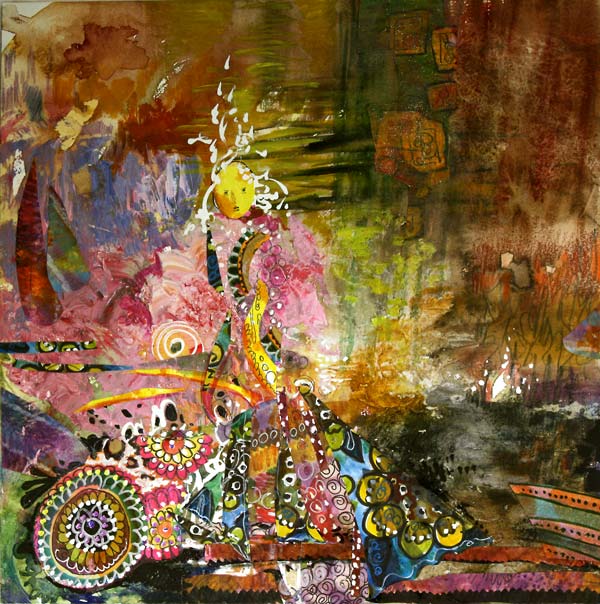
When I begin creating art, I often have petty thoughts like: “I want to draw a flower” or “I want to create something pink.” Even if I create regularly many times a week, I am still bothered by the fear of failure. I know I have to handle that at as soon as it comes, preferably before the first brush stroke. Why? Wouldn’t it be fun sometimes to draw that single flower or create that pink square? I believe that if we give ourselves that kind of clear commands and simple tasks, we don’t really trust our creativity. The big question is always: do you trust yourself when creating art?
The Unpredictable Nature of Art
If you trust yourself, you can step into the world of unpredictability. Not knowing exactly what to aim for is a major factor when creating art. We can set restrictions and principles, but we have to leave space for unpredictability. It means that we are more creative if we do not have the clear picture of the result.
Setting Restrictions on Supplies
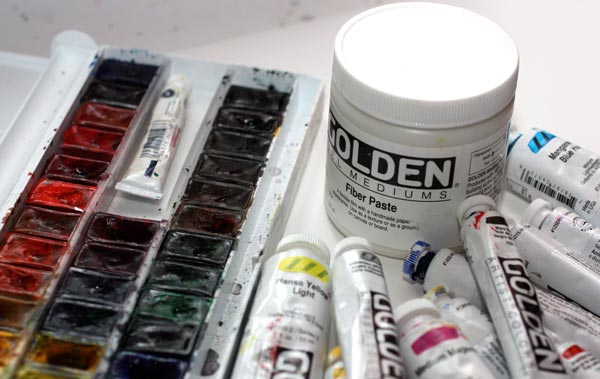
These are the art supplies that I gathered when I began making the collage of this post. Watercolors, acrylic paints, and fiber paste. I also picked a thick watercolor paper and cut it to a square. I chose the supplies but left behind the thoughts about what I was going to make.
Find what You Want to Express
My method is to browse art books just before creating art. I do it only for few minutes, and I try to pick art that really lifts my spirit, raises the bar, sparks my imagination. Usually, it is something from the history of world art. This time I browsed a picture book from impressionism.
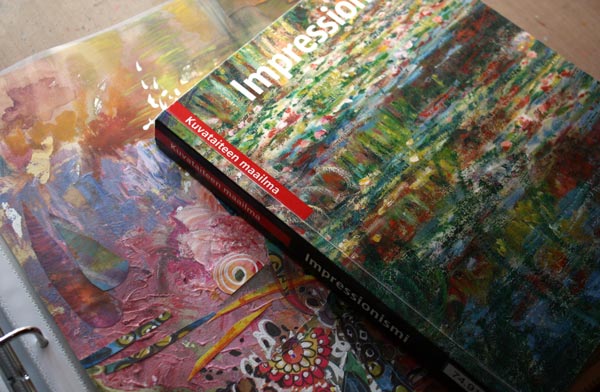
So, do I advise you to get a book of impressionism? No. I advise you to name what spheres you want to reach when making art and pick images which resonate with that. They do not have to be the same style than what you want to accomplish. The more important is the feeling that they evoke in you. When I browsed the book of impressionism, I thought how art is above all the mundane things. How those artists who lived at the end of the 19th century have managed to describe the beauty in the way that is still understood. How the brush strokes, full of paint, were successfully set to represent weightless light. All that would be exciting to see in my piece too.

When the first watercolors hit the paper, I still had some self-doubt: I could not ever do anything like the great impressionists. I heard the sarcastic voice in my head: “Reborn Monet, yeah right!” But that sarcasm is the moment when I know I am almost there: I am almost leaving the rational side of me behind. Then I just need to wow to trust myself, stop seeing any desired images in my mind and start working fiercely.
Layering (With Some Moments of Self-Doubt)
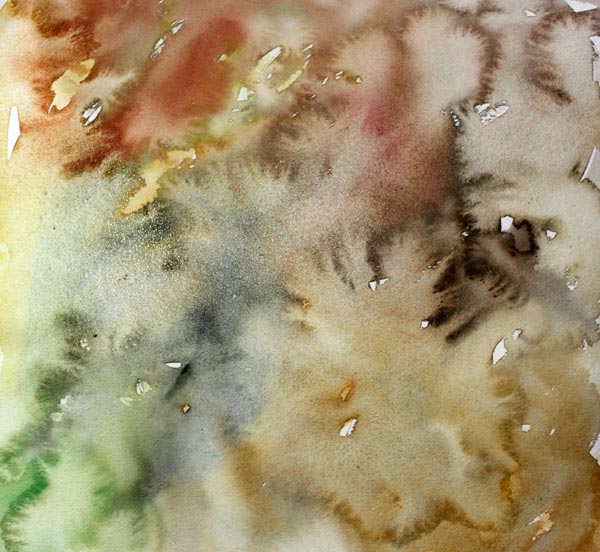
I often start with watercolors because they cover the paper quickly. Even if I have the idea of creating some surface structure, I wanted to use watercolors first to get into the mood of uncontrolled splashes.

While waiting for the watercolors dry, I mixed some acrylic paint. Pastel shades like many impressionists used to choose. 
To get some interesting texture with the paint, I used a palette knife instead of a brush.
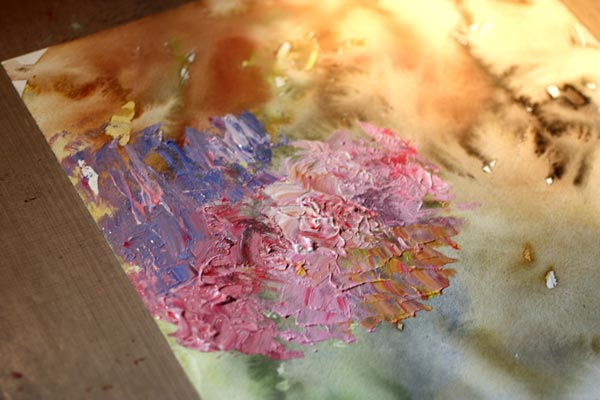
After playing a little with the palette knife and thick paint, I became clueless of how to continue. It’s important to recognize these moments. If you are not aware of these, your rational side takes the control and decides to do things you really cannot justify. Like: “Let’s use the rest of the paint to cover the surface evenly.” Or: “Let’s get some other colors and splash the paint here and there.” When you feel that you do not know what to do, don’t do the obvious. I might browse some pages of the book again to get back into the mood. Or change the media, the solution that I made this time. I doodled something not so important with the colored pencils just to realize I wanted to continue with watercolors and a thin brush.
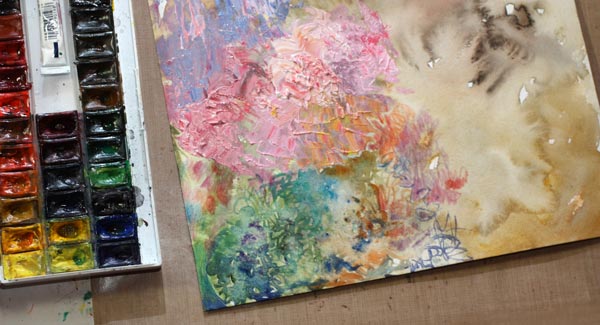
When I got bored with colored pencils and watercolors, I opened the jar of fiber paste. Even if I often prefer to stay with the basic art supplies, fiber paste is something I like. It not only creates an interesting texture like watercolor paper, but it also works like a watercolor paper. You can paint over it with watercolors and create beautiful details to your work! 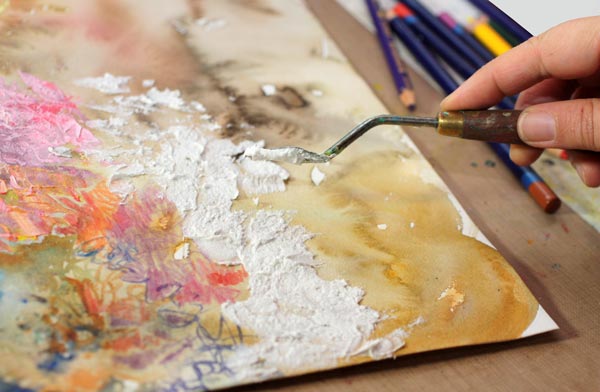
Trying to achieve distinct variation in the surface texture, I used the palette knife again.

Then my mind was empty again, so I browsed few pages from the book again and then continued with colored pencils.

When I reached the next point of frustration, I decided to change to the watercolors and work with high speed. Working fast helps to get creativity flow.
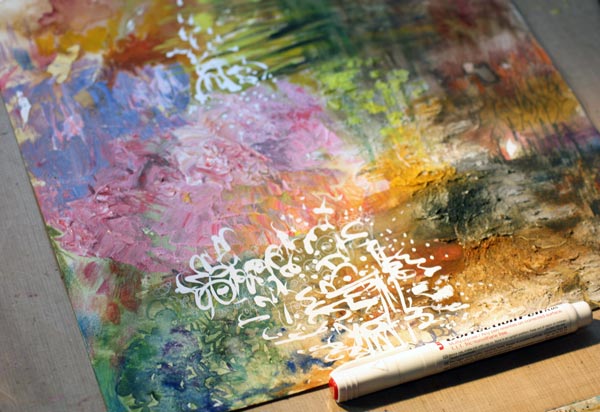
Once the paper was covered all over, I started adding details. A white correction pen is great as it usually works on any surface.
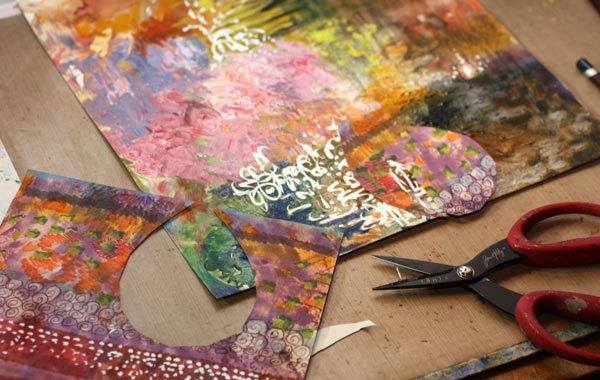
Hand decorated papers are great for details. I picked some of my prettiest papers and began to cut them. The paper shown in the picture isn’t that great as an artwork, but it’s versatile for collages as it has a lot of variation.
Finishing
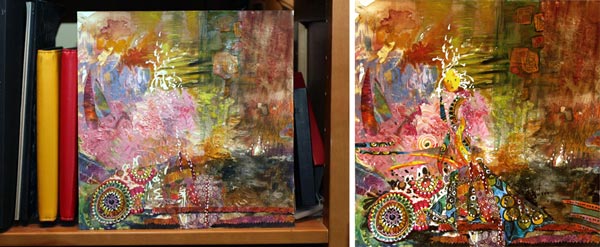
I felt that it was time to begin finishing the work. It is always useful to stop and think. I often put the artwork somewhere where I can look at it, like on the nearest bookshelf. Then I step away and try to figure it out where to lead the viewer’s eye. Here’s another step where you should not question your trust: It will be great! You just need to connect some dots and find the lost pieces of the puzzle. Like I did when I realized that there is someone in the picture. I added the faces and made the rest of the character more visible. Then some tiny adjustments to the composition and after that, the work was finished.

I think that this piece is aesthetically very much my style, but the impressionistic approach to the surface structure makes the work interesting.
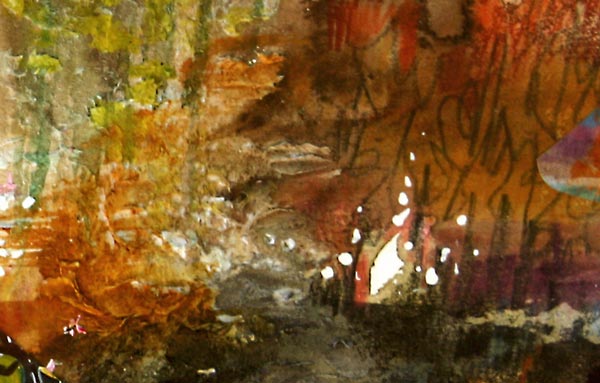
Never underestimate the power of layering: this is my favorite detail, the white area showing the blank watercolor paper. It was created in the first phase, and it still exists in the end. If I had done the obvious and filled the paper with each media layer by layer, this little detail would not exist. So, cherish each stroke and trust your creativity! Focus on the feeling, not to the result! You are allowed to feel like a world-class artist even if you know you are not. Fly to the world of imagination!
This might also interest you: – Stretch Your Artistic Style
Let me be your mentor in art: Subscribe to my weekly emails!
How to Mix Colors?
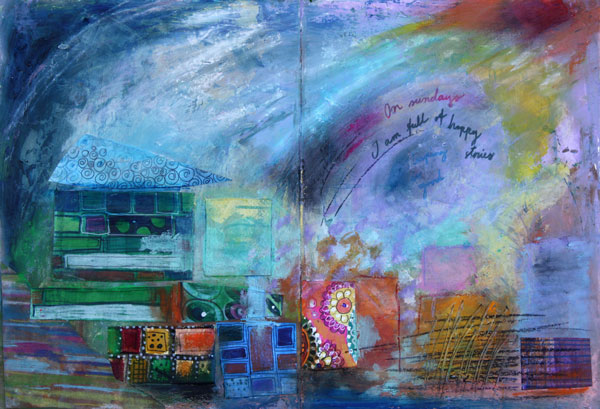
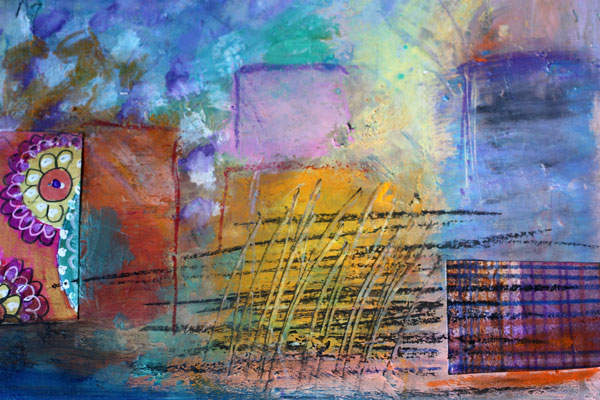
Here’s an art journaling page that I made to show you the gentleness of pastels and the strength of muted, darker shades. I often see art journaling pages that have a potential to be awesome, only if the color palette would be more unified! Meaning: only if the artist would have mixed the colors instead of using them straight from the tubes.
Choosing Color Combinations
Here’s the problem: we are pampered with many great colors by the art supply manufacturers. Like the colors of my Faber & Castell Gelatos, they look so pretty!
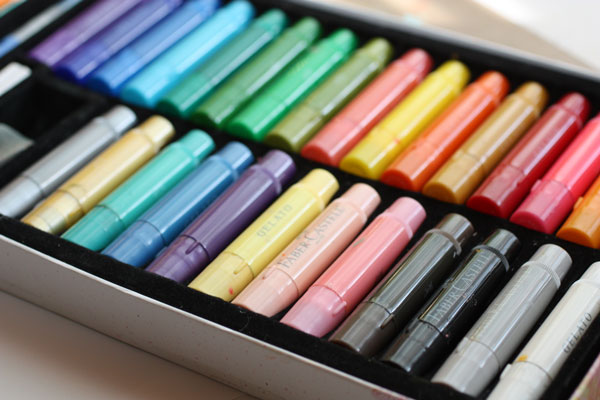
Still, you can pick colors there that won’t look so great together. Those colors have no common base color. Like the bright red, blue purple and mint green shown below. They have nothing in common. The bright red is a primary red; blue-purple is muted with black and mint green is muted with white. If you take out the mint green and mix the red and blue- purple, you can get a better combination. The brown, which is the mix of purple and red, ties the two colors together.
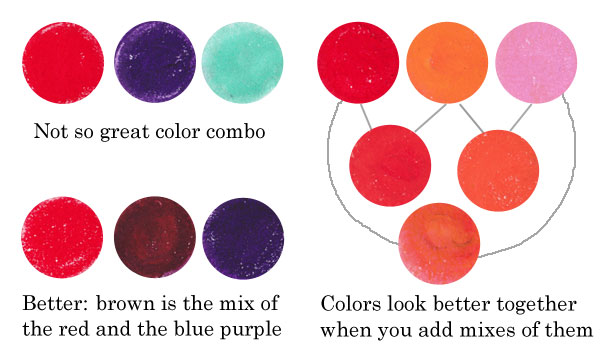
Similarly, if you use only red, orange and pink straight from the box, they look more separate than if you also use the colors that are mixes of them. Like parents and children, they form a unified color family.
Another example: the colors that have a common base color, like the pastels below, suit well together. You can also mix them without fear: they produce lovely combinations. If you don’t want grays or muddy browns, avoid mixing contrast colors together. The contrast color pairs are red and green, blue and orange, yellow and blue-purple.
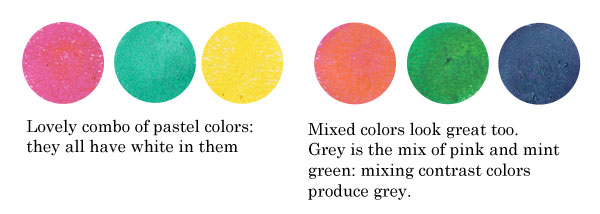
Sometimes people are afraid of getting grays and browns, and so they avoid mixing any colors. But those muddy colors make the brighter colors pop. See how muddy colors support the other colors in the art journal page that I made.
Playing with Tints and Shades
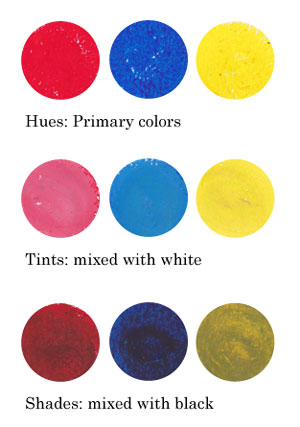 One reason to mix colors is to get more natural, lively look. If you look at any photo, you can see a lot of colors there. The variation of light causes the huge amount of colors.
In the late 19th century, there was a genre of artists called impressionists. They were inspired by the daylight. They wanted to focus on the light, not on the objects themselves. If you are afraid of mixing the colors, look closely at Claude Monet’s Cliffs at Etretat and count the various tones there!

Instead of using primary colors like basic bright reds, blues and yellows and mixes of them, I encourage you to play with tints and shades: mix white or black to the primaries and get softer colors!
Using Faber & Castell Gelatos
When I began creating the art journal page, I chose to use gelato sticks with acrylics and hand decorated papers. I decided to use the background that I had made weeks ago, as its pastel colors reflected the cheerful mood I was having.

I like to create backgrounds when I am tired or uninspired. Then, when I start creating, I feel that I am already half done. When using various supplies in each layer of a page, I will get more variation in color without extra effort.

Faber & Castell Gelatos look like lipsticks, and they have similar kind of waxy feel. You can dilute them with water, but I think the greatest way is to mix them with a paper towel or soft sponge.
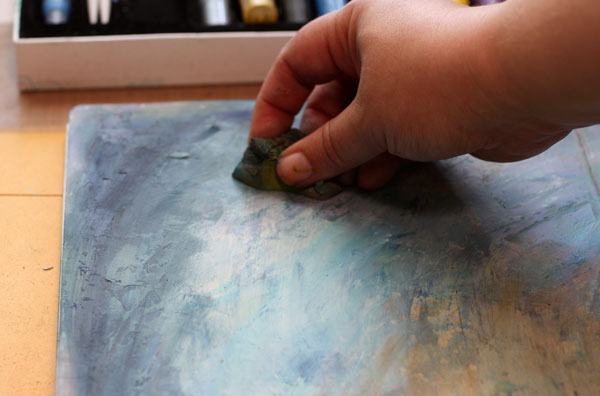
Gelatos work great on a painted surface. Notice that I created color mixes with slight variation in darkness. I used both tinted colors (mixed with white) and shaded tones (mixed with black).

Repeating Colors
One more thing to consider: color repeats. I am very careful of not repeating the same color too much. In general, when the color is used only once, it represents an individual. If it’s used twice or three times and the areas are closely located, they represent a group. But if the same color is here and there or evenly spread, it is often just a mess. The rational side of us wants to create color repeats. But once the work is finished it does not look rational at all! One more reason to mix those readymade tones!
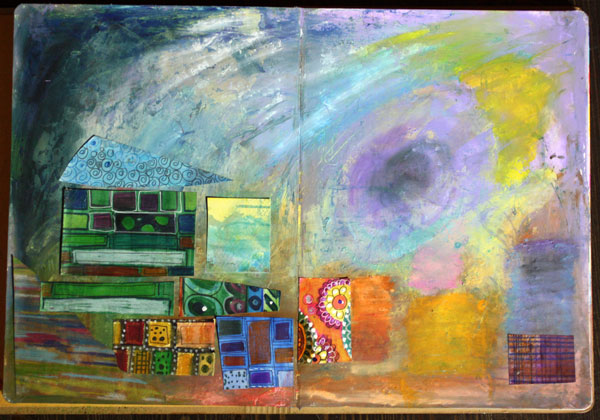
When I began to add hand decorated papers, I followed the same rule of controlling the number of repeats: not too much of the same paper.
Using hand decorated papers is a great way to add thin lines to a page. The gelatos have a waxy surface that can be difficult to handle with thin markers. For the journaling, I used Faber & Castell PITT brush pens.
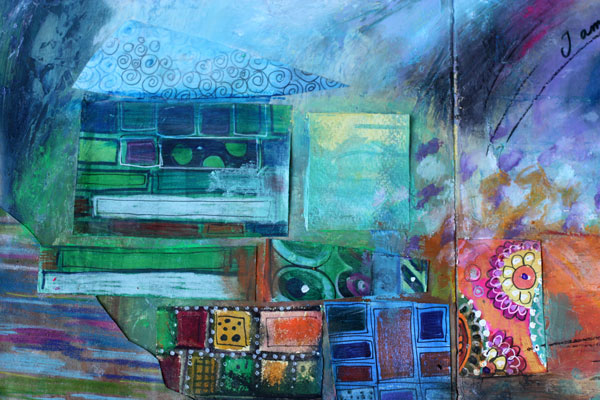
To make the collage look more integrated to the page, I added color with Gelatos on the papers.
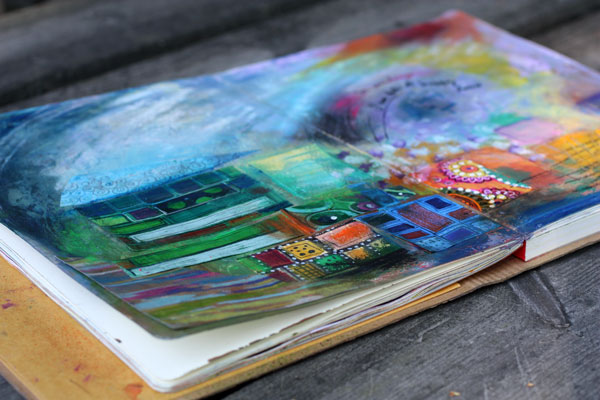
If I had to define art shortly, the definition would be: creating great color mixes and communicating with them. At least that is the step to take when you feel that the page you made does not represent what you wanted to create!
Read more about colors: Yellow, 5 Tips to Choosing Colors
Let me be your art teacher: Subscribe to my weekly emails!
Illustrating Poems in Art Journaling
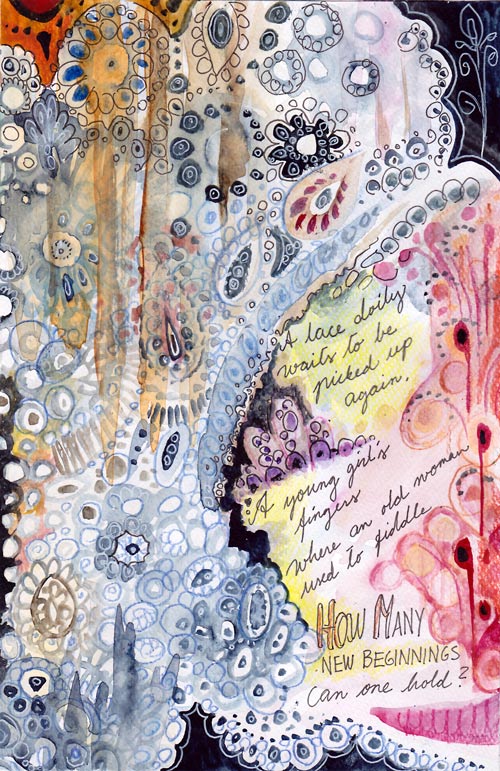
A lace doily waits to be picked up again.
A young girl’s fingers where an old woman used to fiddle.
How many beginnings can one hold?
This is an art journal page which illustrates a poem. I usually create the image first and then add the text. This time, I wrote the poem first and then illustrated it. Namely, for a long time I have had a desire to include creative writing in my art journals. I have loved poems since a small child and I used to write them all the time. After I grew up and moved away from home, it gradually stopped. But now years later, poems seem a great addition to art journal pages. Especially because I usually start writing a poem with a visual image in mind. Wouldn’t it be suitable to document that image too?
Of course, you do not have to be a poet to get into illustrating poems. You can also illustrate the poems that other people have written. Poems are great tools to get connected with the visual images that represent feelings. I think poems make a perfect pair with visual self-expression!
Illustrating Poems
1) Getting in touch with the feeling
Read the poem several times.
What kind of atmosphere does it create? What metaphors does it use? Are there physical objects or people to include?
There’s a risk of getting too rational here. Try answering these too:
What kind of memories or thoughts does the poem raise in you? What kind of rhythm, music or dance does it resemble?
2) Sketching
Lightly sketch the elements you want to include to the page. Write the poem or at least reserve a place for it.
I used watercolors for sketching. Light painting can bring a more intuitive approach to your work than using a pencil. You don’t need to know your exact composition yet. Think this phase as the first steps in the dark! Do not take it too seriously (= too rationally)! Focus on the feeling you want to express!

3) Expressing with composition
After sketching, adjust the composition by adding more elements to the page! With poems, I often feel that if the composition delivers the message, the rest is trivial or easy. There’s so much content in the words itself.
I wanted my page to lean to the right and then up. Right – because there’s a strong connection to the future in the text. Up – because the doily waits to be picked up in the story. I also chose the colors accordingly: blue representing the old and red representing the new.
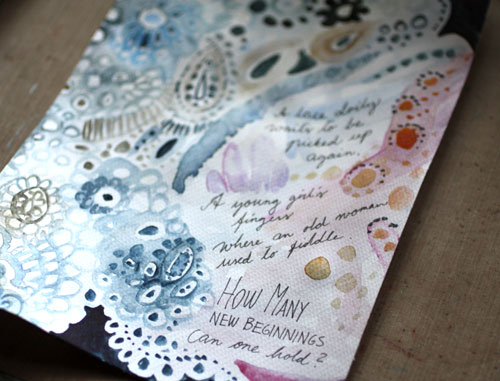
4) Finishing
This phase is to fine-tune everything already created.
I wanted to add the feeling of fabric and emphasize the upward movement by adding thick lines with watercolors. I also made the lace more detailed. Then I added some dark areas to make lighter areas pop. A thin black marker and colored pencils are great for the finishing touches when using watercolors on the page.

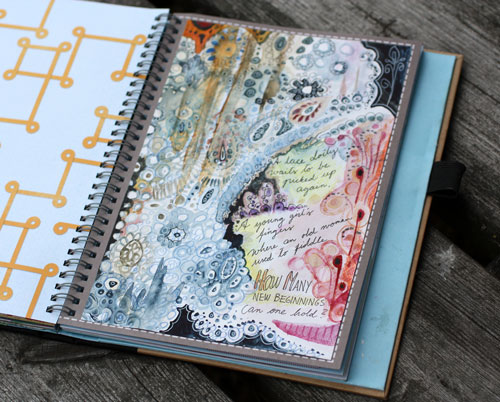
The page was made on a separate watercolor paper and then attached to the journal. Watercolors work best on watercolor paper. Even if you use a thin watercolor paper it’s better than using a smoother surface.
Illustrating Poems – A Minimalistic Approach
You know that I am not a particularly fond of minimalism in self-expression but with poems, I think it can be a very effective approach.

A yellow spot on a white painting.
A happy thought when leaving.
I saw the sun on a cloudy morning,
The one to brighten my being.
This poem of mine began with a visual image that called for simplicity. When aiming for lots of space, acrylic paints can be a better medium to use than watercolors. Acrylic paints have more substance themselves, and it’s easy to add slight, yet powerful color changes with them.
In this page, I divided the poem into three parts. The composition was built accordingly.

The first part is focused on expressing the latter sentence: the leaving. It is bittersweet, light peachy orange.
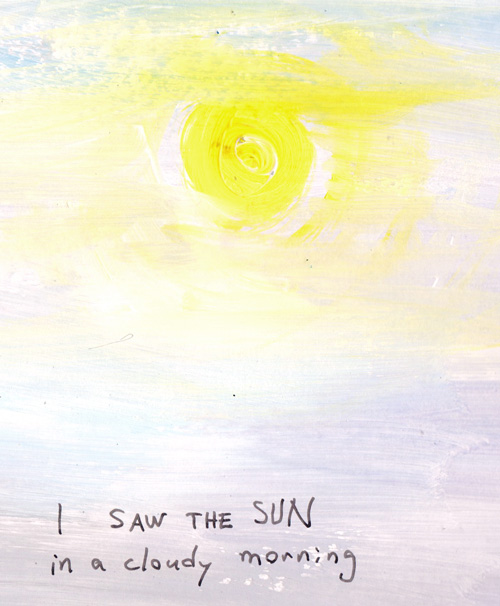
The second part visualizes the sun in cloudy weather.
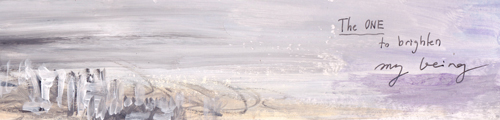
The last part communicates the person, her being and her relation to the world that she is leaving behind.
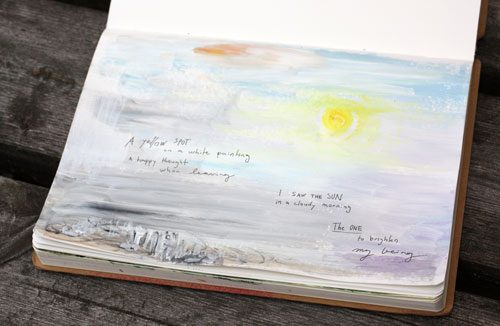
With acrylics, it’s easy to work on any surface. I used white gesso instead of white paint but only to save some money.
Art Journal of Poems
Think about having an art journal that is filled with illustrated poems! What a treasure would it be! The best things in life are those we can create ourselves.
Let me be your art teacher: Subscribe to my weekly emails!
Imitate Ceramic Art!
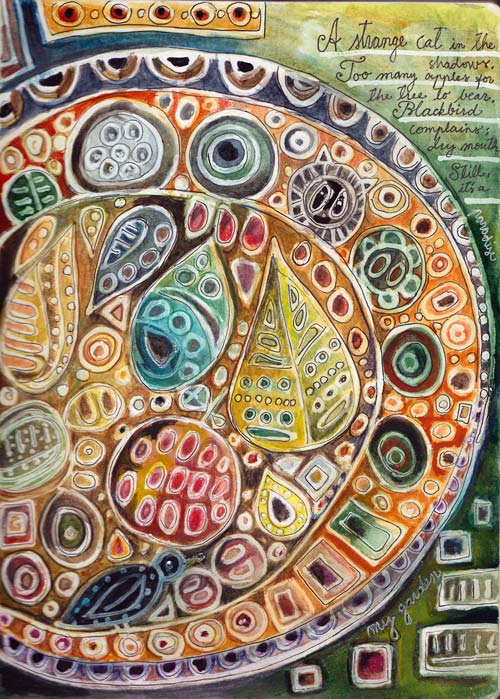
A strange cat in the shadows.
Too many apples for the tree to bear.
A blackbird complains: Dry mouth!
Still, it’s a paradise: my garden.
This is an art journal page where I wanted to achieve two things:
1) imitate Scandinavian ceramic artists of 1940-1960s
2) write a poem and illustrate it
Scandinavian Ceramic Art
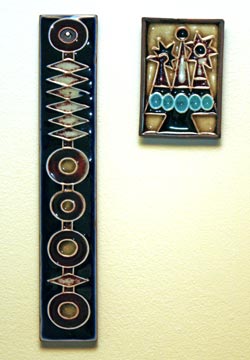 Let’s start with the artists: Annikki Hovisaari from Finland and Lisa Larson from Sweden. They are women who made beautiful ceramic art in 40s-60s. Annikki Hovisaari died in 2004 but Lisa Larson is still alive and she has a website too.
Me and my husband own a couple of Annikki Hovisaari’s work. We have bought those from antique fairs.
I found out about Lisa Larson in Scandinavian Retro magazine nr 1/2014. You can also see the best work of hers by searching from Google with the search term “Lisa Larson tile”
When I examined the work of these two artists, it was clear that a white correction pen would be perfect to imitate the lines. I made a couple of small pages by combining the correction pen with acrylic paints and PITT Artist Pens. However I was not fully satisfied with the outcome. These did not have the liveliness in color that I wanted to achieve.
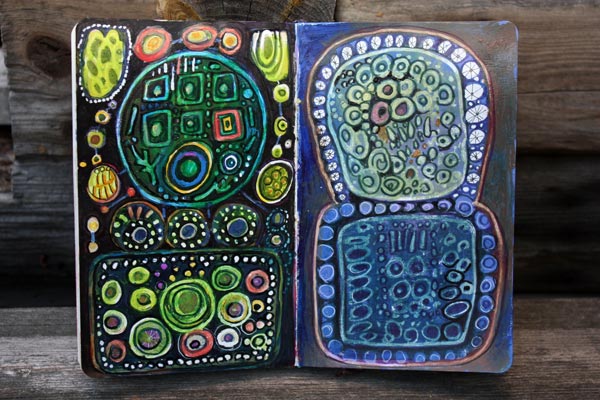
But after making these I realized how I would use the correction pen and what I would combine it with: watercolors! Here’s how you can create your own ceramic tile look!
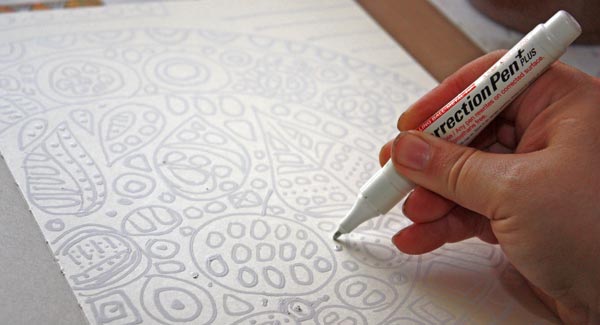
1) Doodle with correction pen
2) Use watercolors for coloring
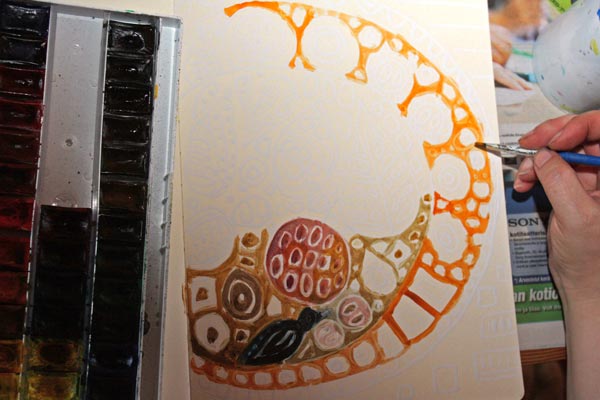
The correction pen works as a resist. You can watercolor over the white doodles. After painting add some water and wipe the paint off from the doodles.
3) Add contrast and draw thin black lines

When you are done with watercolors, don’t stop yet. Add color variation and contrasts to doodled shapes. You can also work with colored pencils when finishing if it feels easier. Finally, take a thin black marker and add thin lines in the center of white doodles or both sides of the doodles. These lines will make your work look sharper and more dimensional.

Here you can see the difference that finishing makes. At this stage, I have also added the poem. Actually, my process began by writing the poem. I have discovered that if I want more depth in journaling, it’s better to write it first.
Have fun with this simple technique!
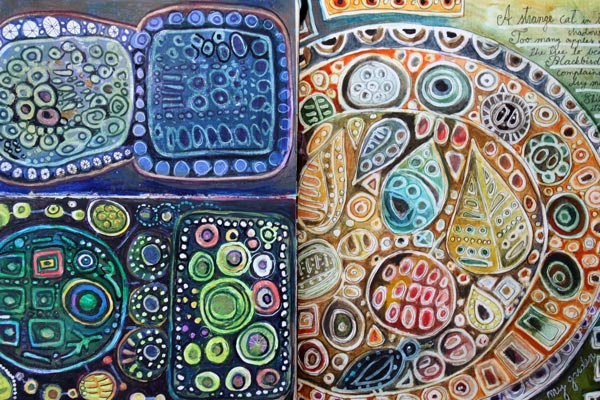
More ceramic art inspiration and playing with simple shapes
>> Modern Mid-Century art journaling mini-course