Hand-Drawn Collage Samplers
I have been browsing my art archives lately, and it has been surprisingly inspiring. I have lots of art journals and a big box of paintings and drawings from my teenage years. Even if I have experimented with many techniques and themes, it all looks very similar now. Everything fits together and gets my approval. Painting “Icebreaker” gave me a new kind of confidence, and with that confidence, I am now blogging about a playful idea that I got from cross-stitching – hand-drawn collage samplers!
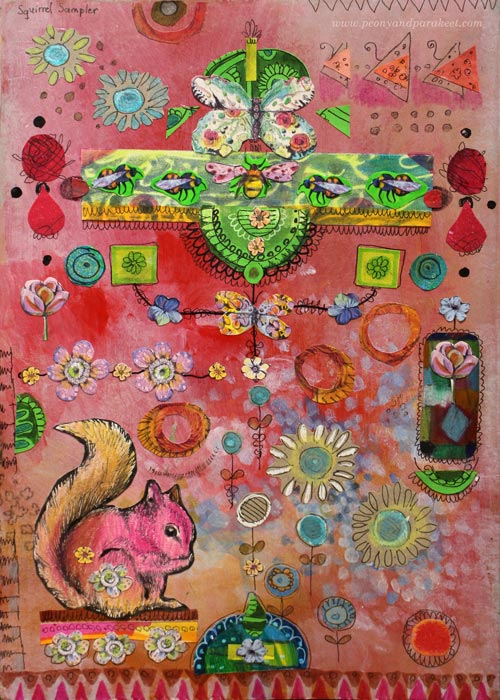
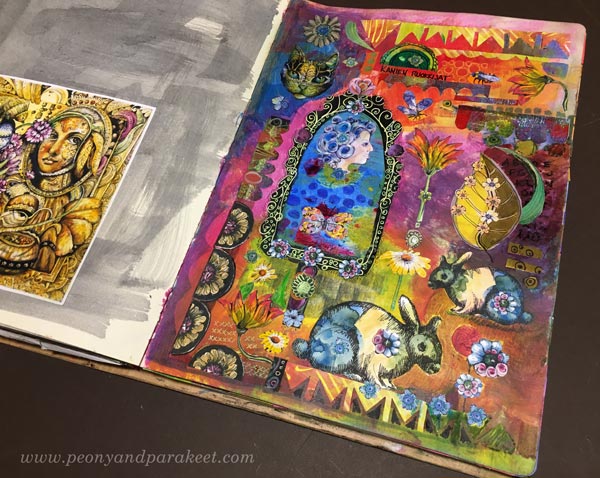
These samplers are composed of hand-drawn paper pieces so that they look like cross-stitch samplers. They have ribbons, many identical ornaments, tiny floating elements, and some symmetry. There’s also stiffness and order so that it looks like the elements are on a grid.
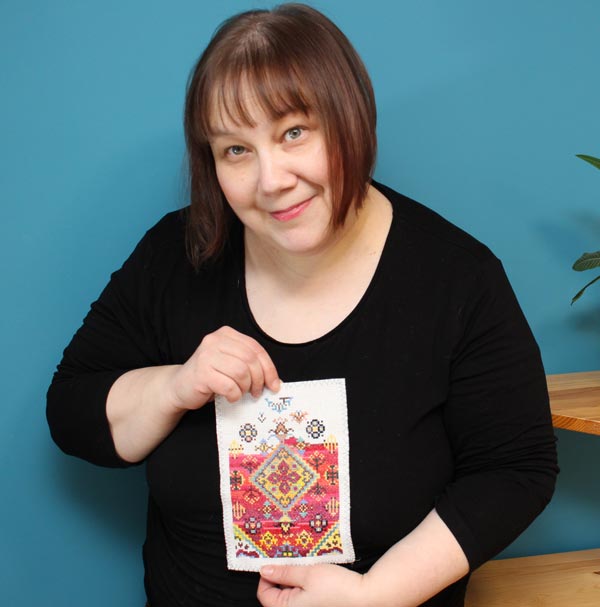
Cross-stitching is one of my hobbies, and even if I try not to think about art when stitching, I just couldn’t resist this idea! Here’s how I applied cross-stitching to collage art.
Print Tiny Scans of Hand-Drawn Collage Pieces!
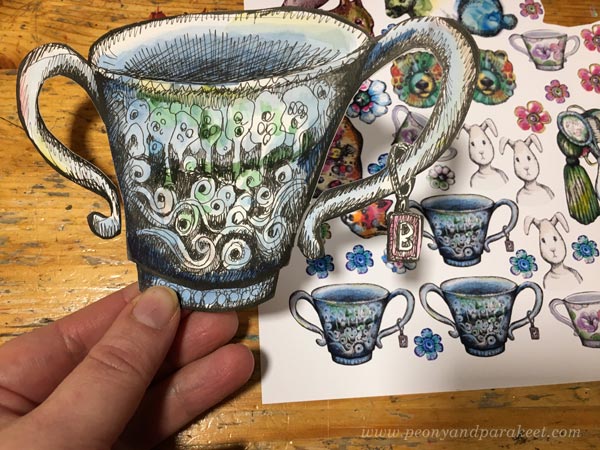
It’s essential to have tiny decorations to make the collage look ornamental. I solved the problem by making collage sheets of scanned hand-drawn pieces. These collage elements were drawn for the classes Animal Inkdom and Magical Inkdom, and there are some jeweled flowers from the free mini-course for subscribers too.
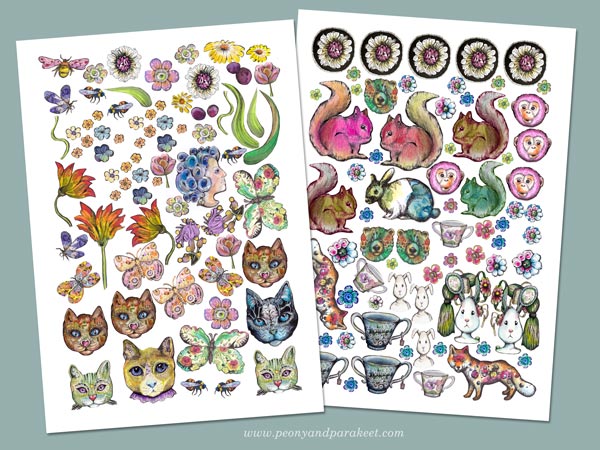
The original size of these pieces is much bigger than in the printed sheets.
Use All Kinds of Hand-Decorated Papers!
Samplers have a variety of designs, so every little doodle is a potential sampler piece. I have a box of hand-decorated and painted papers (mostly leftovers from Collageland) and two boxes of hand-drawn collage elements. I have also cut some old art created in the 1980s. All these are a good addition to small printed pieces.
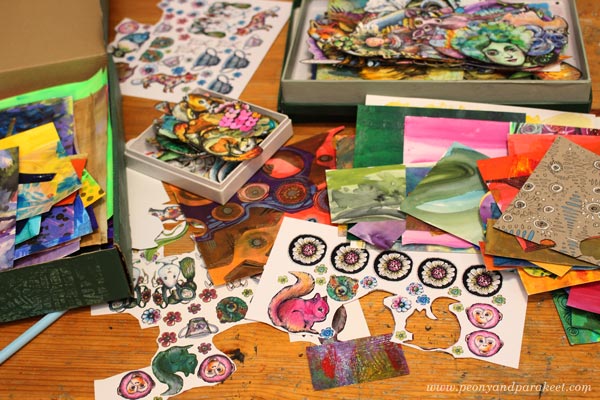
Of course, you can also use store-bought die-cuts, pictures from magazines, etc. but if all the elements are handmade, they will all fit together much better because they are all YOU!
Perfect Project for Hand-Painted Background Pages
If you are an art journaler, I bet your journal has a lot of pages that are more like backgrounds rather than finished pages. You can use them for collage samplers!
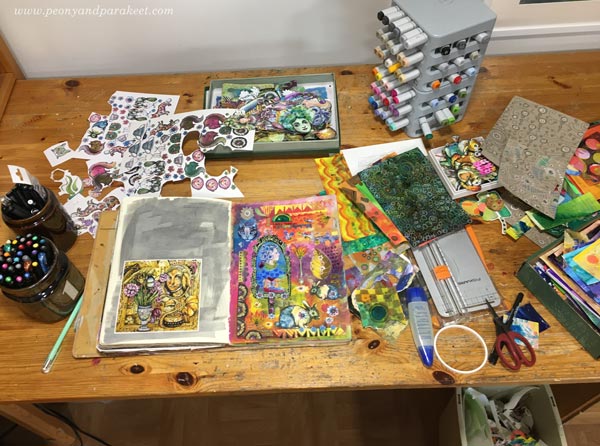
The background of this sampler was busy and bright, but I just added brown over some of the areas and let the colors speak, or should I say shout!
I attached the pieces with paper glue and some larger elements with double-sided tape. I usually use gel medium, but it’s messier, and it’s too difficult to cut all those tiny pieces with sticky fingers.
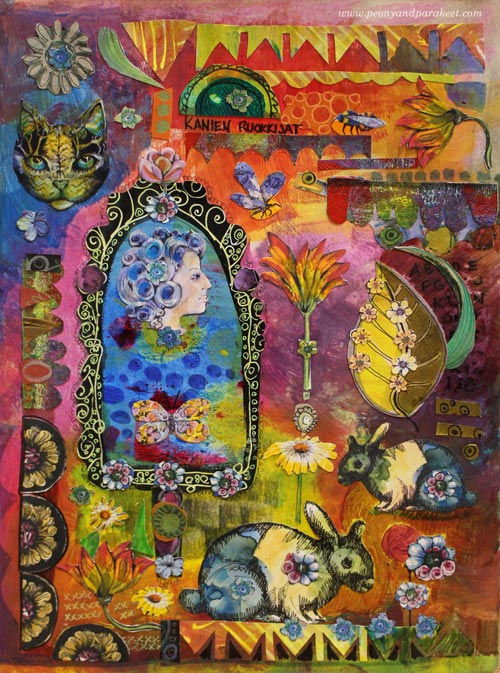
Self-Expression with Hand-drawn Collage Samplers
Sticking paper pieces can be just a relaxing hobby, like cross-stitching. But samplers can also tell stories!
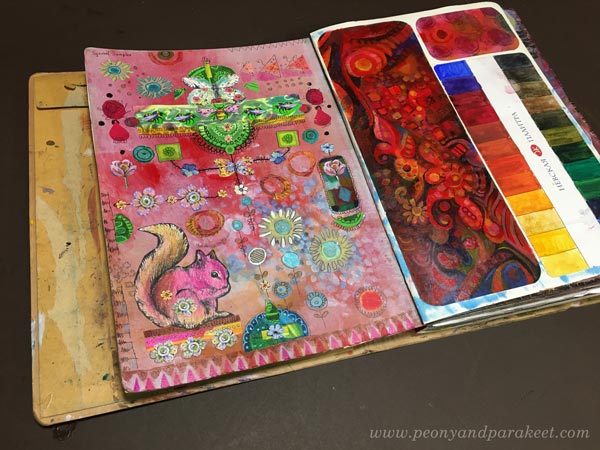
My first page is called Squirrel Sampler, and it has all kinds of little treasures that Paivi the Squirrel has collected.
The second page is called Rabbit Feeders. It refers to women’s status and importance in Virginia Woolf’s novel The Voyage Out. An isolated woman looks at herself from the mirror and questions her importance for the world. I read Voyage Out as a teenager, and this allegory, even if it’s just a few rows in the book, touched me deeply.
It often happens that creative play evokes feelings and stories that are too big to express in any other way. I hope you’ll enjoy making these samplers!
Start drawing your sampler pieces – Subscribe to my weekly emails and get a free mini-course!
Inktober Warm-Up Exercise
It’s soon October and with that – Inktober! Last year, I did all 31 prompts. Read about my previous experience here and here!
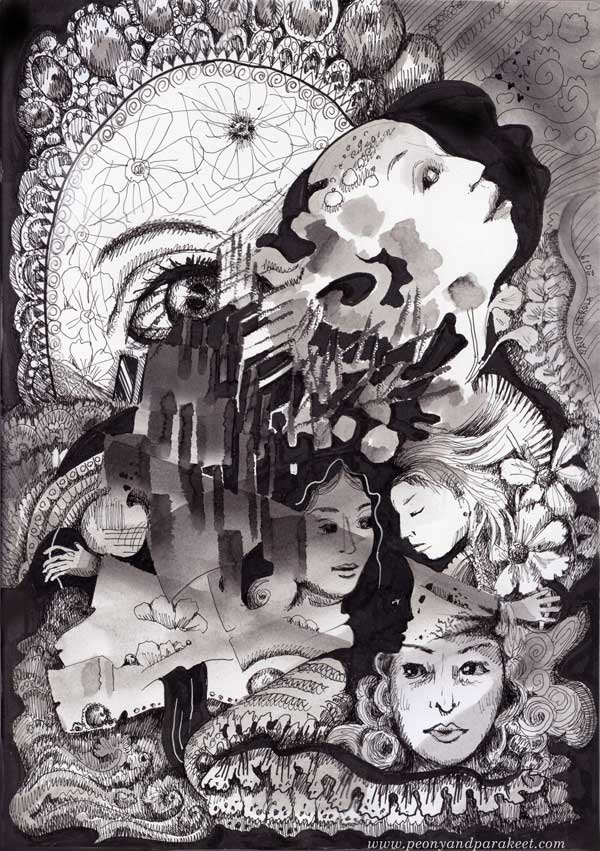
This year, I intend to make at least some drawings. And because Inktober was such a great experience for me last year, I want to support you to take it too. Here’s an Inktober warm-up exercise. I hope it inspires you to use inks and black felt-tipped pens to create black and white art. Follow the steps to keep going!
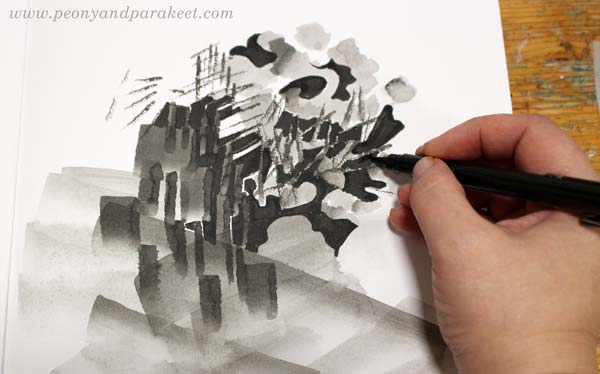
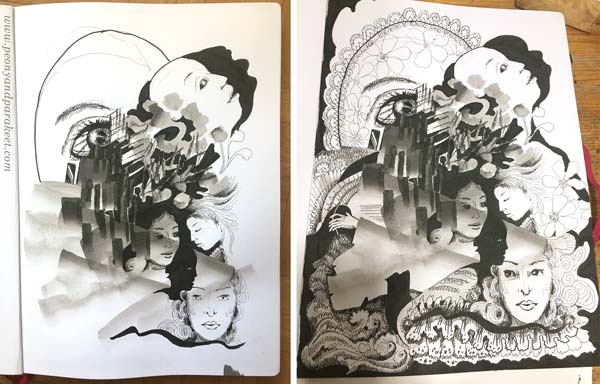
1) Paint an Abstract Composition
Let’s start by playing with liquid ink! Mine is Dr. Ph. Martin’s Bombay India Ink. I make the image on Leuchtturm 1917 Sketchbook.
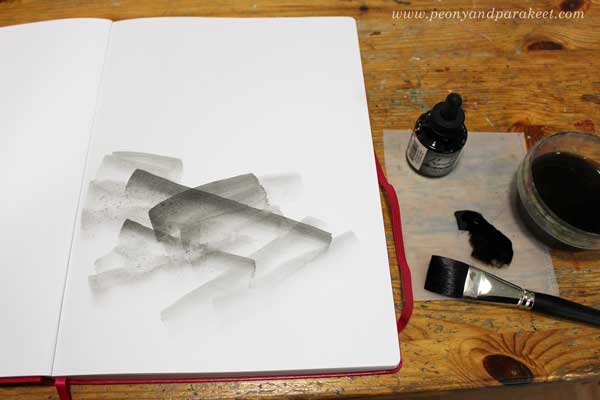
Put a few drops of black ink on a palette. Mix some water to the ink so that it’s grey rather than pitch black. Make some pale strokes with a flat brush. Then add new strokes on the top of previous ones. Work slowly! Enjoy each stroke and the translucency of it.

Turn the brush upward and make narrow strokes by using the tip of the flat brush. Experiment with both wet and dry brush.
Pick a small round brush and add some ink on the top of the narrow strokes. Now you should have an abstract composition that has a variety of painted elements.
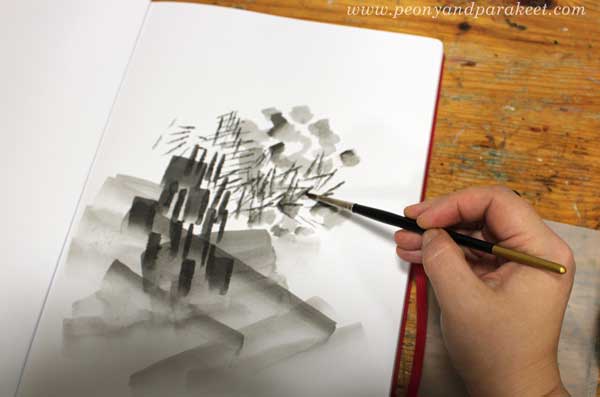
2) Fill Spaces Between the Painted Areas
Use a brush pen or black ink that hasn’t been watered down. Focus on the center of your composition.
Fill most of the spaces between the painted areas with black ink. Leave some white to highlight the best parts. Black adds depth to the grey composition.
3) Draw Realistic Objects
Select black thin-tipped drawing pens of various thicknesses. I use Copic Multiliners from 0.05 to 1.0.
Choose a realistic object that you want to repeat in the image. My choice was women’s faces. For example, flowers or birds could be great too.
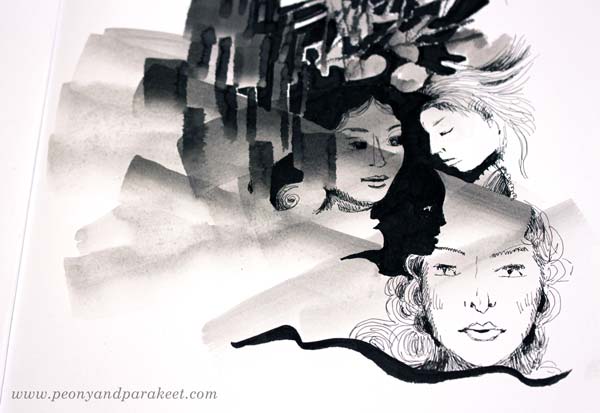
Look at the abstract composition and seek for places where you can add the objects. Add more black, and adjust the shape of the pale areas so that they partly outline the objects. When drawing the objects, play with the scale so that some are big and some small no matter where they are located in the image. All the objects don’t have to be fully visible. Some can hide partly behind the abstract elements.
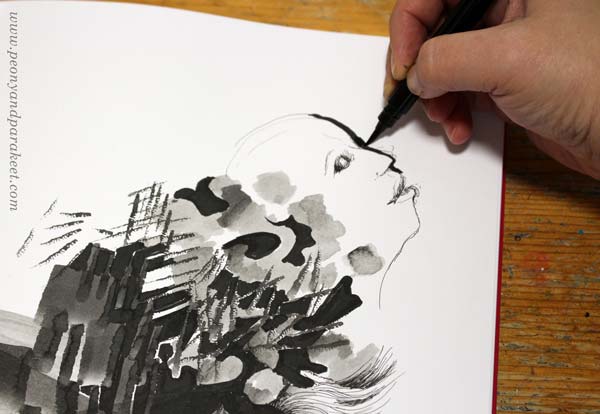
I like to draw faces so that I sketch it first with a thin ink pen, and then adjust it by adding a black element beside the face. (In my classes Animal Inkdom and Magical Inkdom, I show easy step-by-step methods for drawing all kinds of fun figures.)
4) Doodle Decorations
Continue with the black drawing pens, and doodle on the blank and pale areas. I also use a handmade oval template to get a big geometric shape that is fun to decorate.
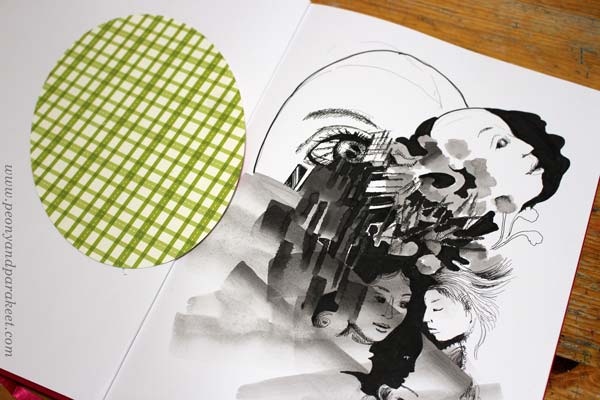
For decoration, the sky is the limit, but I like jewels, frills, laces, waves, and flowers!
When doodling, I also add shadows to the elements by drawing thin lines side by side.
5) Finishing Touches: Shadows and Highlights
Squeeze your eyes and point all the white areas. Usually, there are too many and it makes the image look busy. Pick a brush and paint most of the white with diluted black ink.
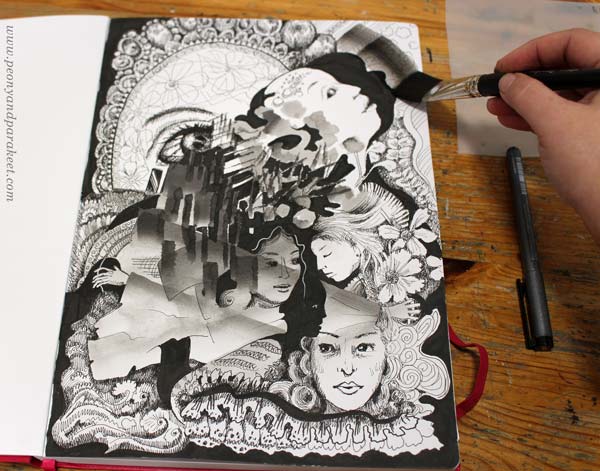
Especially the areas that are near the edges are worth toning down.
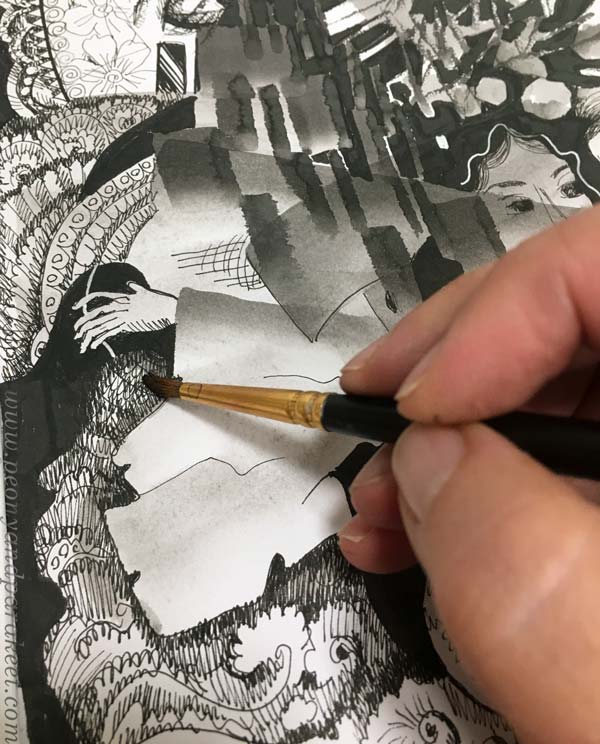
I also like to paint over the shadowed areas to give them a softer look.
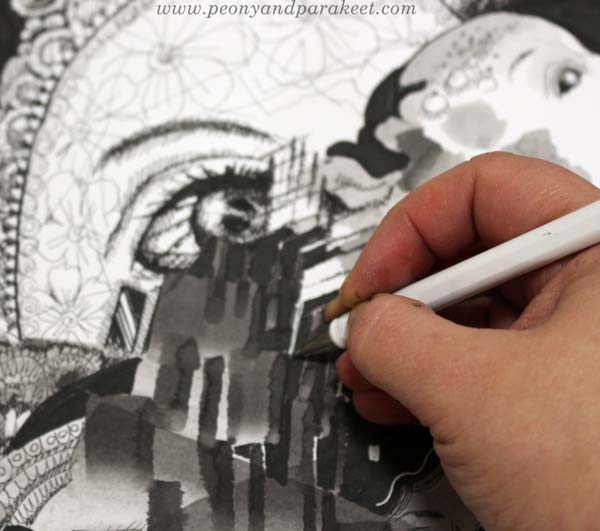
White gel pen can be handy for those areas that need a little bit more white.
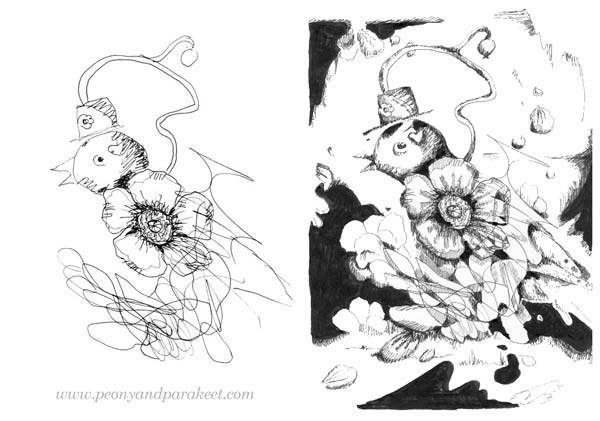
Inktober Warm-Up – Finished Piece
Here’s my finished piece again. See how limited the number of white areas is.
I hope you enjoyed this Inktober warm-up! Tell me – are you going to participate in Inktober?
How to Draw, and How to Enjoy and Keep Drawing
Yesterday, I ran a webinar about drawing. It’s always a lot of fun to talk about the topic I love so much. Thank you all who joined me!
The Joy of Drawing
I wanted to include the word “joy” in the title of the webinar because, in the end, it’s what keeps us drawing. I shared ideas about what supplies to use, what to draw, and how to solve those situations when you don’t grab a pen even if there’s a chance.
Unfortunately, the recording of the webinar wasn’t the best quality, maybe the snowstorm that has just blown over Finland had some effect on it. But luckily, I had some extra footage and I also made some more to compensate the parts that affected the experience. The video has a lot of ideas and examples, so it’s worth watching.
Animal Inkdom – Come to Draw with Me!
Let’s draw wild animals and decorate them with fun motifs and patterns. My new class Animal Inkdom is dedicated to the joy of drawing.
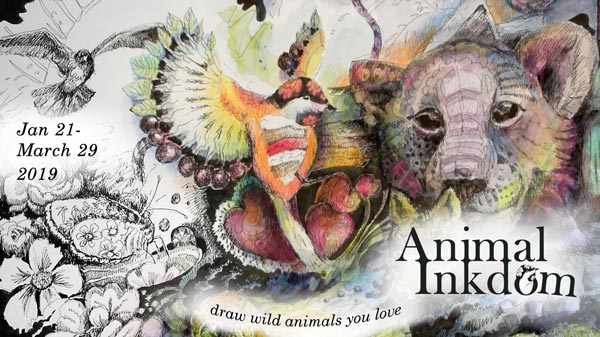
Animal Inkdom begins on Monday, January 21, sign up now!
Video Blog: Finding Inspiration from Plants
In this video blog post I am creating this art journal page and talk about finding inspiration from plants.
If you got interested in creating imaginative plant-inspired pages, see also the previous blog post mentioned on the video: Create Abstract Botanical Art!