Peony and Parakeet

Fly to Your Inner World and Color the Emotion

drawing pen

Doodler’s Sampler Step by Step

Doodler's Sampler, a drawing by Paivi Eerola of Peony and Parakeet. See the step by step instructions!

I have always loved antique embroidery, and it inspires my art too. This week, I invite you to treat your pen as a needle and doodle the look of the precious hand-stitched fabric. My drawing – I call this Doodler’s Sampler – is 9 by 12 inches but you can make a smaller or bigger piece with these instructions. The best paper for this is Bristol paper. It’s smooth and nice to color with watercolors.

Step 1 – Draw a Grid

Because we aim for ornamental stiffness, a grid helps to place the elements. Use a pencil so that you can erase the lines before coloring. Start by outlining a space for a frame. Then divide the rest of the paper so that they help to place the main elements.

Making a symmetrical drawing with the help of a grid. By Paivi Eerola of Peony and Parakeet.

I wanted my Doodler’s Sampler to be symmetrical, so I drew a vertical centerline, and then divided the two halves into three parts. Another idea that I had was to have a vase of flowers. So I drew horizontal lines that mark each third, and the lowest third is reserved for the vase.

Step 2 – Sketch the Structure

Old samplers are filled with decorations but at the beginning, it’s enough to sketch the places for the biggest elements and their shapes.

Making a symmetrical drawing with the help of a grid. By Paivi Eerola of Peony and Parakeet.

I wanted to have something rectangular on the top corners, the vase on the bottom, plant-like organic shapes coming out of the vase, and then an angular jewel-like thing on the top of the ornament.

Step 3 – Doodle and Decorate

Pick a thin-tipped drawing pen, that has permanent ink, and start doodling! Make more shapes and fill them with circles, rectangles, flowers, hearts, anything you can think of!

Drawing ornaments for a doodler's sampler. By Paivi Eerola of Peony and Parakeet.

My pen is Copic Multiliner, tip size 0.05. I add shadows to my doodles so that they don’t just outline the shapes but there are darker parts too.

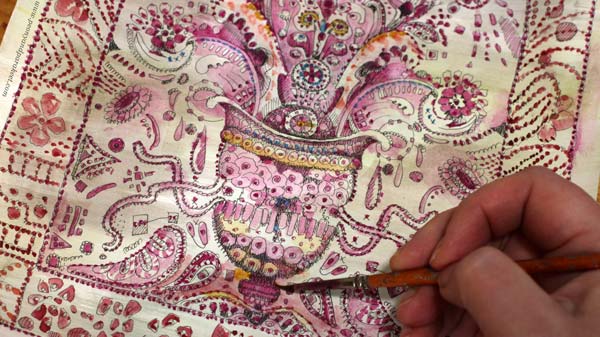
Doodling with Copic Multiliner. By Paivi Eerola of Peony and Parakeet.

I make the decorative border simpler so that it doesn’t take the power away from the centerpiece. Trembling lines look more decorative than straight ones.

Doodler's Sampler, a drawing by Paivi Eerola of Peony and Parakeet. See the step by step instructions!

Here’s my Doodler’s Sampler after Step 3, ready for coloring.

Doodler's Sampler, a drawing by Paivi Eerola of Peony and Parakeet. See the step by step instructions!

Step 4 – Color the Background

You can use any supplies for coloring, but in my opinion, the softness of watercolors complements the sharp black lines best. Start the coloring by adding some color to the background.

Doodler's Sampler in progress. See the step by step instructions!

I use very little pigment and many tones so that the background looks like old antique linen.

Step 5 – Color the Doodles

Pick one main color for the sampler. My choice is cool carmine red. When coloring, add more decorations like dots and other decorative shapes. You can also color around a shape instead of inside the shape.

Doodler's Sampler in progress. See the step by step instructions!

Pick slightly different tones for the frame. I use warmer red and a little bit of orange.

Coloring a black and white drawing. By Paivi Eerola of Peony and Parakeet.

When you have colored the sampler with a very narrow color scheme, make it more lively with some new tones.

Watercolors and doodling. By Paivi Eerola of Peony and Parakeet.

I added blue and yellow, but very sparingly.

Coloring the doodles with watercolors. By Paivi Eerola of Peony and Parakeet.

You can also highlight the main elements by making the darkest areas pitch black.

Coloring the doodles with watercolors. Doodler's sampler by Paivi Eerola of Peony and Parakeet.

Here are the black and white version and the colored version side by side. Click the image to see it bigger!

Doodler's Sampler, a drawing by Paivi Eerola of Peony and Parakeet. See the step by step instructions!

Doodler’s Sampler – For the Love of Flowers and Hand-Stitching

Henri Matisse has said: “I don’t paint things. I only paint the difference between things”. I think that to me, it goes like this: “I don’t paint things. I only paint the similarities between things.” So here’s for the love of flowers and hand-stitching!

Draw more with me – Check the courses Animal Inkdom and Magical Inkdom!

Hand-Drawn Collage Samplers

Squirrel Sampler by Paivi Eerola of Peony and Parakeet. Read how to create hand-drawn collage samplers!

I have been browsing my art archives lately, and it has been surprisingly inspiring. I have lots of art journals and a big box of paintings and drawings from my teenage years. Even if I have experimented with many techniques and themes, it all looks very similar now. Everything fits together and gets my approval. Painting “Icebreaker” gave me a new kind of confidence, and with that confidence, I am now blogging about a playful idea that I got from cross-stitching – hand-drawn collage samplers!

These samplers are composed of hand-drawn paper pieces so that they look like cross-stitch samplers. They have ribbons, many identical ornaments, tiny floating elements, and some symmetry. There’s also stiffness and order so that it looks like the elements are on a grid.

Paivi Eerola and a cross stitch project in progress

Cross-stitching is one of my hobbies, and even if I try not to think about art when stitching, I just couldn’t resist this idea! Here’s how I applied cross-stitching to collage art.

Print Tiny Scans of Hand-Drawn Collage Pieces!

It’s essential to have tiny decorations to make the collage look ornamental. I solved the problem by making collage sheets of scanned hand-drawn pieces. These collage elements were drawn for the classes Animal Inkdom and Magical Inkdom, and there are some jeweled flowers from the free mini-course for subscribers too.

Sheets of scanned hand-drawn collage pieces. By Paivi Eerola of Peony and Parakeet.

The original size of these pieces is much bigger than in the printed sheets.

A hand-drawn collage piece and printables. By Paivi Eerola of Peony and Parakeet.

Use All Kinds of Hand-Decorated Papers!

Samplers have a variety of designs, so every little doodle is a potential sampler piece. I have a box of hand-decorated and painted papers (mostly leftovers from Collageland) and two boxes of hand-drawn collage elements. I have also cut some old art created in the 1980s. All these are a good addition to small printed pieces.

Boxes of hand-decorated papers by Paivi Eerola of Peony and Parakeet.

Of course, you can also use store-bought die-cuts, pictures from magazines, etc. but if all the elements are handmade, they will all fit together much better because they are all YOU!

Perfect Project for Hand-Painted Background Pages

If you are an art journaler, I bet your journal has a lot of pages that are more like backgrounds rather than finished pages. You can use them for collage samplers!

The background of this sampler was busy and bright, but I just added brown over some of the areas and let the colors speak, or should I say shout!

Rabbit Feeders by Paivi Eerola of Peony and Parakeet. Read how to create hand-drawn collage samplers!

I attached the pieces with paper glue and some larger elements with double-sided tape. I usually use gel medium, but it’s messier, and it’s too difficult to cut all those tiny pieces with sticky fingers.

Self-Expression with Hand-drawn Collage Samplers

Sticking paper pieces can be just a relaxing hobby, like cross-stitching. But samplers can also tell stories!

My first page is called Squirrel Sampler, and it has all kinds of little treasures that Paivi the Squirrel has collected.

Art journal page spread by Paivi Eerola of Peony and Parakeet. Read how to create hand-drawn collage samplers!

The second page is called Rabbit Feeders. It refers to women’s status and importance in Virginia Woolf’s novel The Voyage Out. An isolated woman looks at herself from the mirror and questions her importance for the world. I read Voyage Out as a teenager, and this allegory, even if it’s just a few rows in the book, touched me deeply.

Art journal page spread by Paivi Eerola of Peony and Parakeet. Read how to create hand-drawn collage samplers!

It often happens that creative play evokes feelings and stories that are too big to express in any other way. I hope you’ll enjoy making these samplers!

Start drawing your sampler pieces – Subscribe to my weekly emails and get a free mini-course!

The Beauty of Science – Illustrating a Children’s Book

Fairy Experiments for Thinkers and Tinkerers, a cover illustration for the book of C.L. Hunt. Illustration by Paivi Eerola.

This week, I want to show an example of how we can use art to change the world. My example is about illustrating science so that it also appeals to those who love beauty and fantasy. When we talk about inclusiveness, we often talk about what words to use and how but rarely talk about the style of images. My questions for you this week are:

How could your art invite people to try new things or to think in a new way? How could your art make new people feel included right away?

Fairy Experiments for Thinkers and Tinkerers

Last fall, I was hired to illustrate a children’s book. It was a big project – well over 60 images and ornaments, including the illustration for the cover, shown above. The book is called “Fairy Experiments For Thinkers and Tinkerers” and its goal is to inspire young girls to explore science through fun experiments. The book hasn’t been published yet, but my client C.L. Hunt has an email list where you can sign up to get notified when the book goes on sale: www.fairyexperiments.com

Black-and-White Drawings in Victorian Style

The book combines fantasy and science in a fascinating way. My client wanted to have black-and-white hand-drawings with a Victorian feel.

Fairy Queen, an illustration for the book Fairy Experiments for Thinkers and Tinkerers, author C.L. Hunt, illustrator Paivi Eerola.

Illustrating the Feminine Beauty of Science

This project soon became close to my heart. As a child, I fell in love with science at school and then later, studied software engineering at The Helsinki University of Technology. Natural science, especially physics and mathematics have always interested me. As a young girl, I bought copper sulfate from a pharmacy because I thought it was so beautiful. I warmed it to make bigger crystals from the powder and loved the glow.

I have had a few women, teachers and mentors, who have supported me during my career in technology. But I have also always known, even as a young girl, that I was in a masculine world. The assignments and the culture often felt strange and yes – let’s say it aloud: not beautiful at all.

Science is not just bolts and levers, it’s also a world of glitter, shimmer, and sunsets. Nature’s transformations, the structure of the universe, and the fascinating microcosmos are full of aesthetics. And still, most science books don’t show that beauty, at least not in a feminine way.

In this book, my goal was to combine intelligence and beauty so that the feel of the images is inviting and light-hearted too.

Illustrations for the book Fairy Experiments for Thinkers and Tinkerers, author C.L. Hunt, illustrator Paivi Eerola.

I was excited when my client wanted to combine fairy fantasies and practical science experiments. We were on the same page from the very beginning. In the end, she summarized the project:

“Paivi understood and appreciated my project, and her enthusiasm has kept me motivated to keep working on it. The images are very well suited to my book, and their style is exactly what I was looking for. Paivi kept to her schedule, communicated well when I had questions, and I was really happy creating a shared vision with Paivi. I recommend her warmly.”

– C.L. Hunt, the author of Fairy Experiments For Thinkers & Tinkerers”

Illustrating Girl Power – Stepping away from a Passive Role

Even if we wanted to show the beauty of science, the fairies needed to be more than pretty faces and poses. In the illustrations, fairies take an active role and make the most of nature’s forces. I drew plain and classic dresses for the fairies so that action gets the attention.

Illustrating science for girls. Illustrations for the book Fairy Experiments for Thinkers and Tinkerers, author C.L. Hunt, illustrator Paivi Eerola.

My client also wanted to have a variety of ethnic groups so that every girl can feel that the book is for her.

An illustration for the book Fairy Experiments for Thinkers and Tinkerers, author C.L. Hunt, illustrator Paivi Eerola.

Illustrating Science with a Flair of Fantasy

In the manuscript, there were wonderful descriptions that built bridges between reality and fantasy. My job was not only to demonstrate the essentials of the experiment but also tie them with imagination.

Illustrations for the book Fairy Experiments for Thinkers and Tinkerers, author C.L. Hunt, illustrator Paivi Eerola.

In these illustrations, fairies rule and take care of the world but also have fun. The book is all about exploring life’s miracles like the circle of life with step-by-step instructions.

Illustrations for the book Fairy Experiments for Thinkers and Tinkerers, author C.L. Hunt, illustrator Paivi Eerola.

With the book, the child becomes part of the royal guard of fairies, so my job was also to design a badge that could be colored. Here’s the badge with the rest of the visual world.

Illustrating science for girls. Illustrations for the book Fairy Experiments for Thinkers and Tinkerers, author C.L. Hunt, illustrator Paivi Eerola.

Expressing Natural Science as Ornaments

My favorite part of the projects was to design ornaments for fairy families. I hand-drew them all and used a computer only to make them symmetric.

Drawing ornaments for the book Fairy Experiments for Thinkers and Tinkerers, author C.L. Hunt, illustrator Paivi Eerola.

These ornaments take ideas from the illustrations and express the major chapters in a decorative way. They mark the chapters and make the book look more Victorian.

Illustrating science for girls. Ornaments for the book Fairy Experiments for Thinkers and Tinkerers, author C.L. Hunt, illustrator Paivi Eerola.

I hope you enjoyed this sneak peek to the upcoming book Fairy Experiments for Thinkers and Tinkerers by C.L. Hunt!

An illustration for the book Fairy Experiments for Thinkers and Tinkerers, author C.L. Hunt, illustrator Paivi Eerola. Read her post about illustrating science.

Learn to Draw with Me! I teach line-drawing techniques (+ using your imagination) in my classes Animal Inkdom and Magical Inkdom!

Hire Me as an Illustrator! See my portfolio in Hire an Illustrator!

10 Black and White Art Techniques with Personal Stories

One of the many black and white art techniques: Drawing a pattern, and making an image from it. By Paivi Eerola from Peony and Parakeet.

I have made the first ten prompts of Inktober 2019, and want to share the art techniques and stories behind the images. I have been following the official Inktober prompts that are single words. By brainstorming around the prompt, I have decided what the first element is, and then worked from one association to another. After creating the image, I have documented my thoughts in writing. For me, Inktober is as much about finding personal stories than making the drawings. The stories help me to see where I am as an artist and as a person in general.

For these first ten images, I also set an art technique to make creating in black and white more interesting. I hope you find these black and white art techniques inspiring too!

Day 1 – Ring

Technique: A big solid shape in the background. I like to use a brush pen for large black areas.

Inktober 2019, Ring. Art by Paivi Eerola of Peony and Parakeet.

Story: As a teenager, I read Jane Austen’s novels and wondered if those handsome and honorable men really exist. But when I moved to a bigger town to study at the university, I found my Mr. Darcy. Dark hair, brown eyes, doesn’t smile or talk much, but when he does, it’s always worth listening. He looks at my art like Mr. Darcy watches Lizzie playing the piano. He has many skills, but he never brags about them. What others might consider as faults, are what makes him whole to me. So here’s to commitments and true love!

Day 2 – Mindless

Technique: Strong shadowing so that the outlines disappear to the background. It is quite time-consuming but I love the 3D effect.

Inktober 2019, Mindless. Art by Paivi Eerola of Peony and Parakeet. See more black and white art techniques in the blog post!

Story: Instead of mindfulness, I practice mindlessness. I like to think about thinking, imagine the impossible, and when I relax, I knit, because it can be done mindlessly. Pick a circular needle and row never ends – until it’s 3 am and the low energy level makes you stop! The mindless world of imagination where no one needs to do laundry, make dinner, or find a missing sock, is what we humans need every single day. It’s a world of magic that we carry inside us, and no matter how mindless it feels, it’s one of the best things in being alive.

Day 3 – Bait

Technique: Using white space. The earlier I get the idea about the content of the image, the easier it is to leave white space as well.

Inktober 2019, Bait. Art by Paivi Eerola of Peony and Parakeet.

Story: In today’s world, money seems to be everything. Still, we know that there are more precious things like saving the globe. Sometimes I wonder if someone gives us small rewards just to distract our attention from the bigger destruction. Is the world only a big purse waiting for the next coin, or can we stop the fire?

Day 4 – Freeze

Technique: Spraying black ink. It’s often the best way to remove blank page syndrome!

Inktober 2019, Freeze. Art by Paivi Eerola of Peony and Parakeet.

Story: I love historical places and old art. When I begin to create, I imagine time-traveling to the past. My pens take me to an old palace and start vigorously blowing dust away. I imagine revealing all the beautiful designs under white cloths, opening windows and letting fresh air come in. What’s frozen begins to warm up and get color. My biggest dream is that I can make the forgotten world bloom again.

Day 5 – Build

Technique: Using lots of circles and round shapes. I also like to start with a simple circle and then slightly adjust it. See the jewels, for example!

Inktober 2019, Build. Art by Paivi Eerola of Peony and Parakeet.

Story: When we draw, we are free to build anything. Impossible becomes possible, small can be big and big can be small. All the things we see and collect can be toys for the imagination.

Day 6 – Husky

Technique: Shades of grey. I sprayed ink to make the start grey already. Then I added more grey shades by drawing thin parallel lines.

Inktober 2019, Husky. Art by Paivi Eerola of Peony and Parakeet.

Story: Having a dog of my own – that was my dream as a child. I drew dogs and imagined taking them to shows and running a kennel club. I read books about dogs, learned to identify hundreds of dog breeds, knitted stuffed toys that were as close to real dogs as possible. I wondered how it would feel to be a dog, to look at the world from the animal’s perspective, to run with four legs, and to love undoubtedly. It was a long wait. I was over 20 years old when I finally got a dog, a little spaniel. Now I have two beagles, and I hope I don’t ever have to live a day without a dog. Yes, I am definitely a dog person, what about you?

Day 7 – Enchanted

Technique: Rectangular blocks in watercolor. I used only Dr. Ph. Martin’s Hydrus liquid black for the image.

Inktober 2019, Enchanted. Art by Paivi Eerola of Peony and Parakeet. See more black and white art techniques in the blog post!

Story: If I had to choose between outdoors and indoors, my choice would be indoors. Now when it’s autumn, it’s easy to make the home look like an enchanted place. Just switch off most of the lights, light some candles, and make sure you have houseplants, preferably bonsai trees. They look magical in the dark and bring some outdoors to the indoors as well!

Day 8 – Frail

Technique: Combining watercolors and drawing. Some of the areas are painted only so they look softer.

Inktober 2019, Frail. Art by Paivi Eerola of Peony and Parakeet.

Story: I hope that it wouldn’t be so difficult to remember that people are like plants, not always saying aloud what they feel, think, and plan to do. Their pots can be broken, their roots can be too dry, and their vision can be blurry. But they function, participate, and comprehend anyway. Their beauty is more about persistence than perfection. Their origin is more about cohesion than separation. I wish I could remember that like plants, every person is unique but still shares the need for warmth, hope, and attention.

Day 9 – Swing

Technique: Detailed figure as a focal point, and abstract freely-painted shapes in the background. I love to play between abstract and representational.

Inktober 2019, Swing. Art by Paivi Eerola of Peony and Parakeet.

⁣Story: Rococo is one of my favorite historical styles, and I always try to find a way to include some of its abundance in my art too. So no wonder that today’s prompt immediately brought a famous Rococo painting to my mind. It’s Jean-Honoré Fragonard’s Swing, where the main character is a young woman, and other people and details are secondary to her. When we are creating, we are that lady on the swing. The outer world becomes more distant, and we get to rest in the sceneries of our minds.⁣

Day 10 – Pattern

Technique: Designing a pattern, then making it look like a representational image.

Inktober 2019, Pattern. Art by Paivi Eerola of Peony and Parakeet. See more black and white art techniques in the blog post!

I drew a few black shapes in Photoshop and arranged them so that they formed a pattern. Then I traced the printed pattern on another paper by hand. By changing the darkness of the shapes and the background, I made a fall scenery.

Inktober 2019, Pattern. Art by Paivi Eerola of Peony and Parakeet.

Story: I haven’t ever taken an ink blob test, but I assume I would see plants. Bonsai trees, orchids, herbs, flowers in bloom, seedlings, you name it. “I hate nature,” I said as a child when a teacher praised my essay. She was astonished: “But you write so beautifully about your surroundings!” I have always wanted to get away from the influence of plants but have never succeeded in it. They enchant me with their silent whispers. Their organic shapes are like stamps in my mind when I start drawing. They never leave me alone, let me be who I am not. The more I age, the more I surrender. My imagination lives in a pot, blooming only when plants are.

What can’t you escape? What do you keep creating time after time?

Scroll to top